Cottage Kitchen Countertops

October 29, 2010
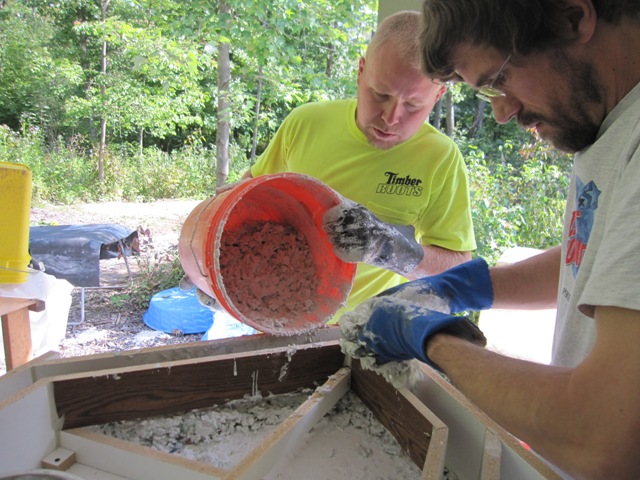
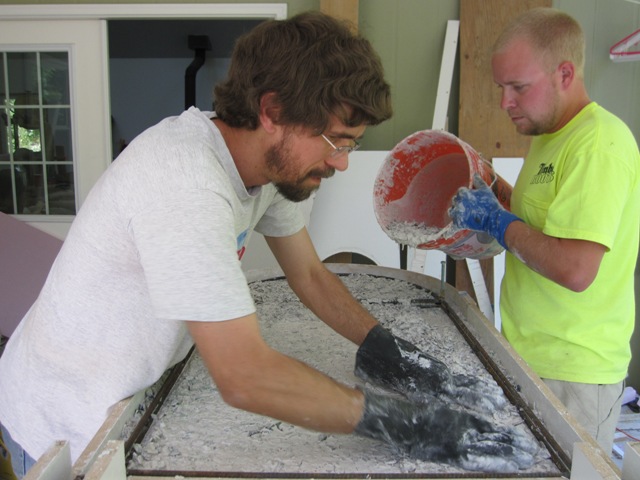
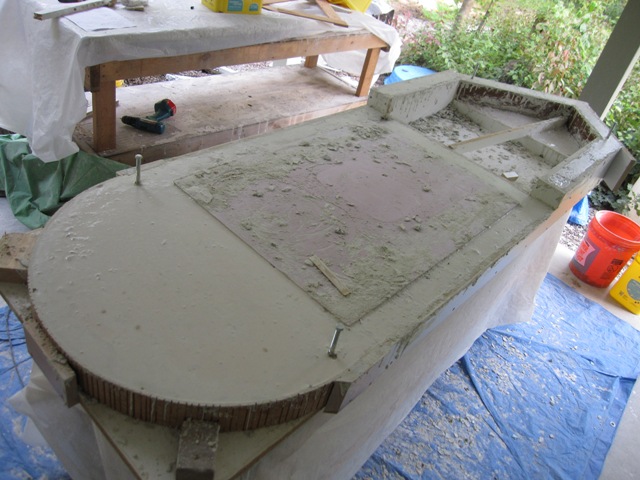
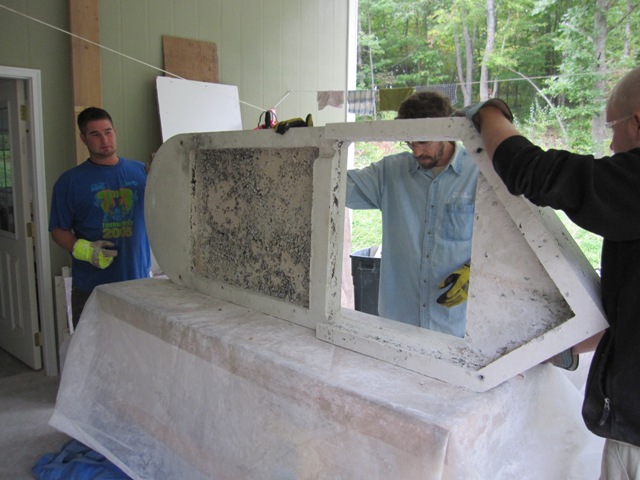
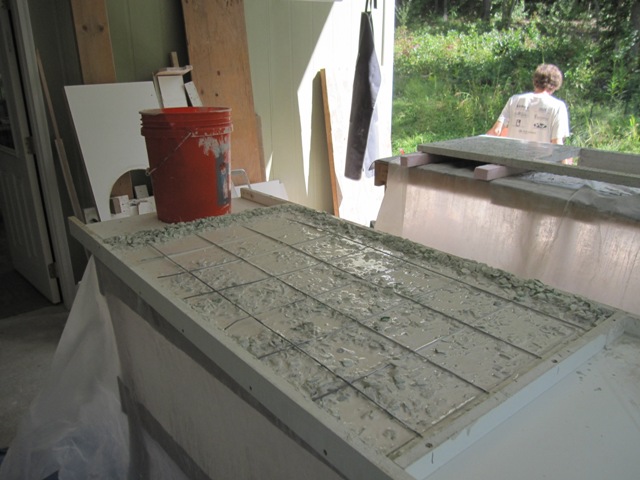
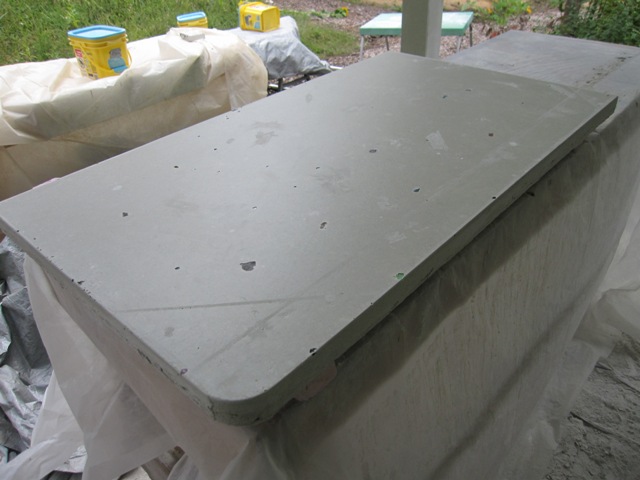
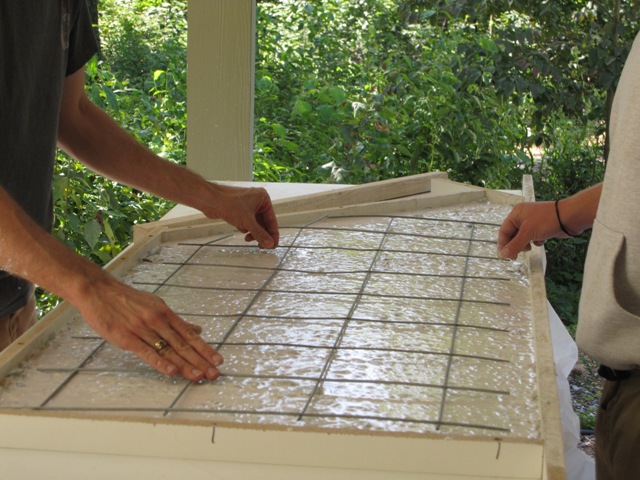
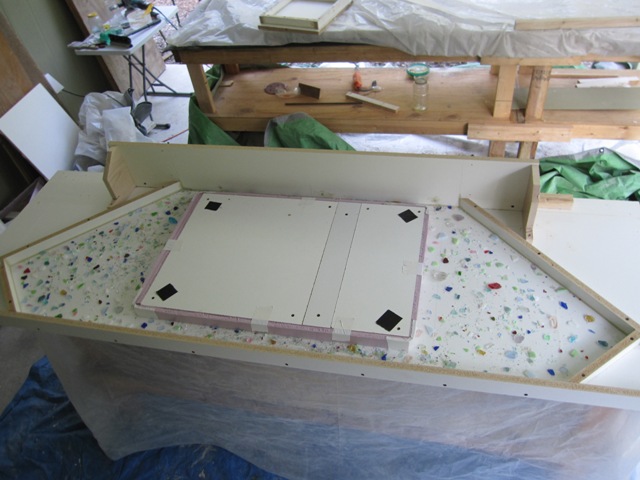
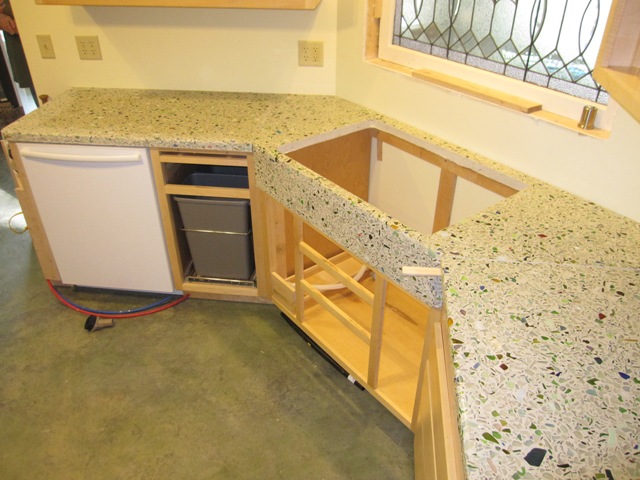
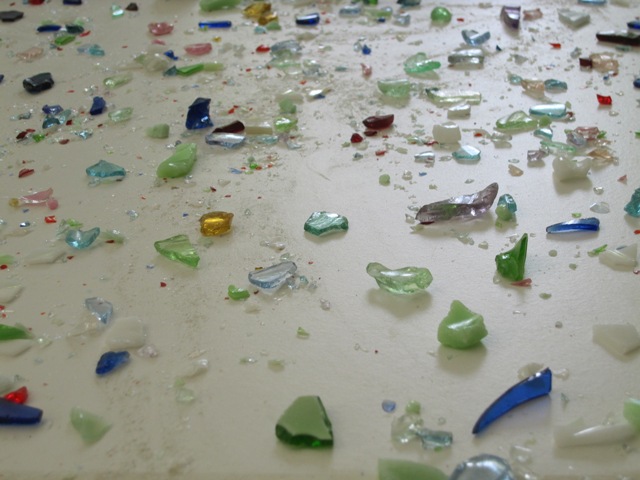
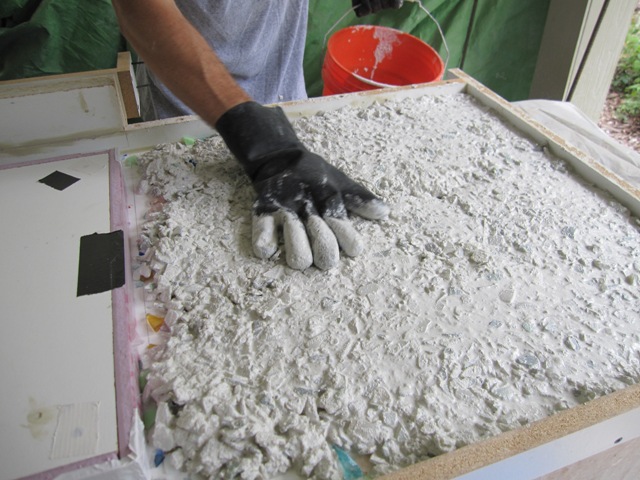
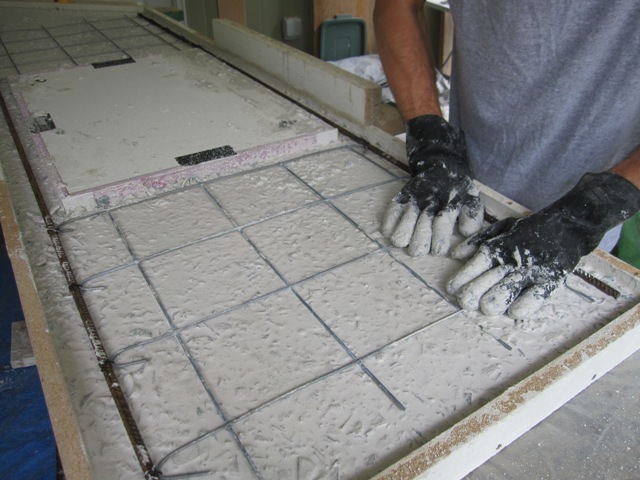
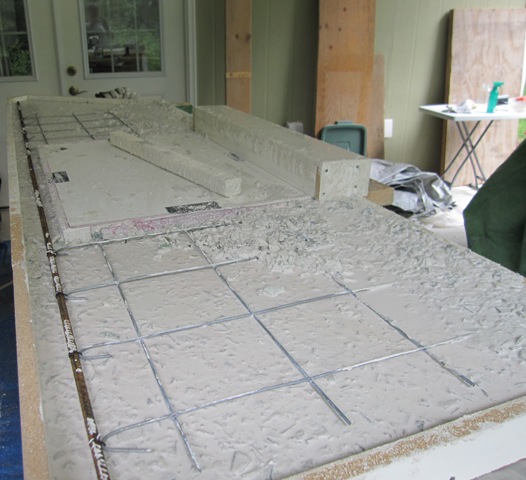
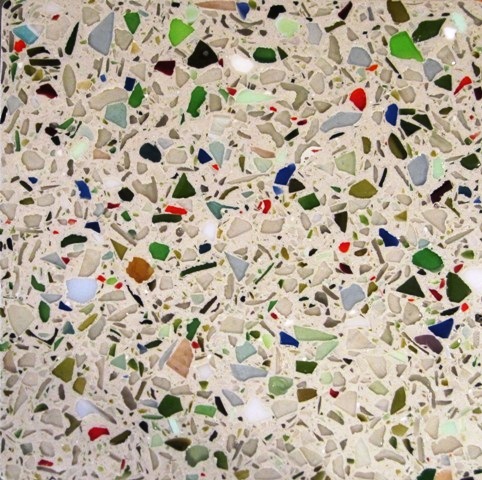
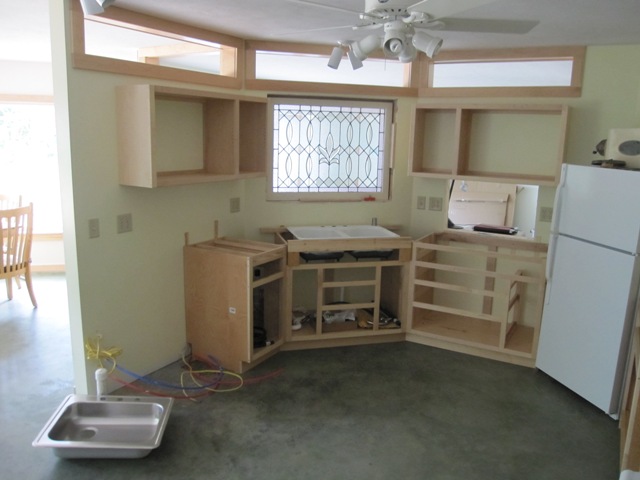
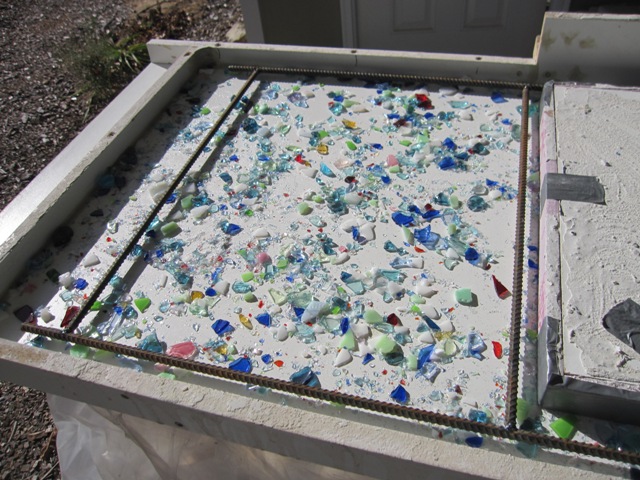
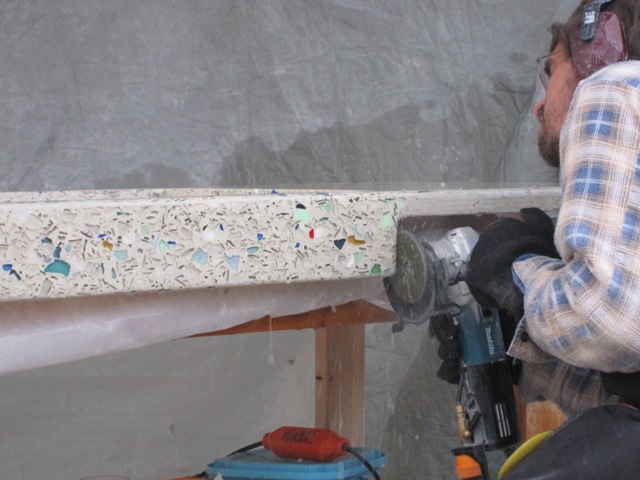
For the cottage kitchen countertops we made a mix of “confetti” glass that is similar to that of the main kitchen, but with a higher percentage of blue glass. And for the first layer of concrete we’ll use only clear glass instead of the clear and green mix that we used in the main kitchen. This should give an appearance similar to the countertops in the main kitchen but with more emphasis on shades of blue and only a little green in the mix. Since there will be no colored glass in the concrete mix, just what we sprinkle directly into the mold, we doubled the amount of confetti glass to 2000 grams per square foot, compared to 1000 grams per square foot in the main kitchen. The photos below show the mold ready to pour the countertop for the north side of the cottage kitchen, with a welded rebar frame to reinforce the concrete around the large opening where the cooktop will go.


November 1, 2010
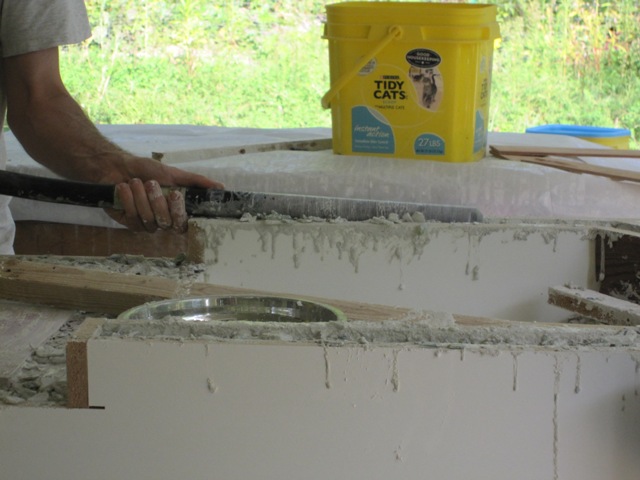
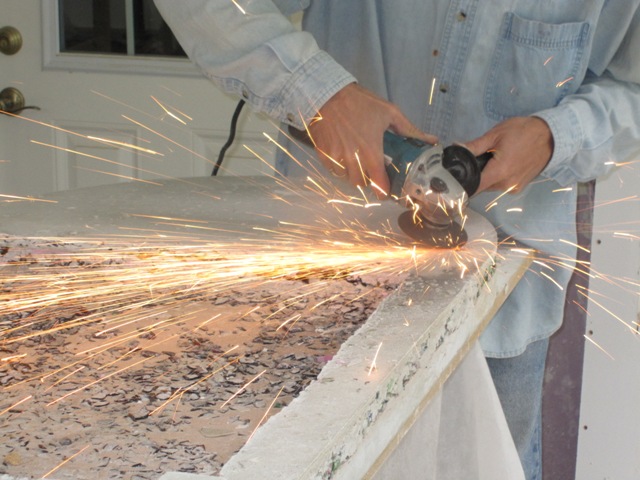
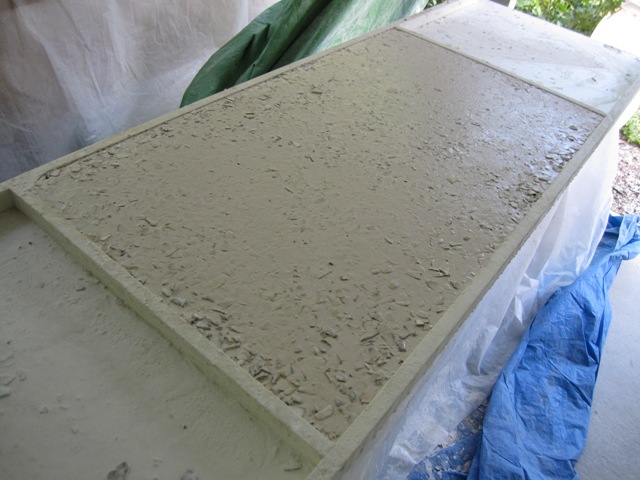
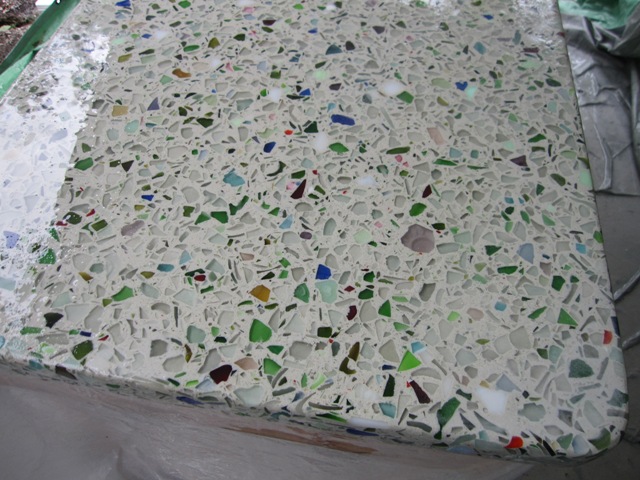
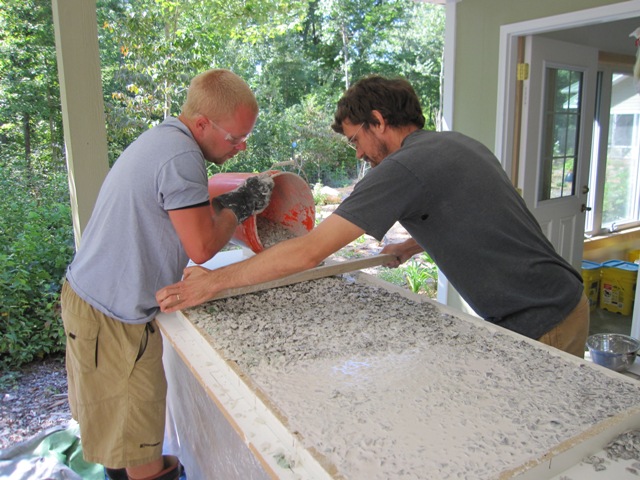
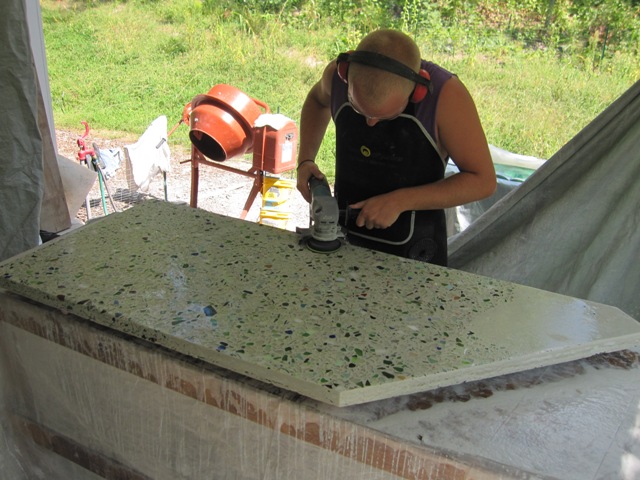
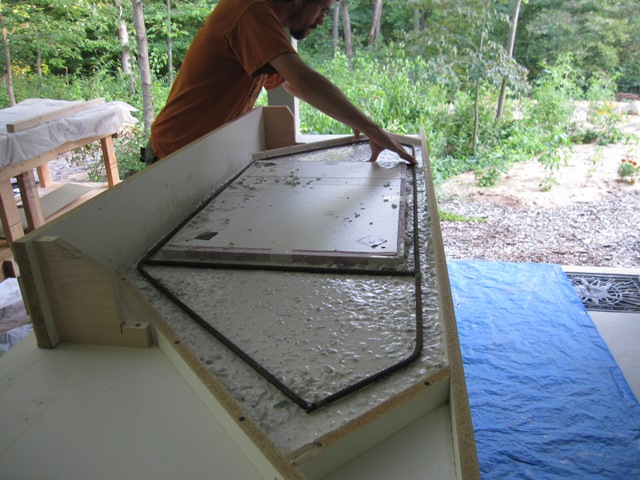
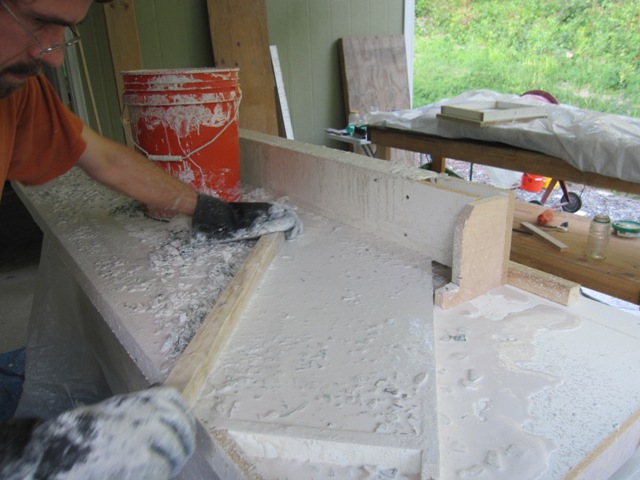
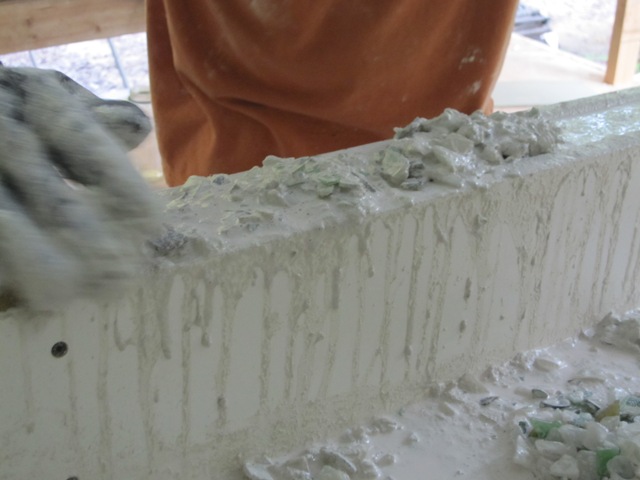
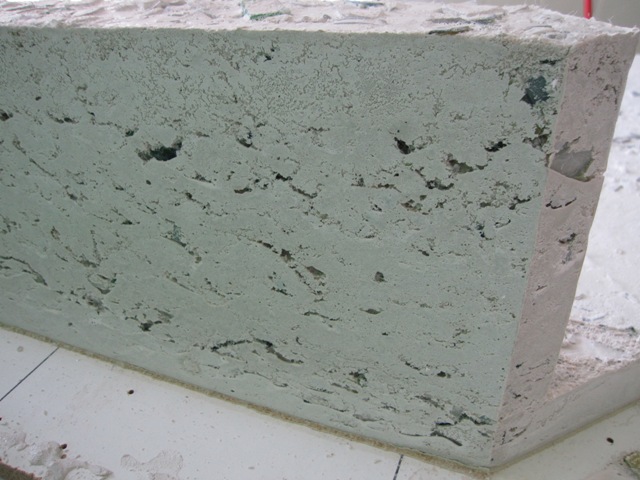
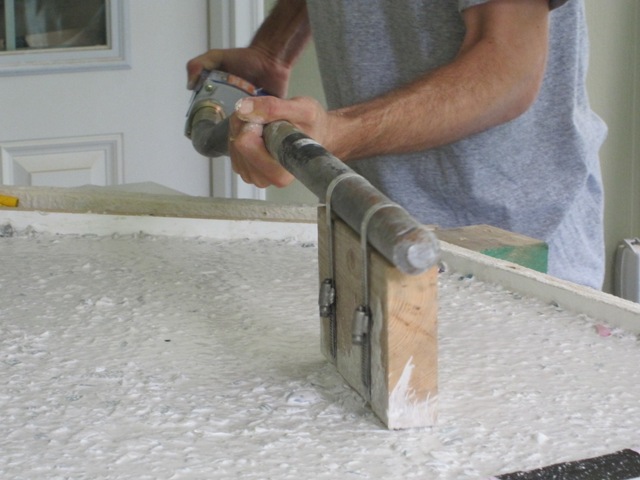
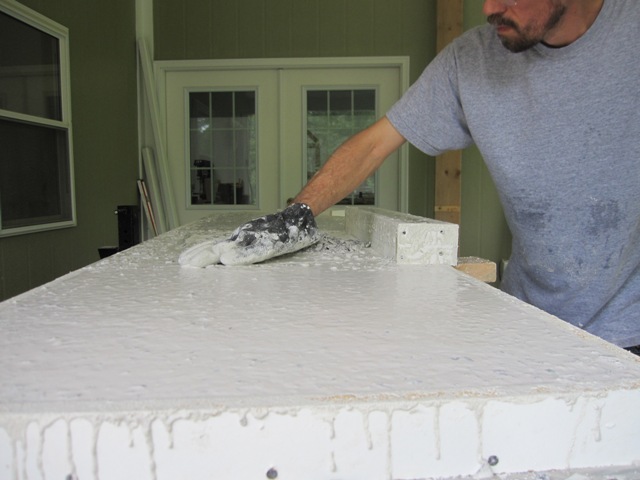
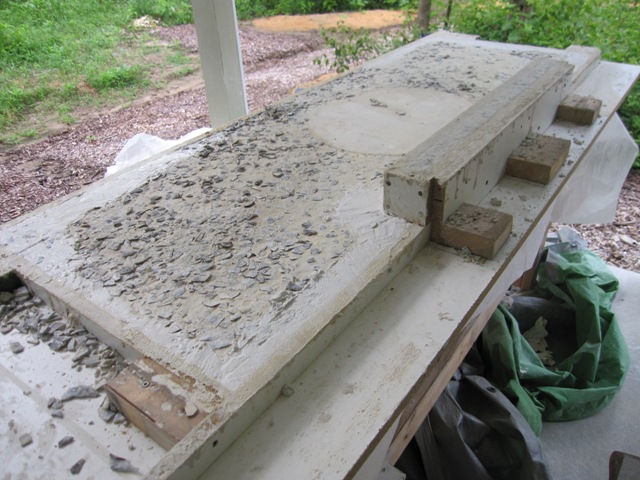
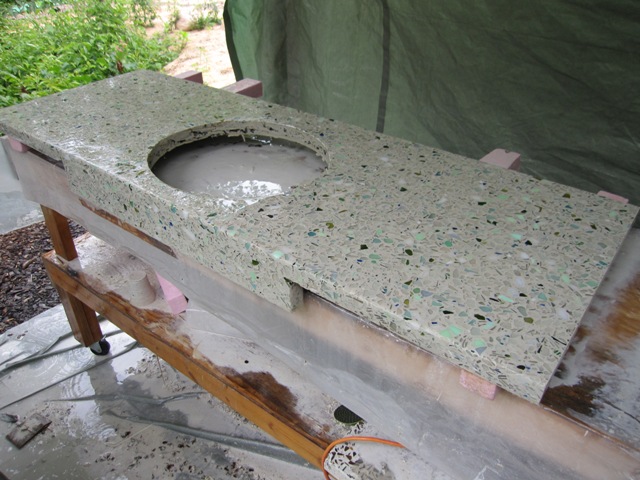
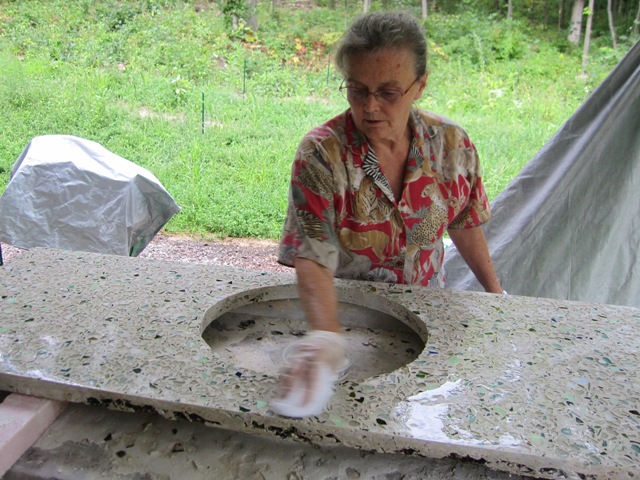
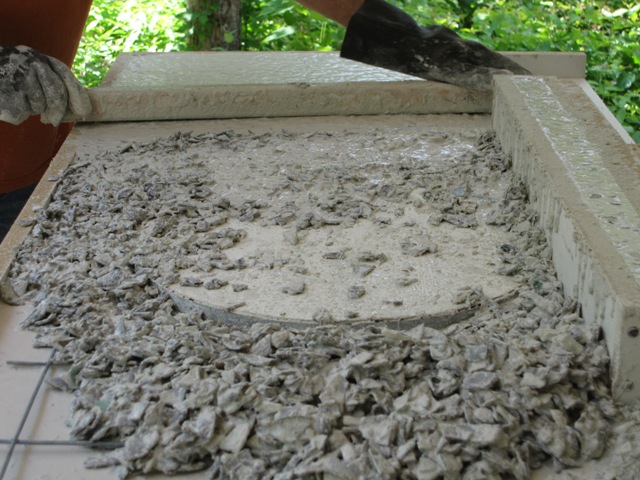
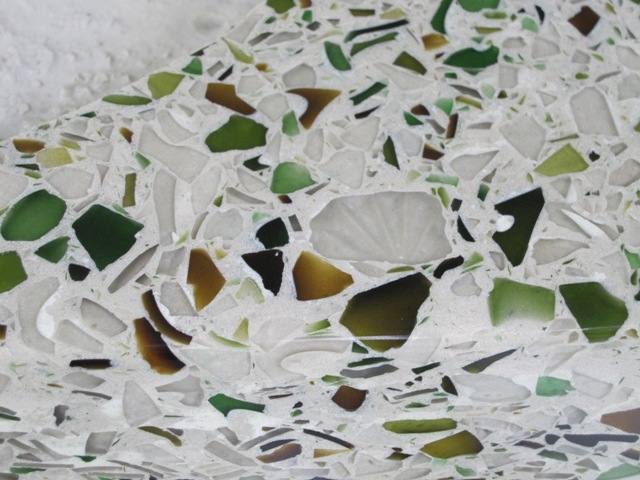
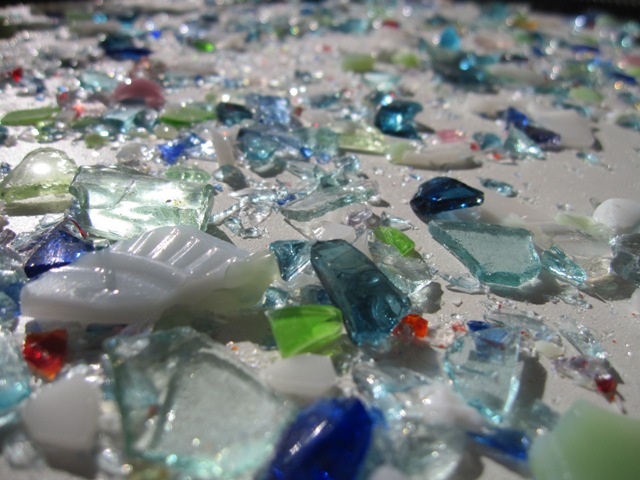
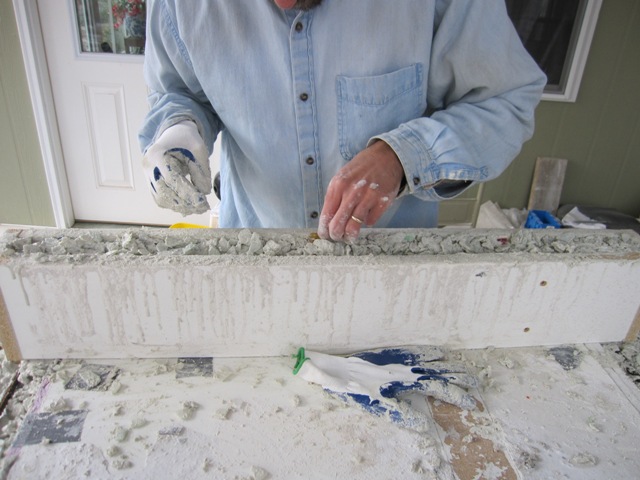
Jay poured the countertop by himself so we don’t have photos of the pouring operation but it was similar to the others and it went reasonably well. The photos below show the result after the first polishing with the 50-grit diamond wheel to cut down into the glass aggregate. The color mix is just what we wanted, light in color and with an emphasis on the blue tones, but with various other colors mixed in too. There are some voids in the surface as we have come to expect, so these will be filled with a slurry of Portland cement and sand before it’s polished again.

November 5, 2010
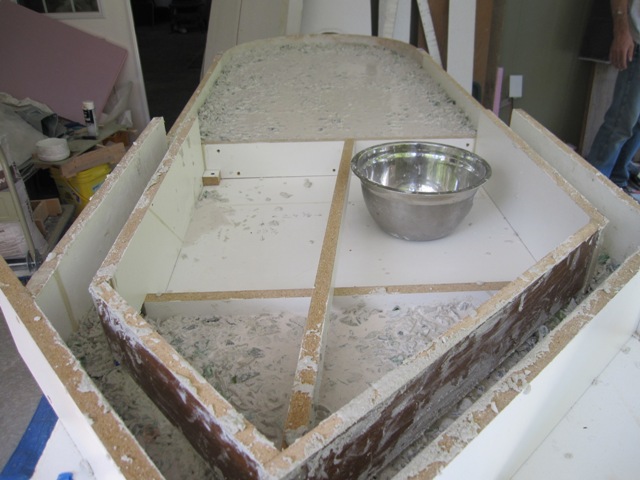
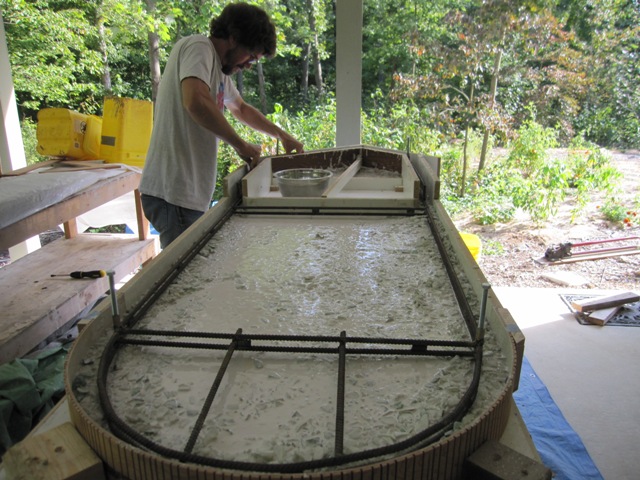
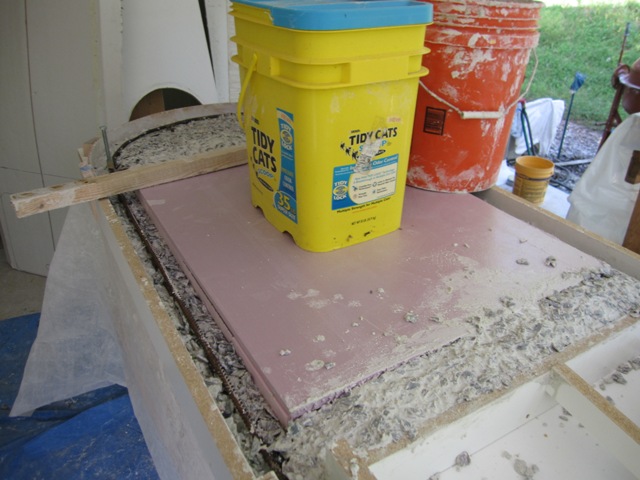
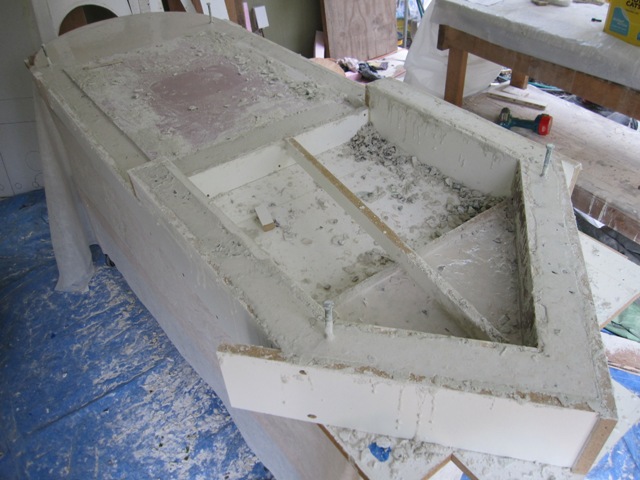
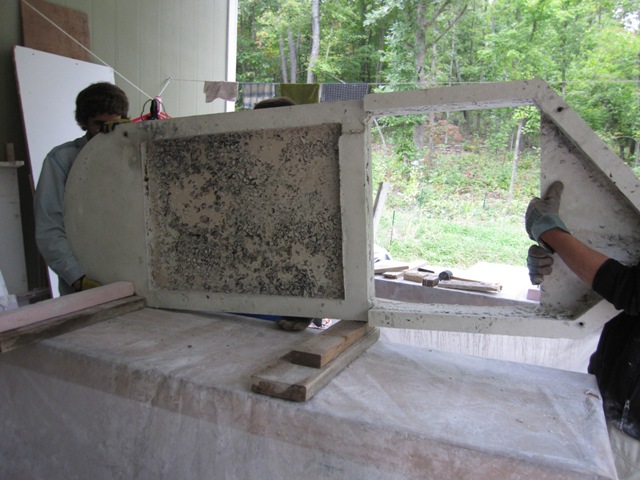
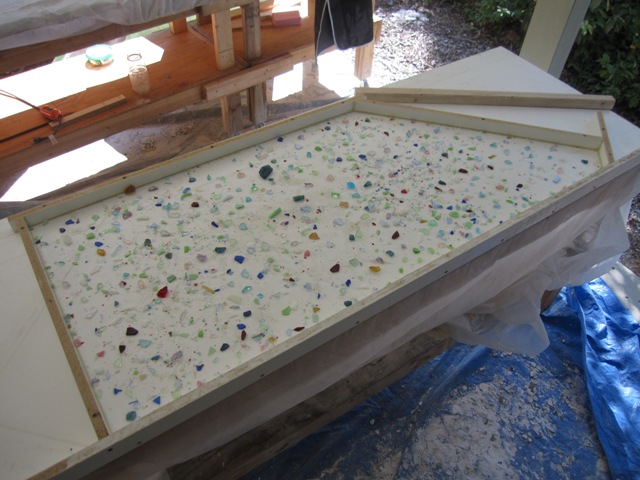
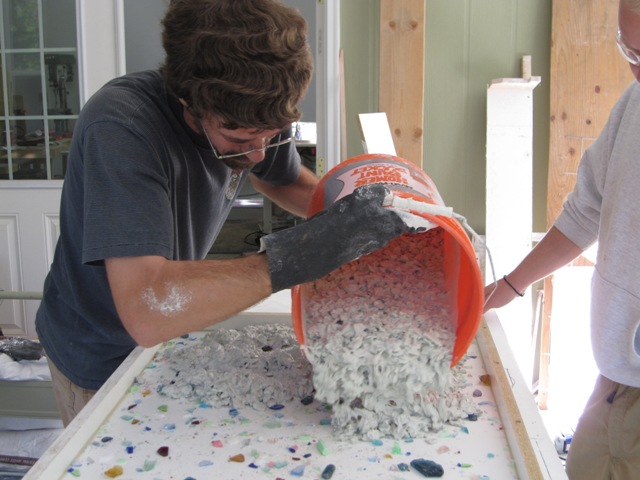
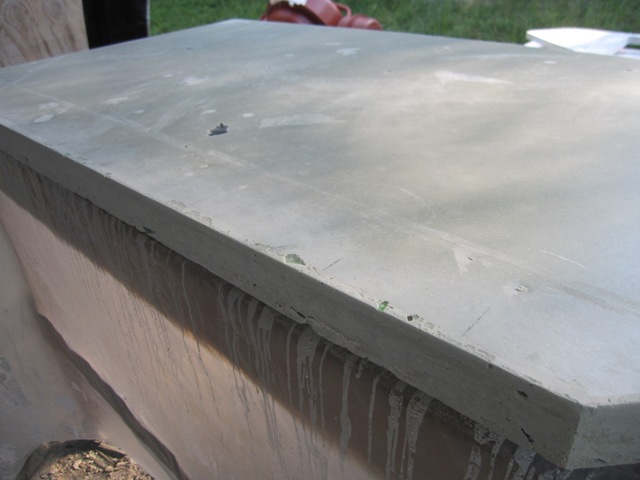
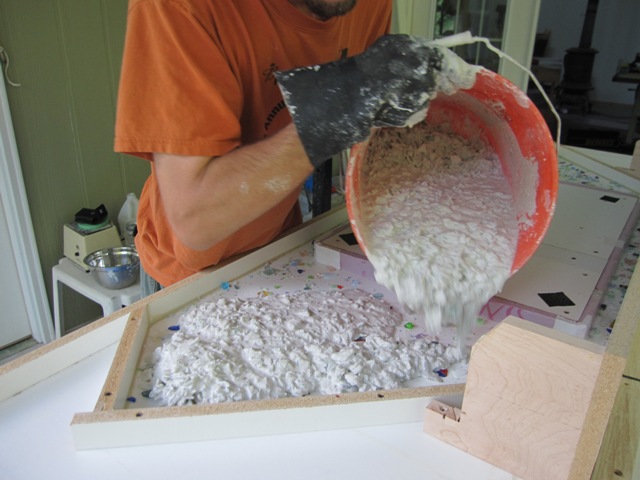
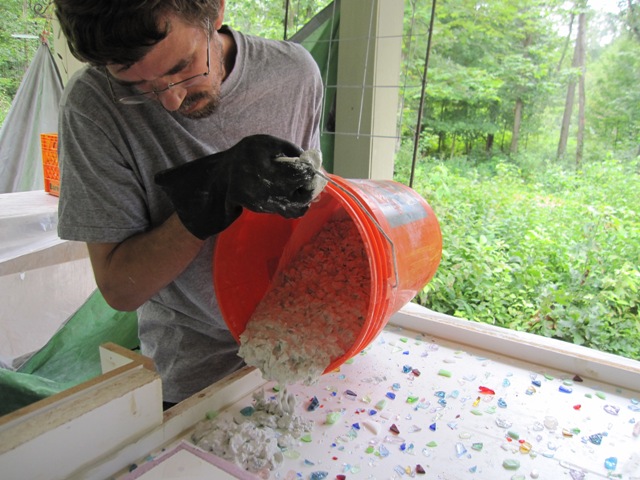
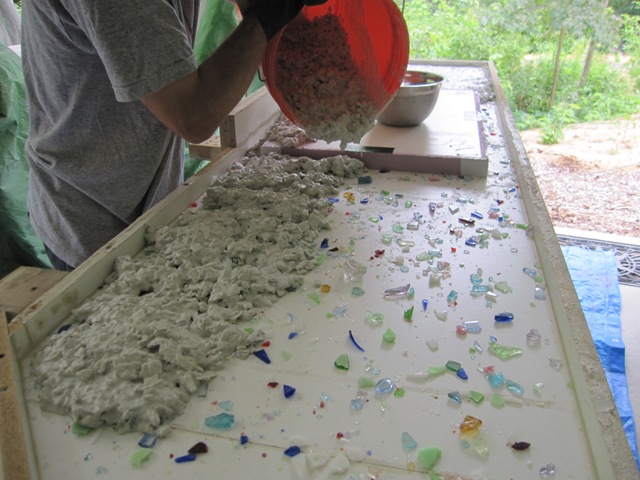
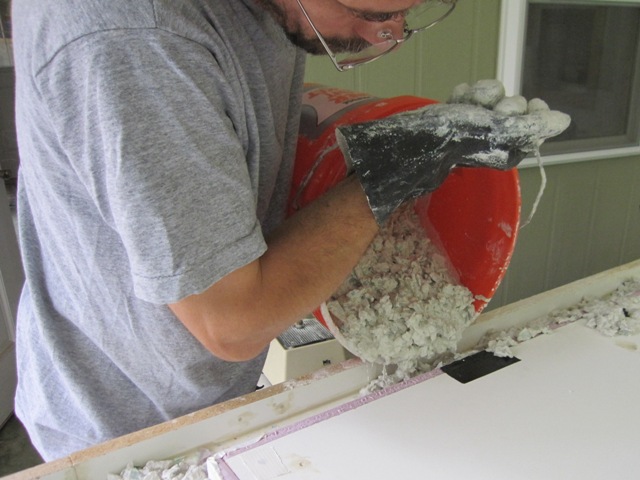
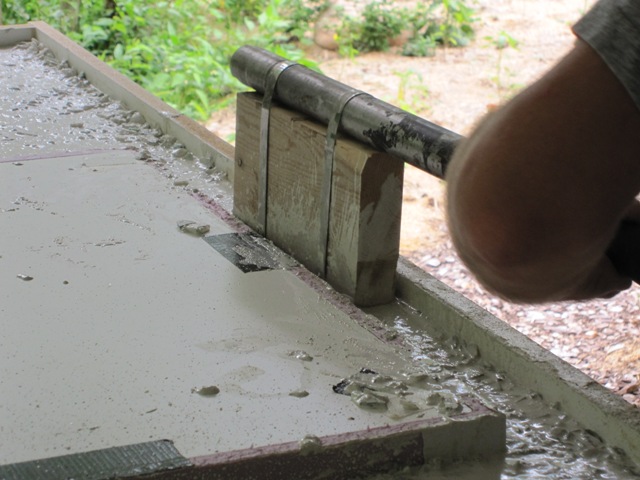
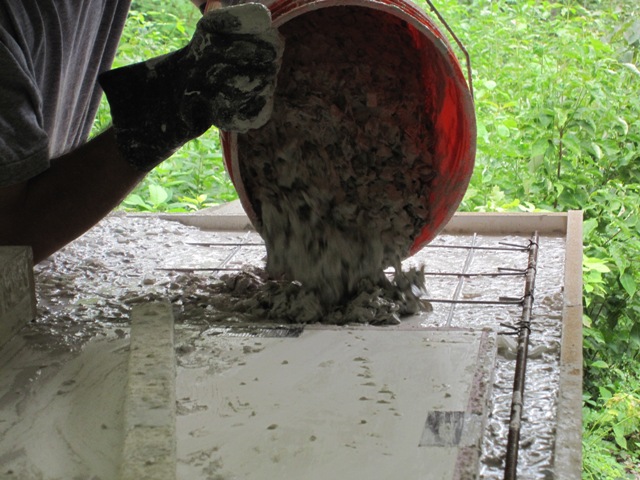
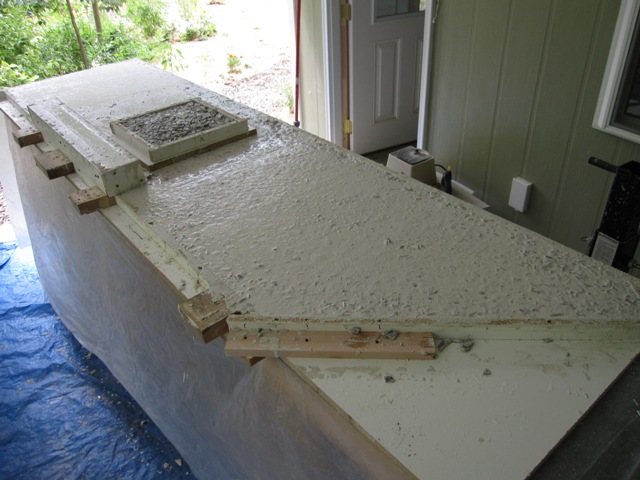
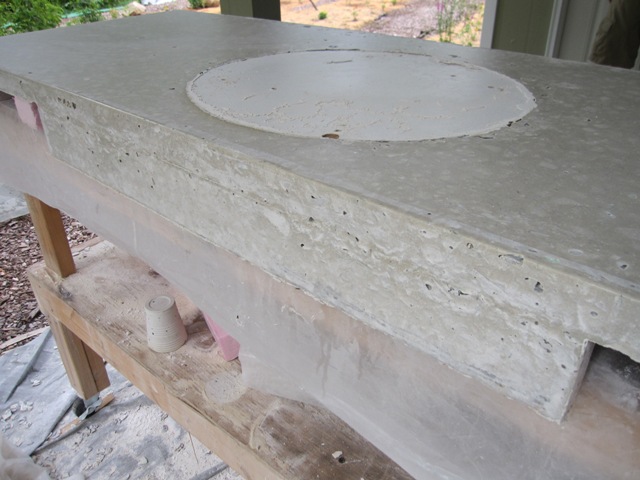
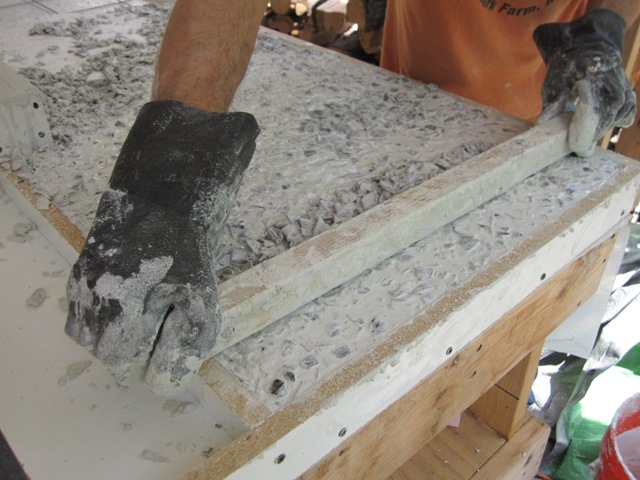
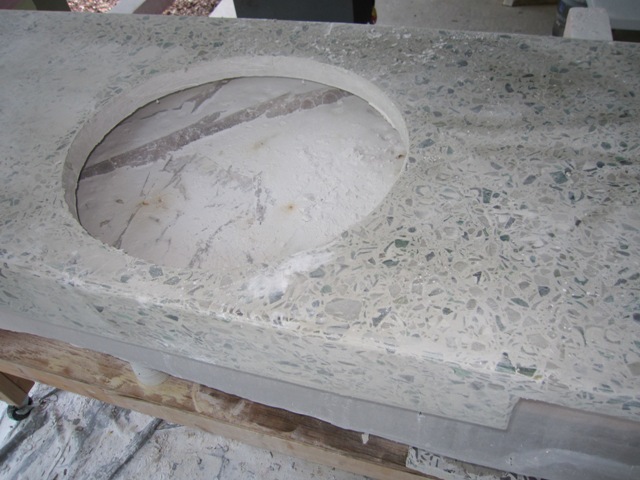
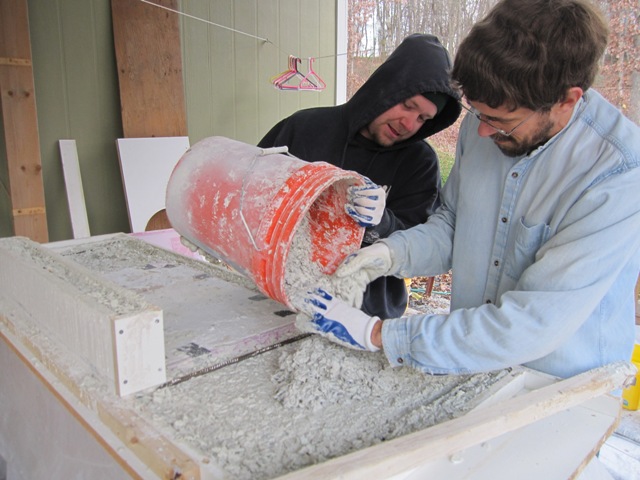
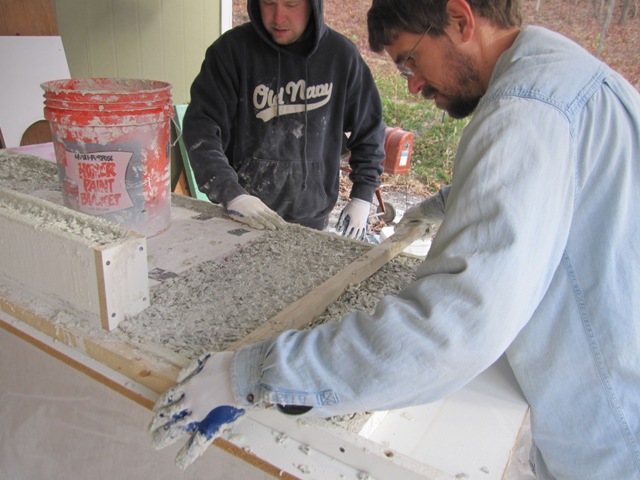
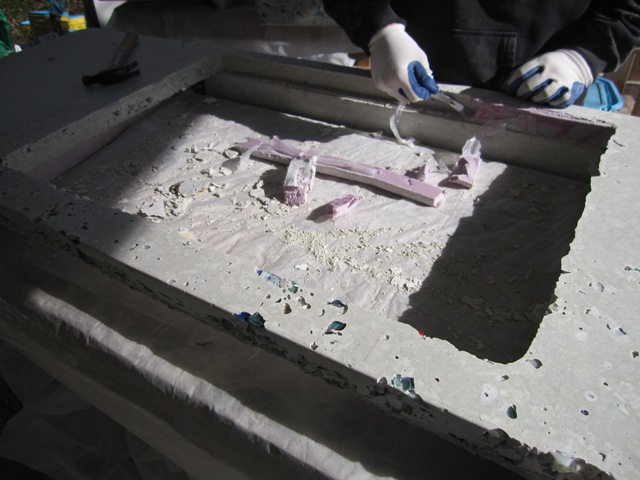
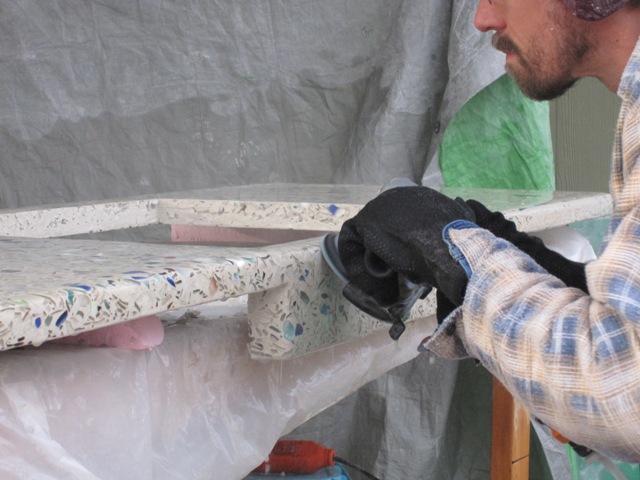
The countertop for the south side of the kitchen will hold the sink. Since we used the same model of sink and cooktop in both kitchens we were able to reuse most of the mold parts that we had made for the main kitchen. As we filled the chimney that will form the dropped apron in front of the sink, Jay pushed some colored confetti glass down in front so the apron will show the same colors as the top. We did the same around the edges, because all but one narrow edge will be visible when this countertop is installed. The second photo gives some idea of how cold it was, and as soon as it was poured we wheeled it into the workshop so it could cure for several days without freezing.


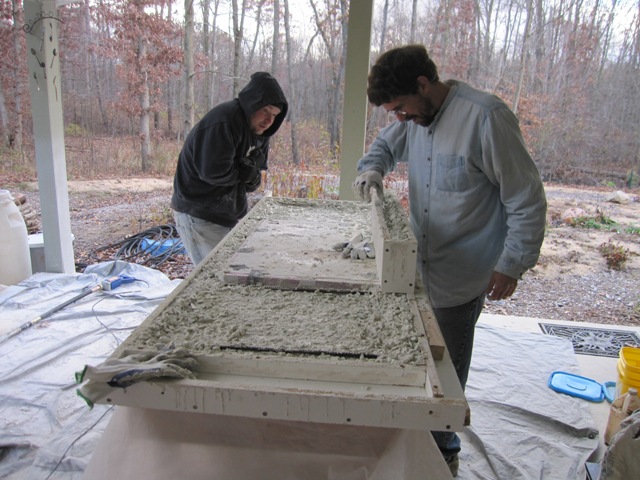
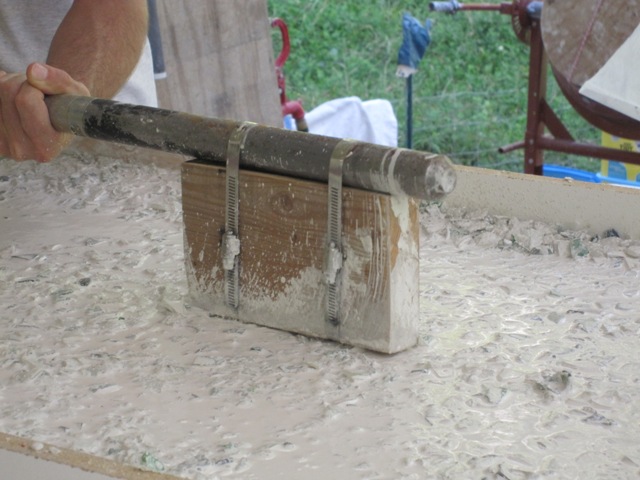
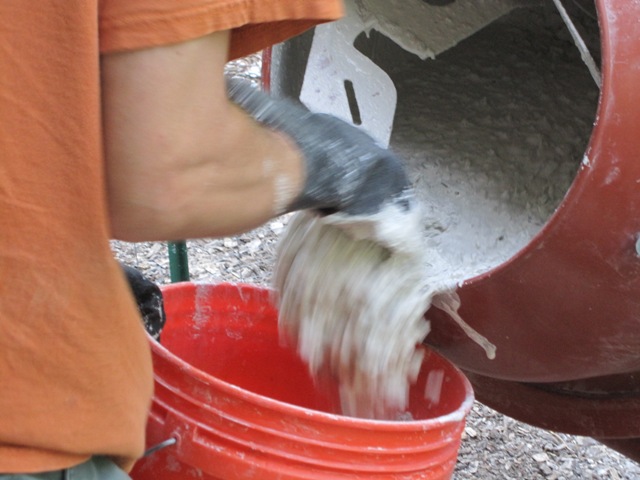
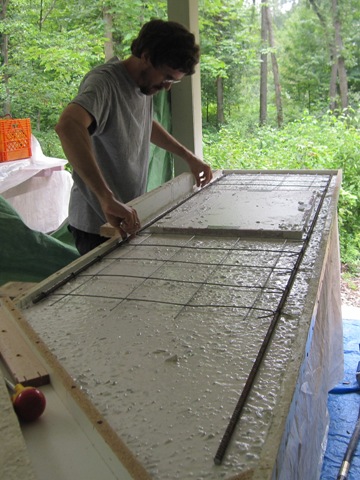
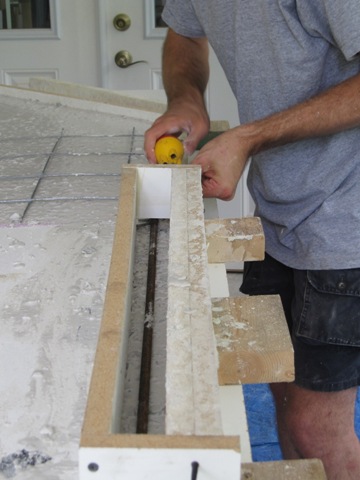
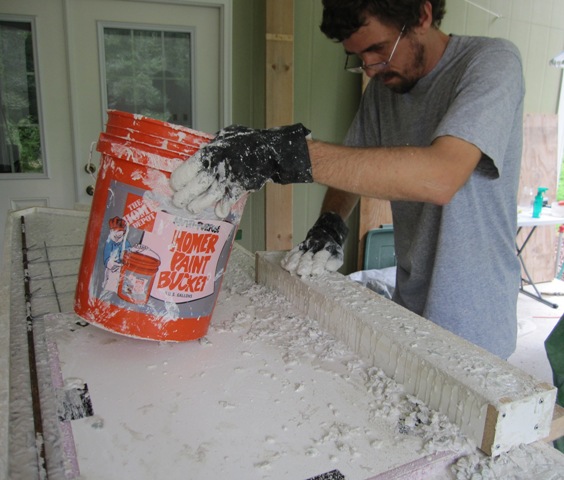
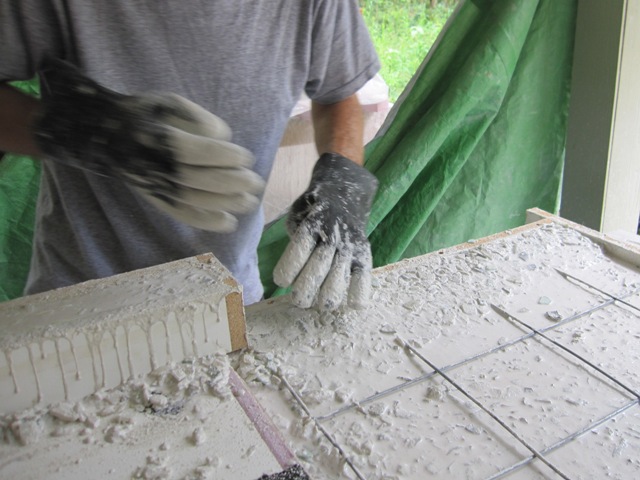
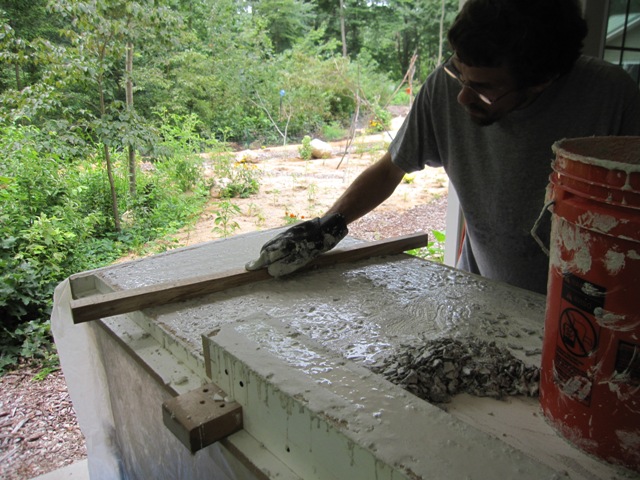
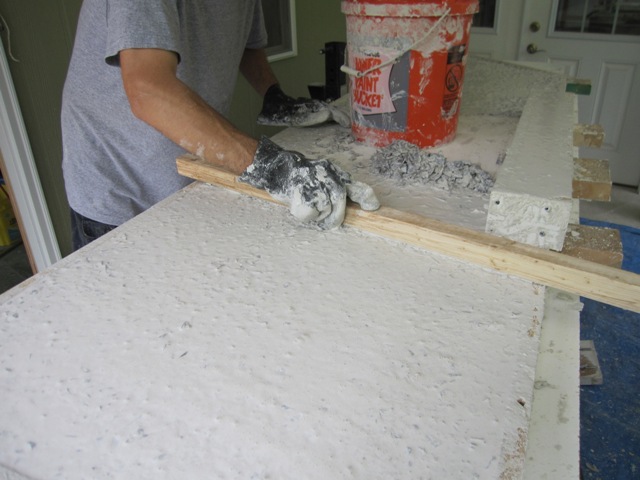
After the first layer of clear glass was placed and vibrated, we poured the second layer containing all brown glass that won’t show. Then we screeded it off, and applied a top coat of sand mortar (2 parts sand and 1 part cement) to give a smooth and solid surface.
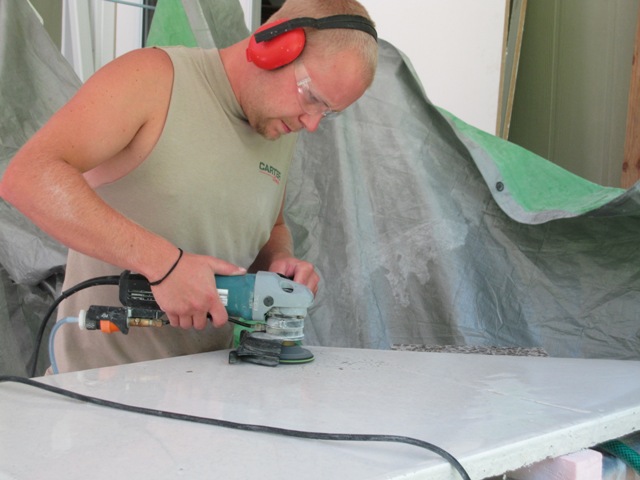
November 8, 2010
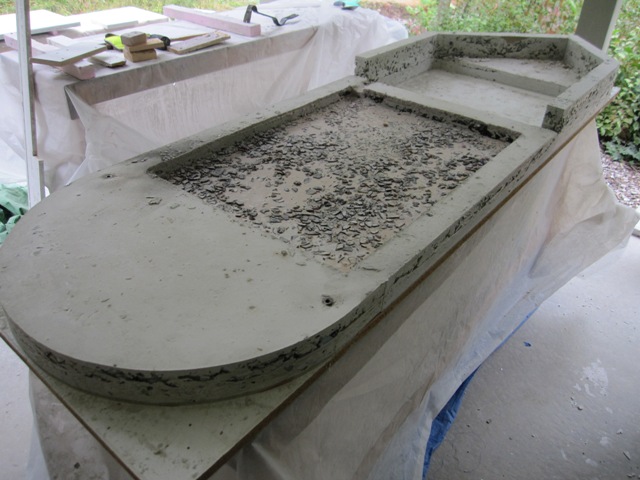
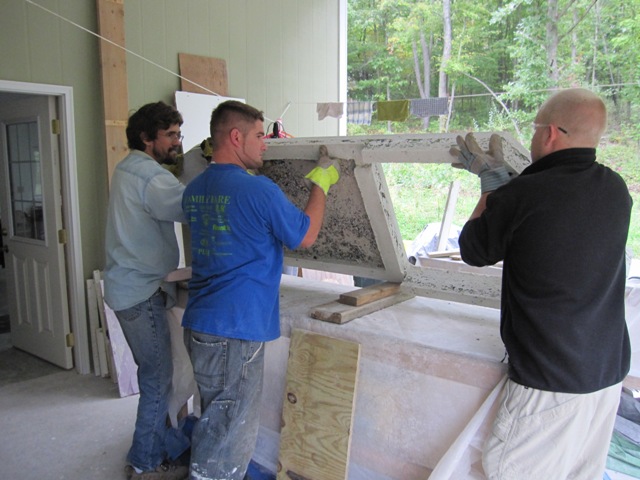
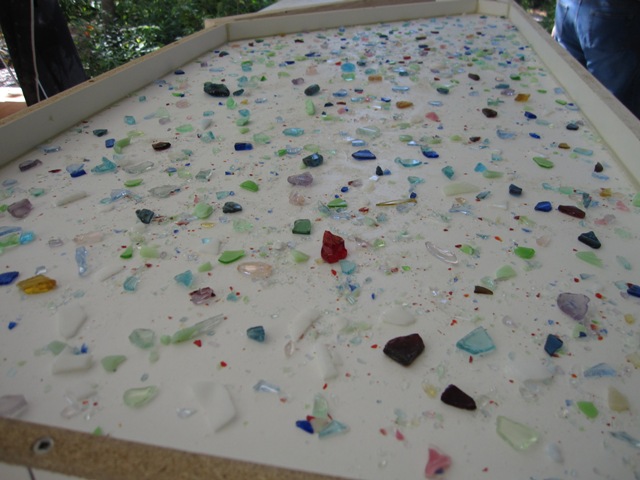
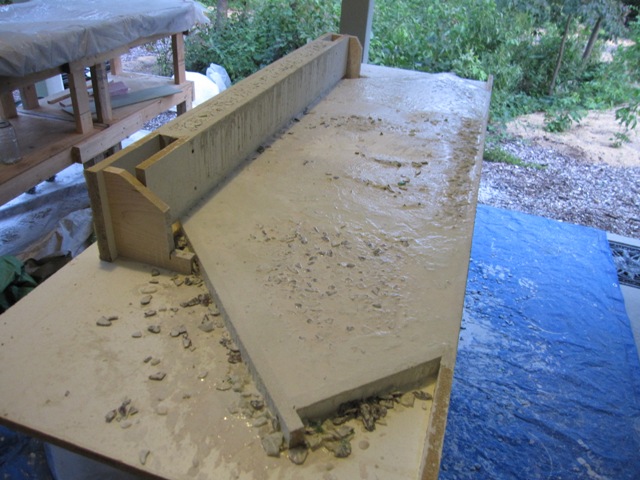
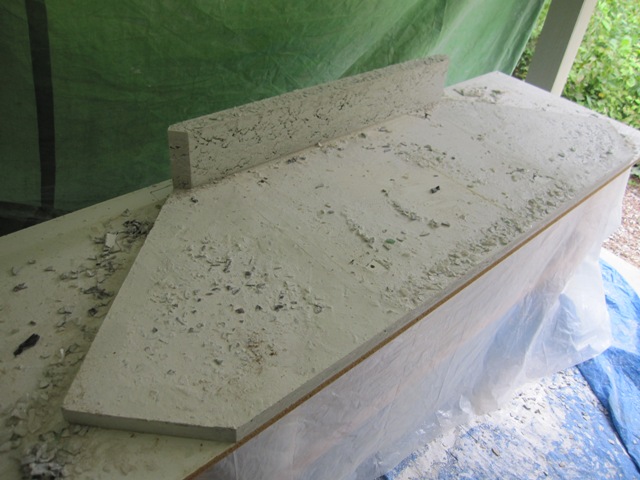
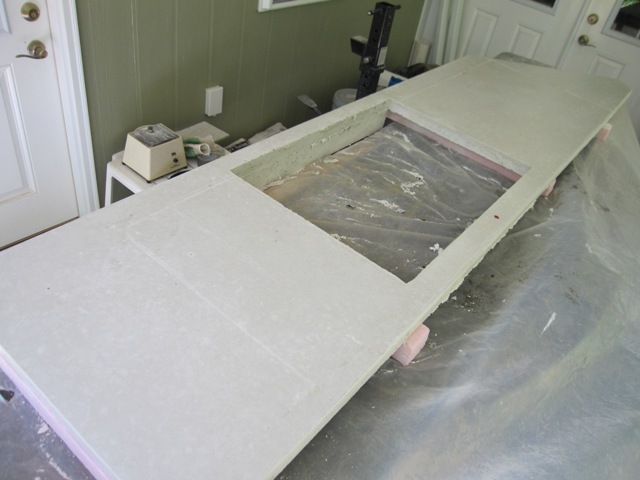
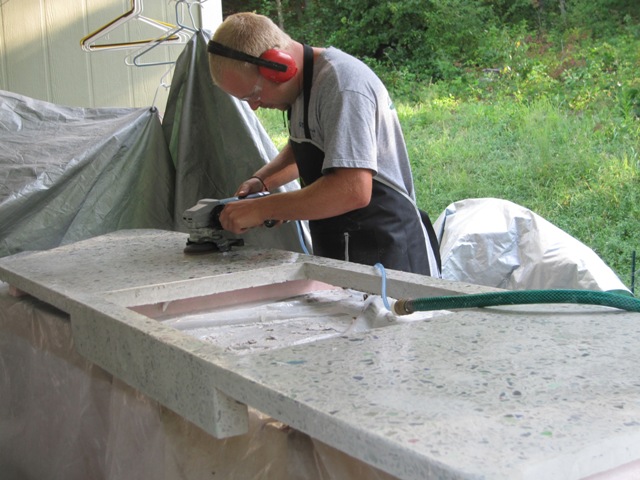
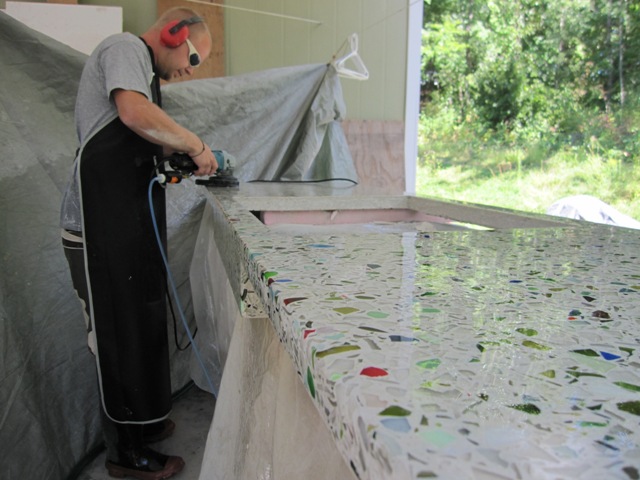
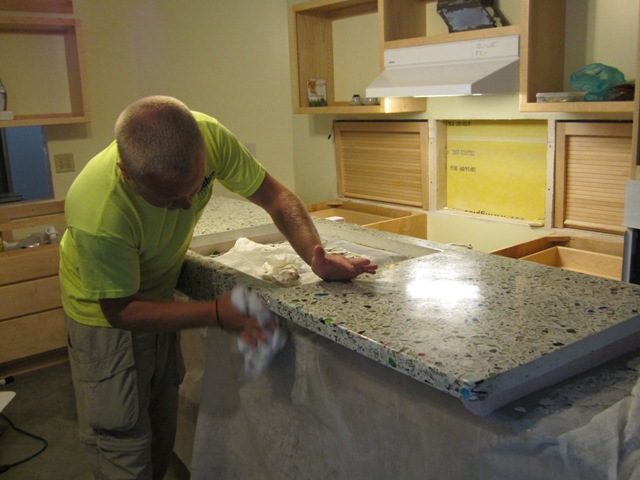
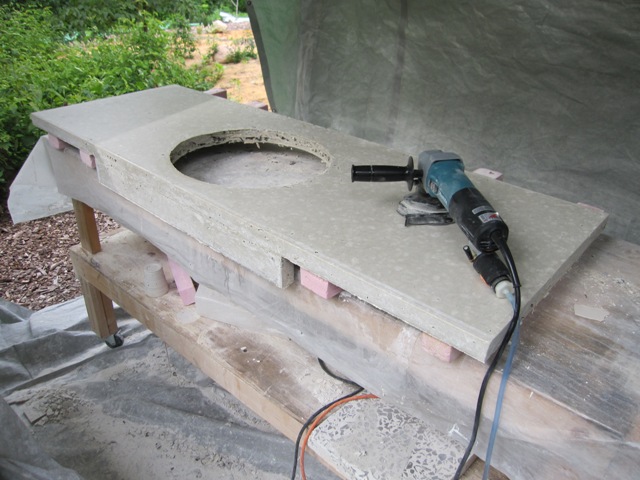
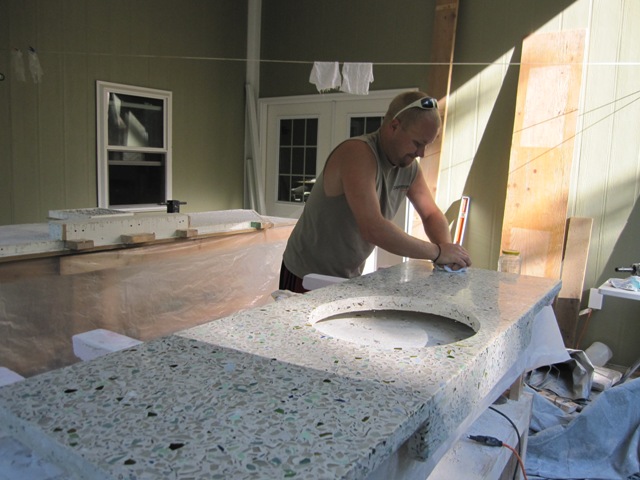
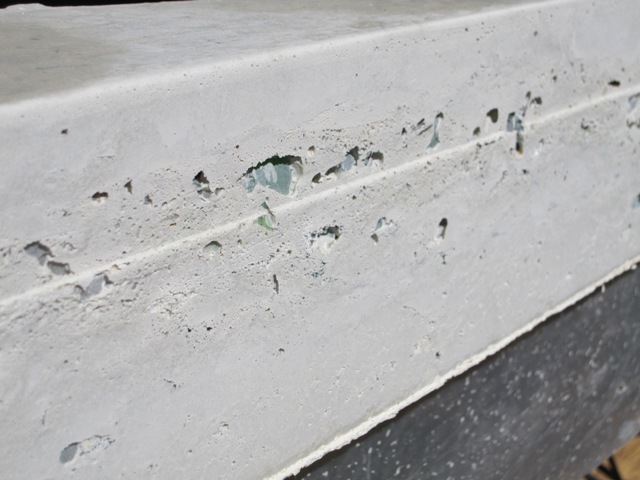
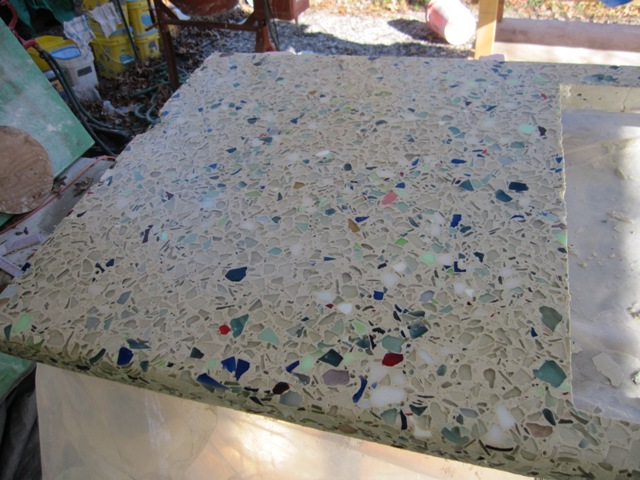
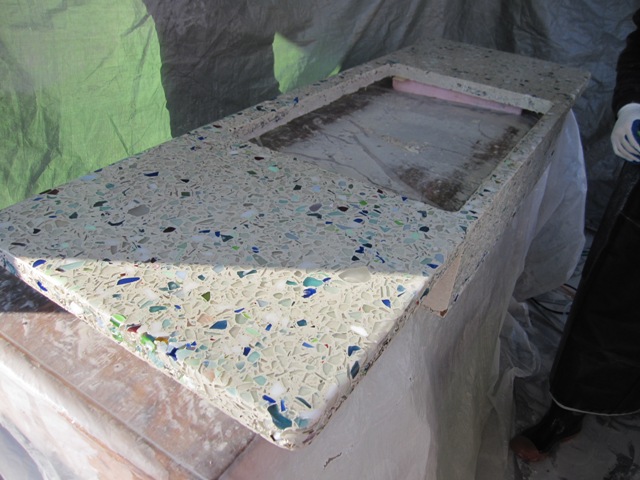
Today we removed the sink countertop from its mold and Nash polished it down with the 50-grit diamond wheel. It came out about the same as the other one, pretty good overall but with some voids that will need filling with sand slurry. We managed to get a good mix of colored glass showing around the edges and on the front of the apron. Today Nash also polished the other countertop and applied a new slurry coat to each one so they’re both progressing together and we hope to have them both ready to install next week.
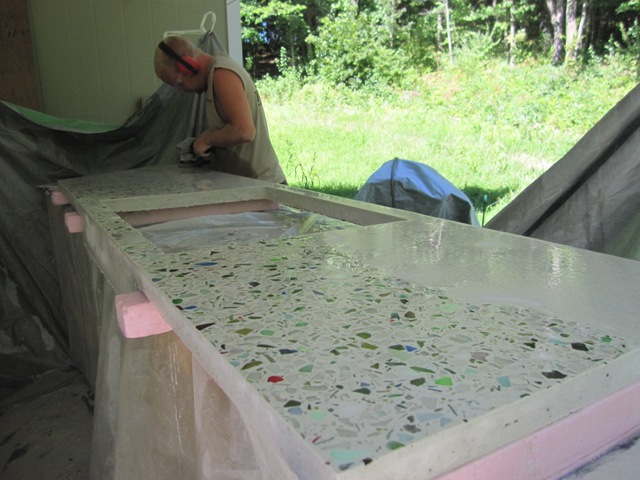
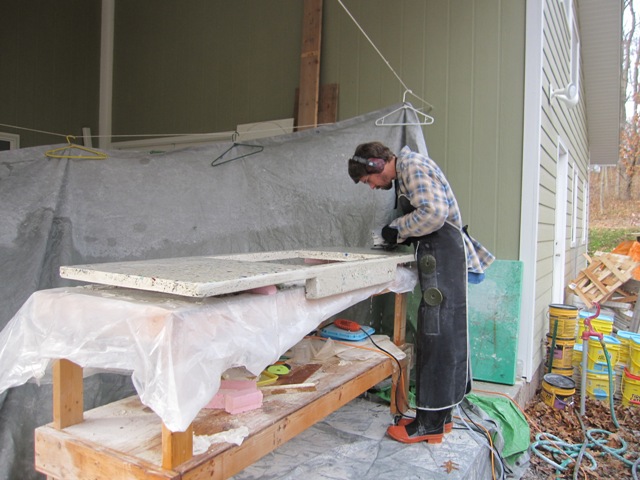
November 20, 2010
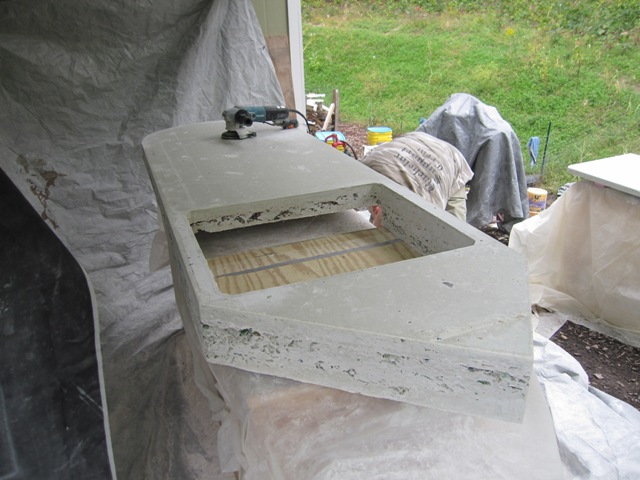
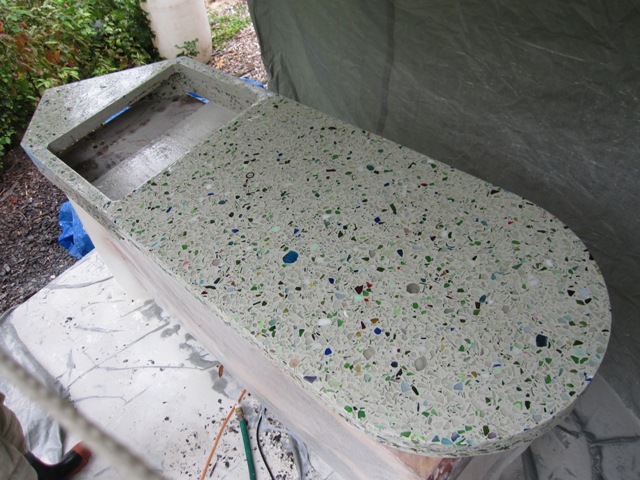
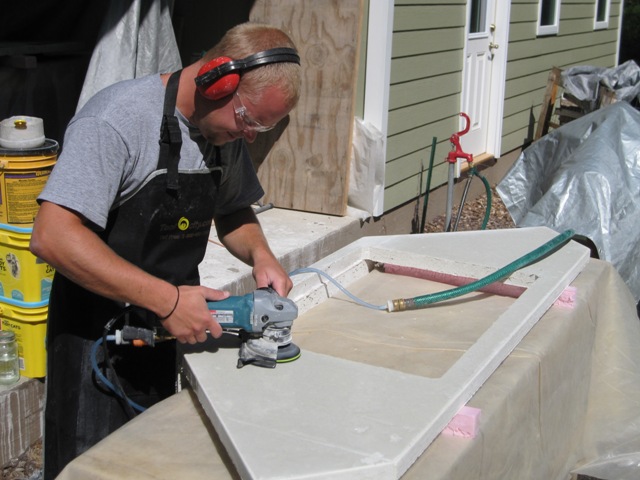
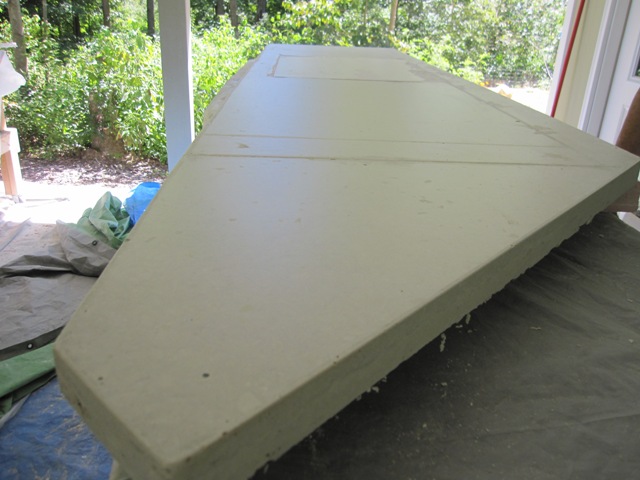
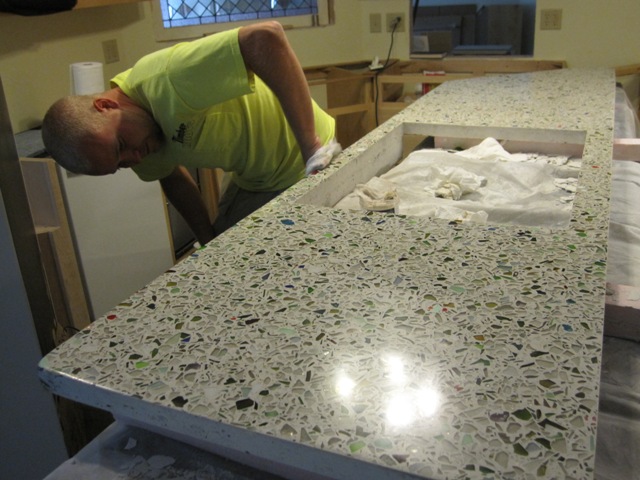
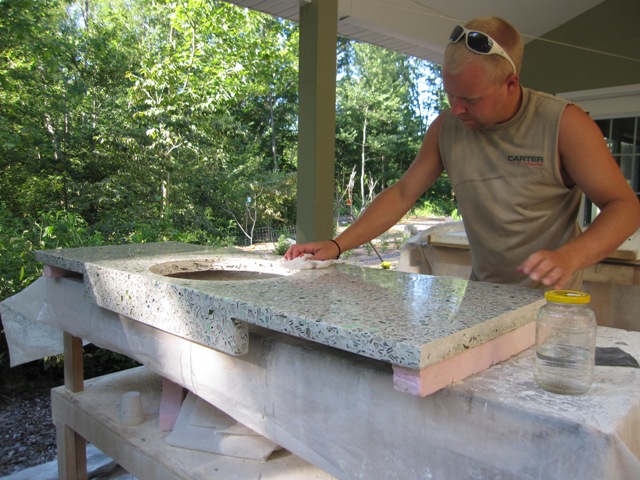
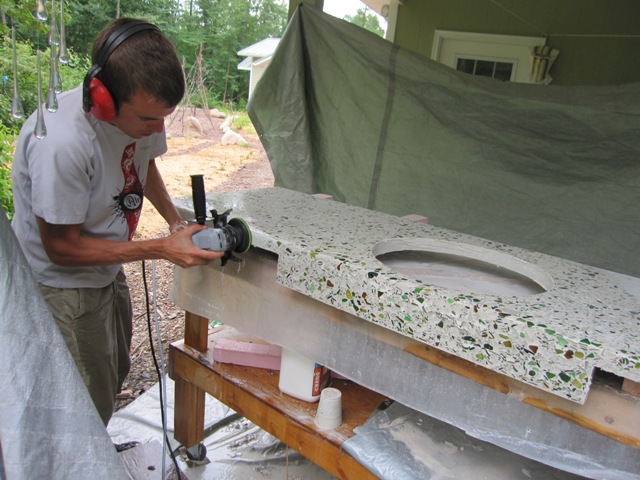
It was about 33 degrees F outside today, and Jay spent several hours polishing the cottage cooktop countertop up to 1500 grit. That completes the polishing so it just needs to be sealed, waxed and installed. Jay’s hands stayed reasonably warm thanks to neoprene gloves so the cold didn’t pose much problem except for having to thaw the hose out beforehand, and the feet afterward.

December 12, 2010
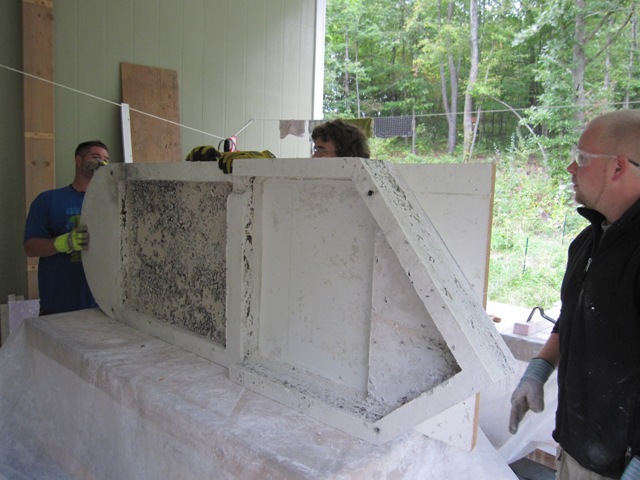
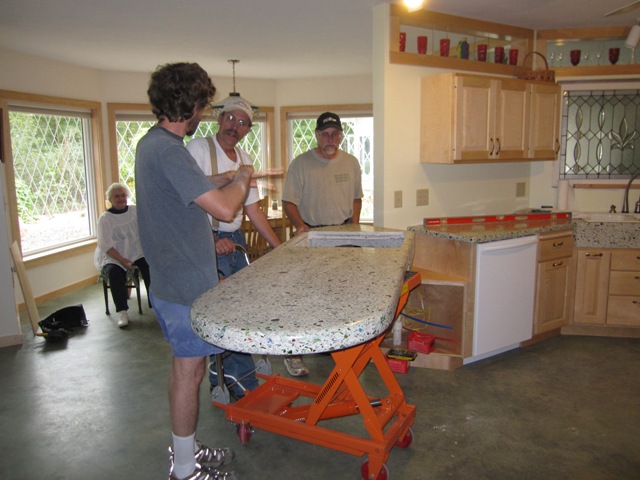
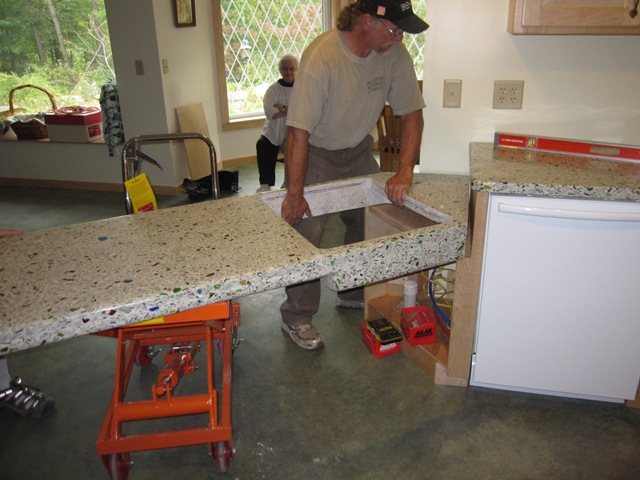
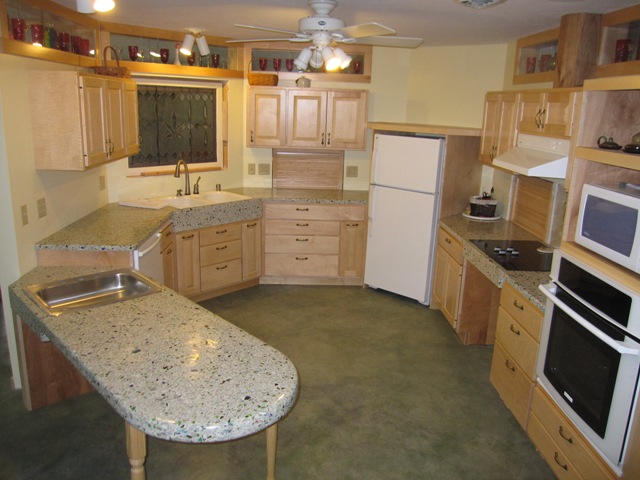
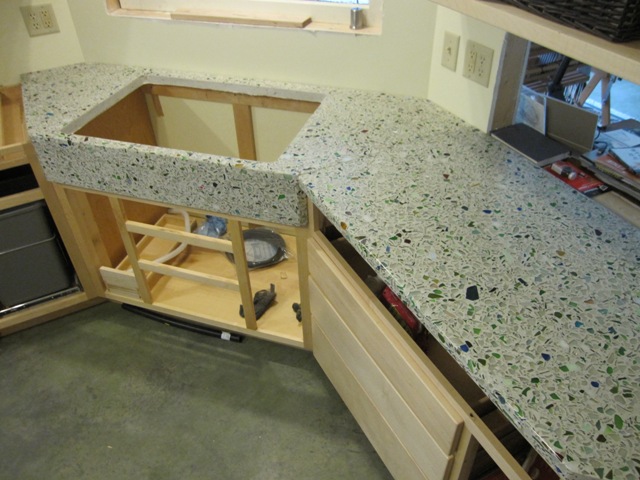
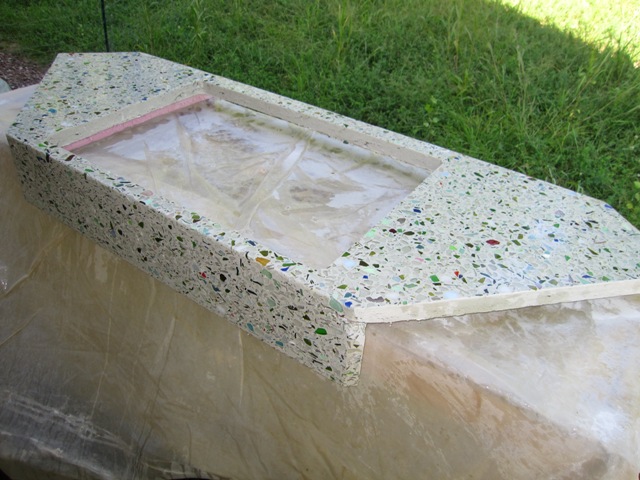
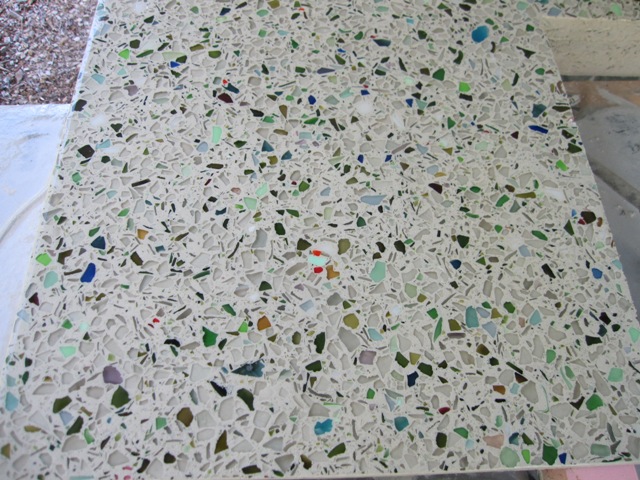
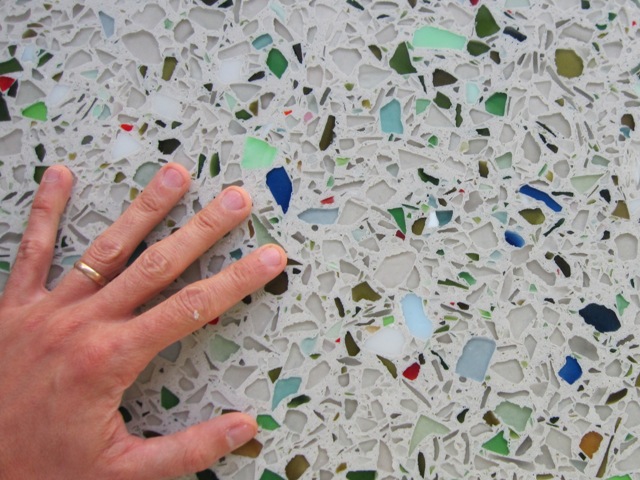
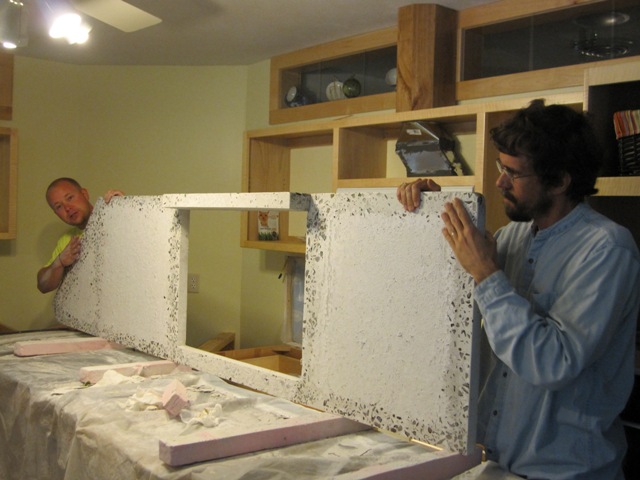
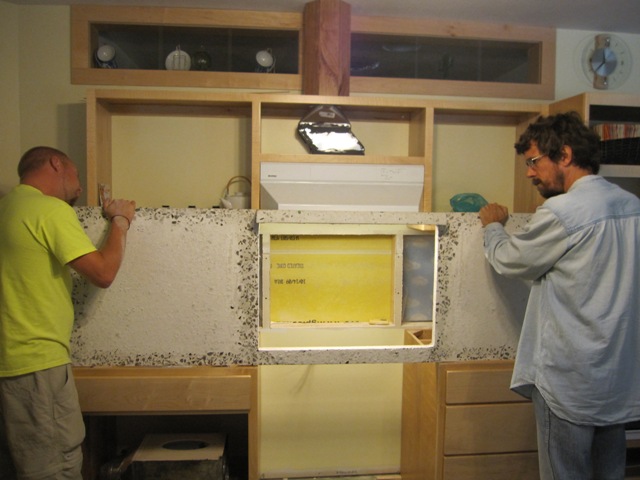
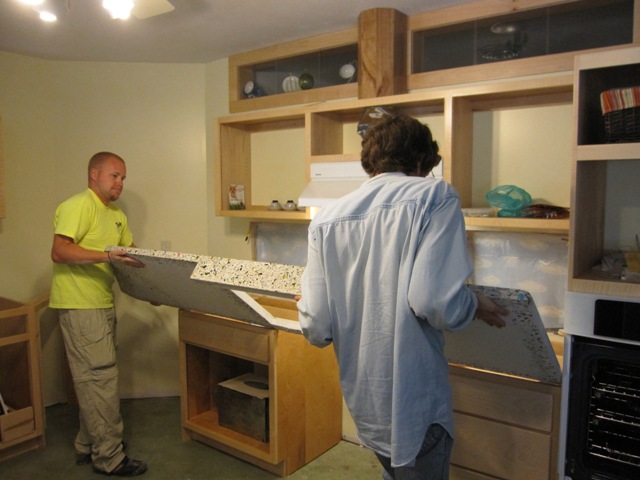
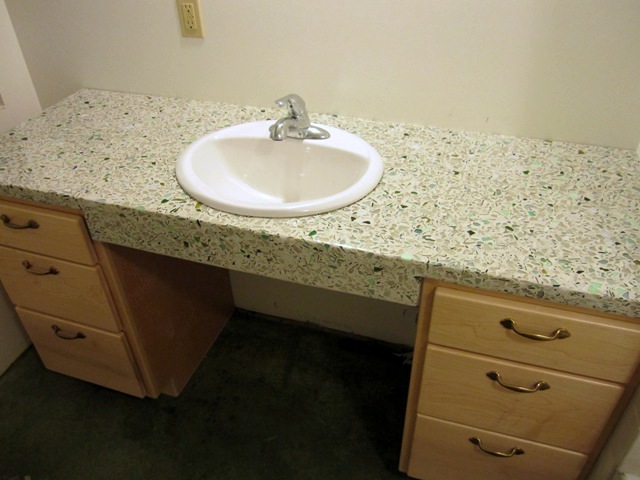
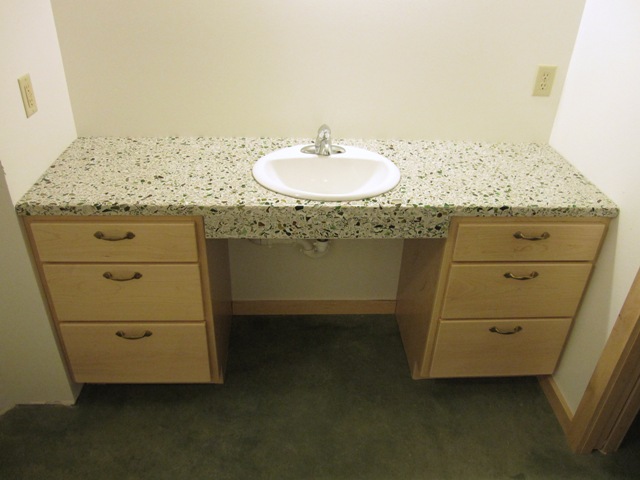
It’s been almost 7 months since we started making our first countertop, and today we finally installed the last one! We made a total of 10 countertops counting the 3 segments that are joined together in the main kitchen. Here are the final two installed in the cottage kitchen. Our digital camera made them appear to be slightly different shades of white in these photos due to the artificial lighting, but the colors actually match very well.

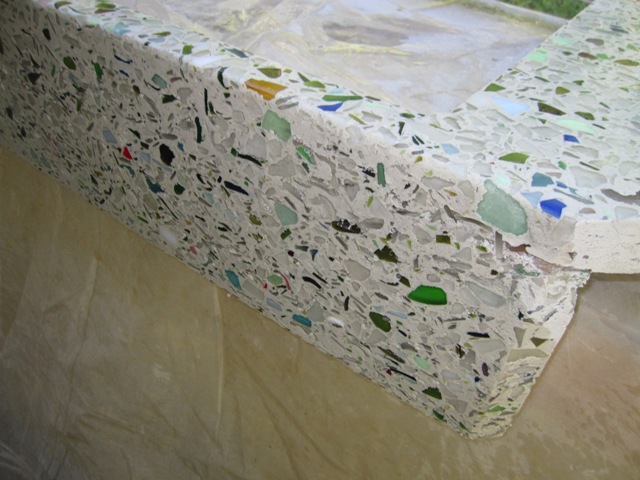
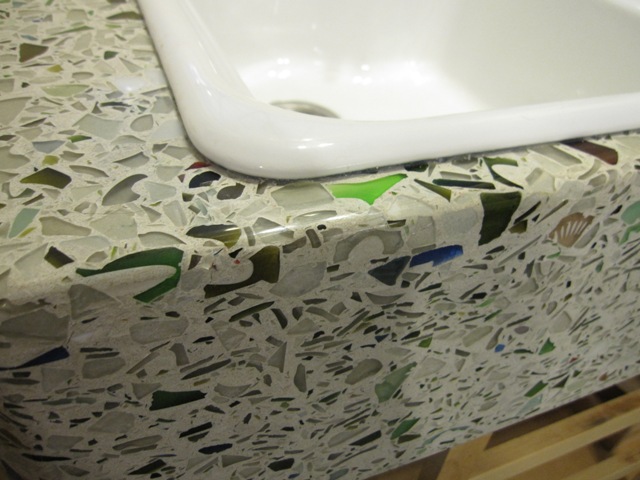
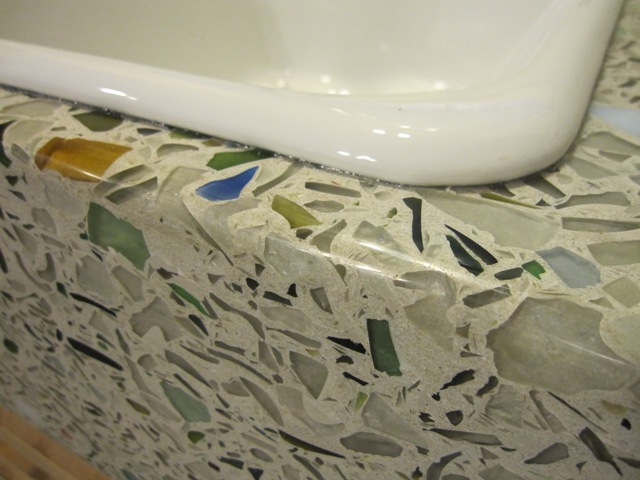
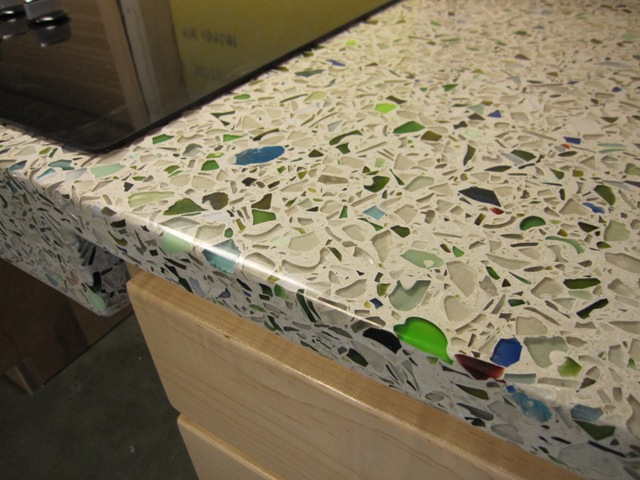
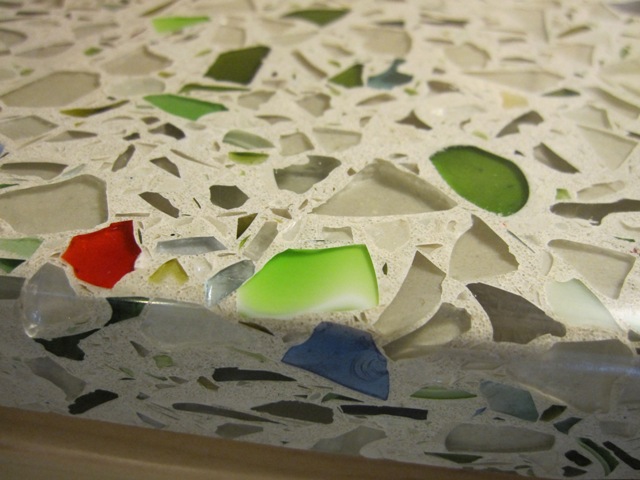
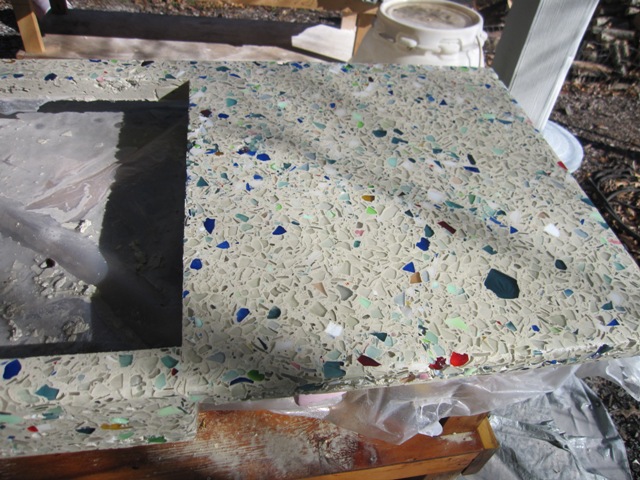
Here are some close-ups of the sink side, showing how the glass seems to wrap around the edges.

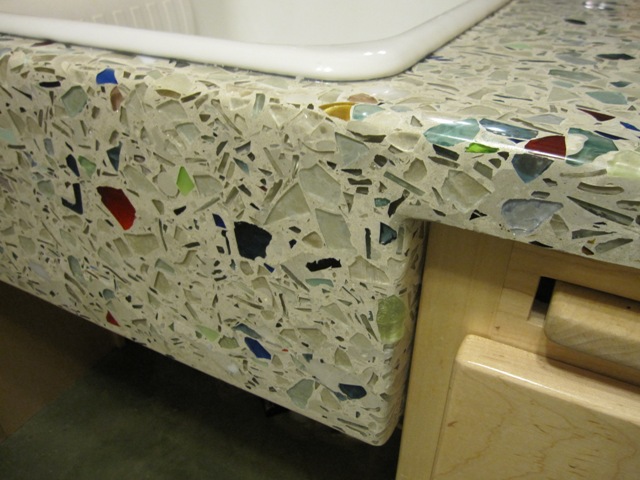
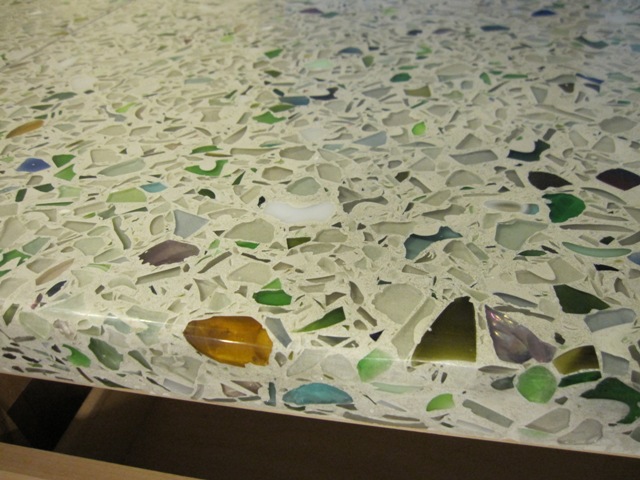
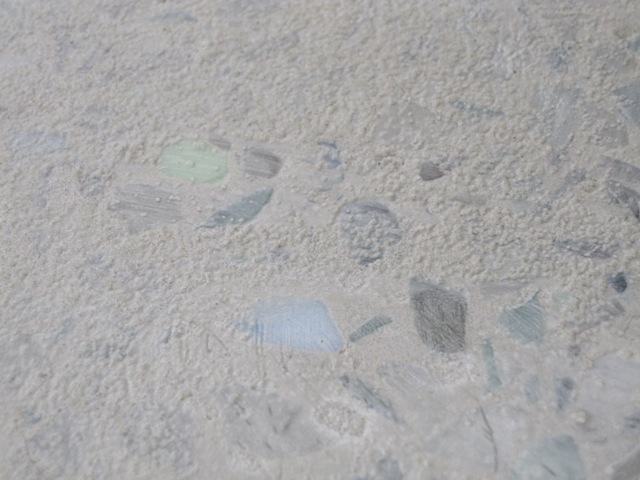
In the second photo below you can see a piece of green depression glass where the pattern in the back side of the glass is clearly visible. The little dark dots surrounding it are grains of sand in the concrete.

We had to polish 3 edges of this countertop since the back is visible behind the tree. We left about 1/4″ of clearance between the countertop and the tree that supports the upper cabinets.

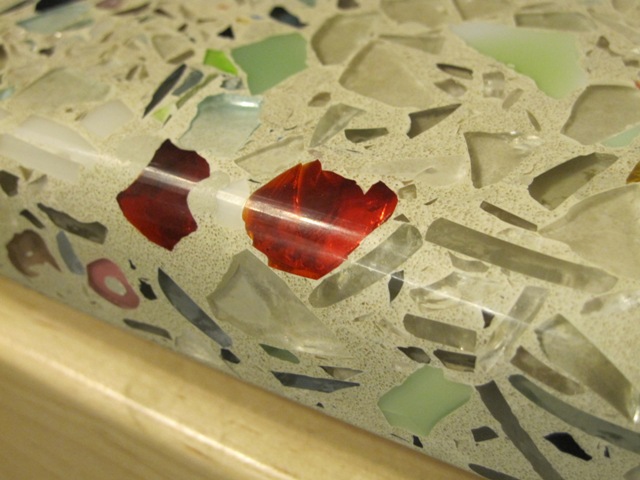
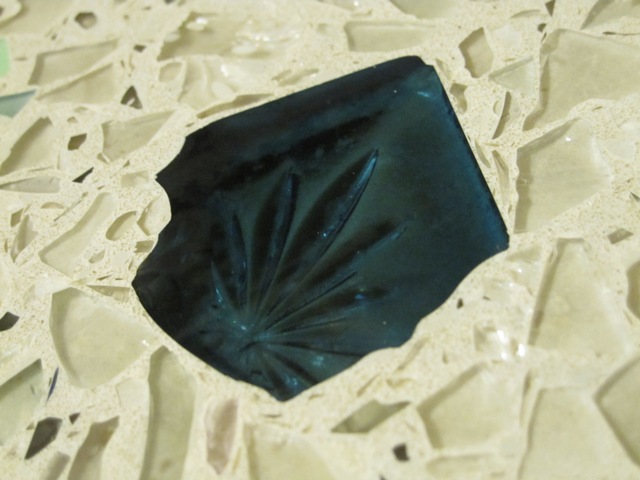
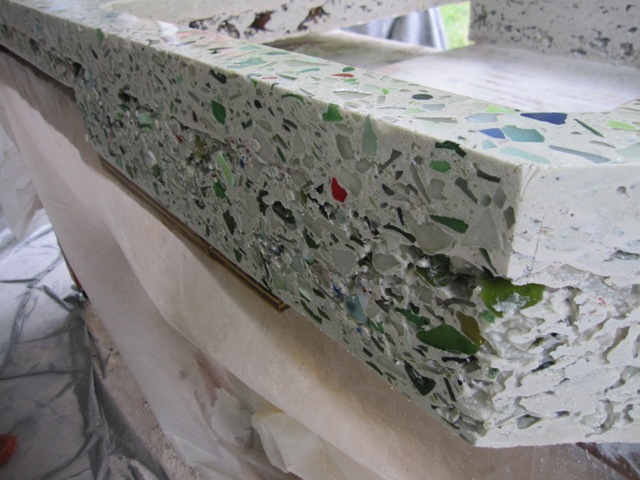
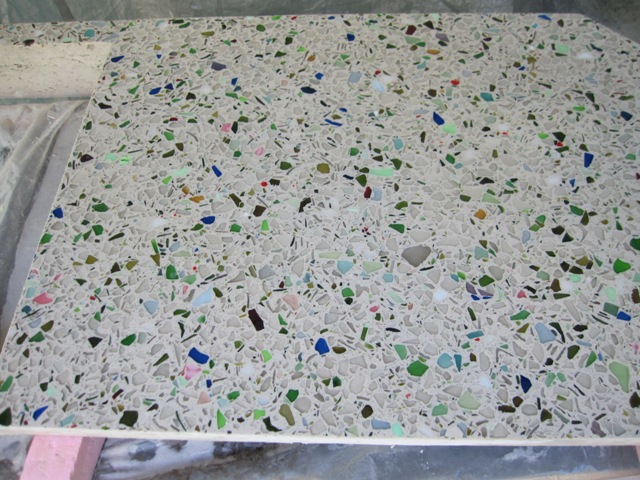
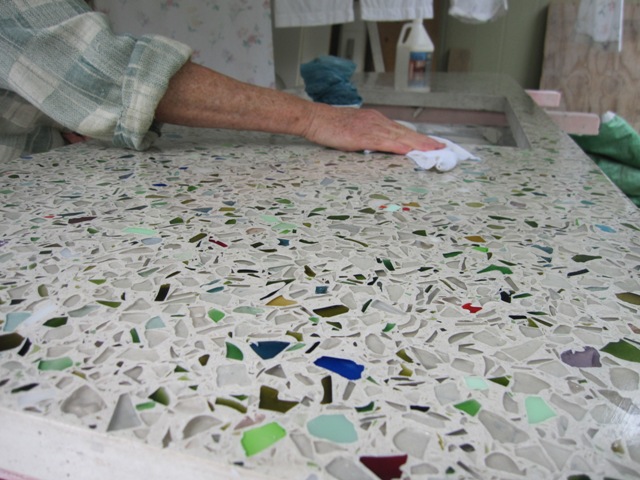
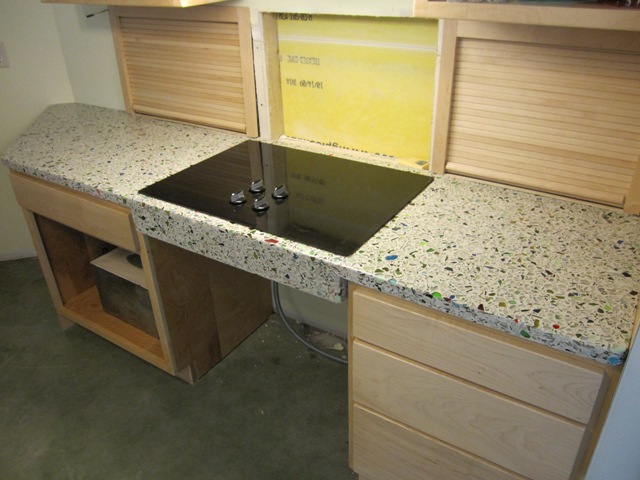
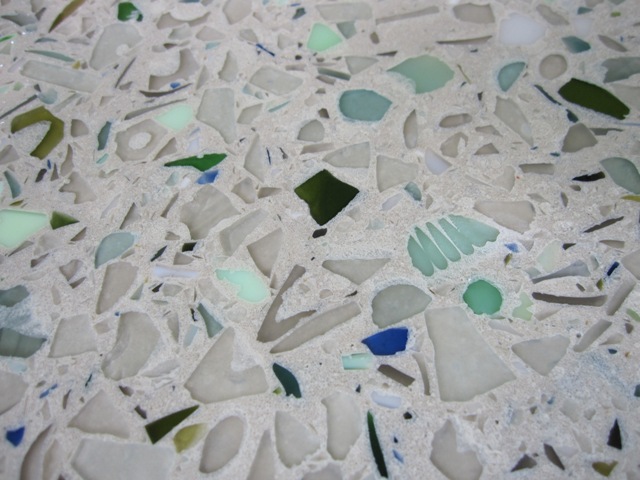
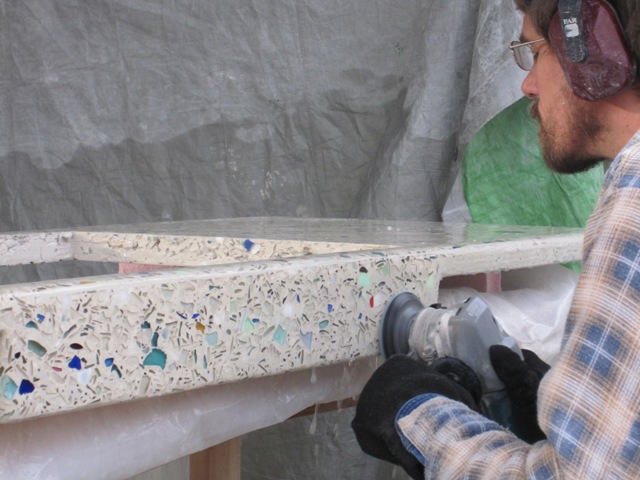
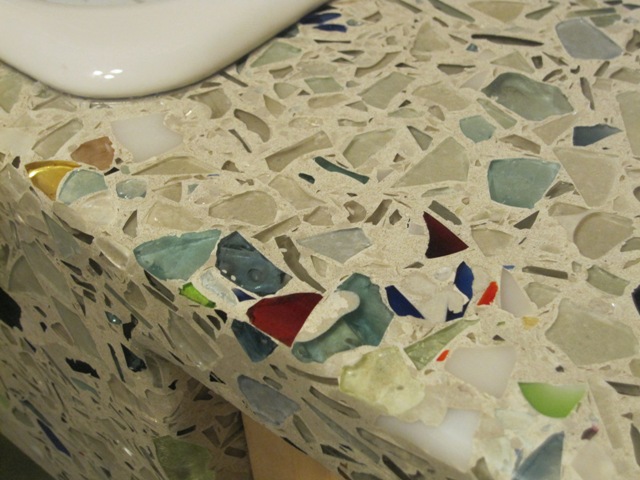
The photos below show close-ups of the cooktop side. In the lower left of the second photo you can see an example of some iridescent glass. This came from a broken antique bowl that had the iridescent coating and the molded pattern on the outside, which we carefully placed in the mold so that it would be on the bottom of the glass in the finished piece.

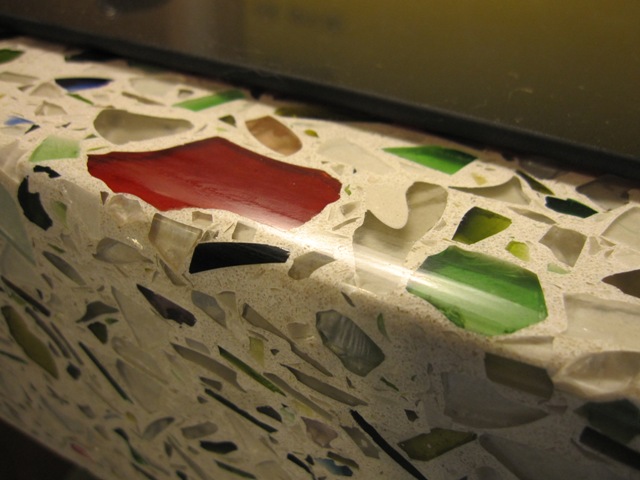
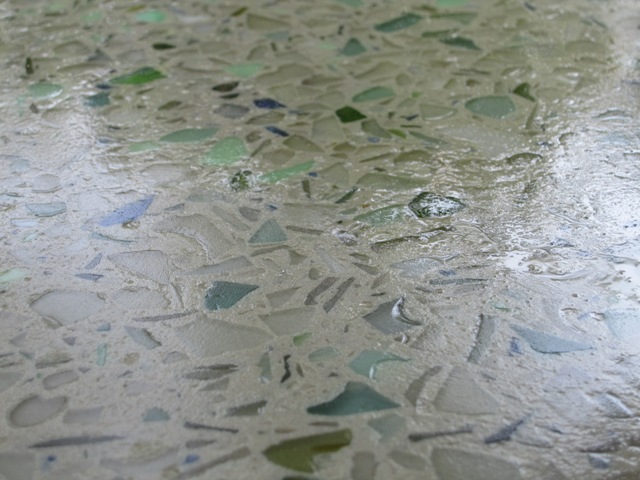
We especially like the red glass along the edge, and here again you can clearly see the grains of sand in the concrete. The second photo below shows a large piece broken from a blue drinking glass that had a square foot with this pattern on it. In order to get the large pieces to show well like this, we first ground each one flat with the 50-grit diamond wheel, then glued it into the mold with hot-melt glue before pouring the concrete over it.

The Sitting Counter

Includes affiliate links that help offset our expenses at no cost to you. Affiliate programs and affiliations include Amazon Associates and the eBay Partner Network.

Back to Main Kitchen Countertops

September 15, 2010
This is our magnum opus countertop! We call it a “sitting counter” because it will be placed at table height, just 30 inches from the floor, and it’s designed to accommodate wheelchair users as well as those who like to sit and give advice to the cook. It’s much like a kitchen table, except that it has its own sink and it’s attached to the base cabinets at one end to form a peninsula.

Because it will be open underneath we designed it to be extra-strong, and it’s 3 inches thick around the outside. It’s 28 inches wide and will weigh 350 pounds when finished. The mold is complicated due to the aprons on both sides of the built-in sink and the diagonal attachment to the base cabinet. In the second photo you can see the rounded front, which Jay made by cutting saw kerfs in a piece of thin plywood so that it would bend around the curve.

It’s a big job to weigh, mix and place this much concrete. Nash did most of the mixing and carrying while Jay spread it out in the mold.

The first layer is about 1 inch thick, and we placed it all around the mold and into the bottoms of the chimneys that will form the aprons on each side. Then Jay ran the vibrator over the whole thing to consolidate it and remove bubbles.

Once the first layer was in place, Nash started mixing the next batch while Jay positioned the rebar frame. This frame is welded together out of 3/8″ rebar, with double bars around the outer edges and across the middle spaced apart like an I-beam for extra strength. Additional bars extend into the aprons on each side of the sink, because otherwise this would be a weak area due to the big sink cutout in the middle. In the second photo below you can see two bolts sticking up from the rebar near the ends of the curve. These are threaded into coupling nuts that are welded to the rebar frame. Once the piece is finished, the bolts will be removed to leave threaded holes for attaching the legs that will support the free end of the countertop.

We tried a new technique for removing the excess liquid that floats to the surface after the concrete is vibrated. Using a wet/dry shop vacuum, we were able to remove the liquid quite effectively. It’s important to thoroughly wash out the shop-vac and the hose afterward!

The pointed end of the countertop will rest on a low wedge-shaped base cabinet, and the rebar frame has threaded attachment points here so we can bolt the countertop down to the base cabinet.

We placed the second layer of concrete, mixed from brown bottle glass, to bring the level up to about 1.5 inches. Then we set a foam rectangle into the middle. This will make the middle section only 1.5 inches thick instead of 3 inches, which saves about 100 pounds. It will also provide a protected space for an electrical outlet strip underneath the countertop. We placed a weight on top of the foam to keep it from floating upward if some liquid seeps underneath.

The third and final batch of concrete was mixed with clear and green glass like the first batch because it will be visible. We packed it around the edges and into the chimneys and then vibrated to consolidate it.

Once all the concrete was in place, we added an extra layer made from just cement and sand, no glass, to fill any low spots and form a smooth surface. We’ll polish the underside of this countertop so it’s reasonably smooth since we’ll be sitting under it, so we want a flat surface to begin with. The photos below show the finished piece in the mold. Now we’ll let it cure for about 5 days before removing it from the mold.

September 20, 2010
Today we removed the sides of the mold and, while it was in a convenient position, we ground down the coupling nuts that protruded slightly above the surface. That way it will sit flush on the legs and base cabinet.

As we removed the sides of the mold we could see a lot of voids in the concrete, despite having used the vibrator to consolidate it. It looks a lot like the front of the kitchen sink countertop, and it’s going to take quite a bit of filling to make a good surface.

The next step was to flip it over, which must be done carefully since the concrete is not yet cured and could crack if we’re not gentle. First we stood it on edge and then we peeled off the bottom of the mold from the top of the countertop.

Then we lifted it up onto supports so we could lower it right-side-up without putting any weight on the aprons around the sink area.

After it was safely flipped over, we wheeled it to the polishing area so Nash could start grinding down the surface. The second photo below shows how it looked a few hours later after Nash had ground down into the glass aggregate with the 50-grit diamond wheel. The top is looking nice!

The voids in the sides are going to take some work, but they’re fixable. Here you can see some of the worst spots where there’s more glass than concrete. Nash filled in these voids with a slurry made from Portland cement and sand, and it should blend in pretty well once it’s polished again.

September 30, 2010
It took a lot of polishing and filling of the voids, but at last it’s ready to be sealed. On the last segment we did, Liz applied the sealer outside on a somewhat windy day and it dried too fast leaving streaks on the surface, which we had to clean off with scrubbing pads in order to get the surface smooth. This time we moved the countertop inside so that Liz could seal it without the sealer drying on the surface, and it worked very well.

October 1, 2010
To manipulate the heavy countertop into position we used a hydraulic scissor lift table. That made it easy to position the countertop at the correct height and to slide it into place on the wedge-shaped cabinet that supports it.

Once we had it in the correct location, we carefully leveled it so that we could measure the exact distance to the floor in order to cut the legs to the proper length.

Since Jay’s wood lathe is not yet set up, we attached some inexpensive store-bought pine table legs in order to get it installed. We’ll probably replace them with homemade legs at some point but they’re adequate for now. People don’t really look at the legs much anyway since they’re fascinated with all the different shapes and colors of glass.

Main Kitchen Countertop – South

Back to Main Kitchen Countertops

September 5 2010
This segment is the simplest of all, just a rectangle with one rounded corner near the sitting counter sink. We poured it in the same way as the others, with just a piece of reinforcing mesh in the middle.

September 8 2010
Here it is removed from the mold, and you can see the rounded corner that will be between the dishwasher and the sitting counter sink. Nash polished it down to expose the glass and it’s looking good.

Main Kitchen Countertop – West

Back to Main Kitchen Countertops

August 26, 2010
This countertop segment will extend to the right of the southwest countertop that holds the kitchen sink. It is a simple shape except for the diagonal end that butts up to the refrigerator space.

Here’s the first layer of concrete going in. This is the layer that will show, so it uses about 2/3 clear glass and 1/3 green glass.

We After placing the first layer we sprinkled confetti glass around the edges, and then used the vibrator to consolidate the concrete.

This countertop shouldn’t experience much stress so we just used a simple sheet of reinforcing mesh. Once it was in place we mounded up concrete from the first batch around the edges, sprinkling in more confetti glass around the edge.

The second layer uses all brown beer bottle glass, and we spread it across the top of the mold where it won’t show in the finished countertop.

August 31, 2010
It came out of the mold cleanly and the surface looks nice and solid.

Nash used the 50-grit diamond wheel to grind down into the glass aggregate.

September 18, 2010
After several coats of slurry and polishing up to the 1500 grit diamond wheel, the countertop was ready for installation. Liz applied a sealer and then we waxed it before moving it in to the kitchen along with the southwest segment that will hold the kitchen sink.

Here are a couple of close-ups showing the glass in this section.

Main Kitchen Countertop – Southwest

Back to Main Kitchen Countertops

August 18, 2010
This 6-sided segment will hold the main kitchen sink, with a 7.5-inch dropped apron in front. The first photo below shows the glued up template on top of the base cabinets. After making the template, we flipped it over and used it to make the mold the right shape. The second photo below shows the finished mold with confetti glass sprinkled into it, read to pour the concrete. The side closest to the camera will go along the wall, and on the far side you can see the outer wall of the “chimney” that will form the dropped apron in front of the sink.

August 19, 2010
We mixed the concrete using the same proportions of ingredients as the last (north) countertop, but it came out quite a bit more fluid. Maybe we incorrectly measured one of the ingredients or maybe we just mixed it a little longer, but it was quite soupy. We quickly went back and double-checked the ingredient list, and confirmed that we had the same recipe so we went ahead and poured it even though it seemed very wet.

After placing about 1/2 the concrete, Jay ran the vibrator over it to remove air bubbles. Then he placed a welded-up rebar frame in the mold. Considering how wet the concrete is, it’s good that we have the extra strength of the welded rebar frame all around the sink opening to help prevent cracking. It should be plenty strong once it is installed, because it is supported by a cabinet on each side of the sink. Our main worry is that it might crack while we are removing it from the mold, when the concrete won’t have reached full strength yet.

Although the concrete was quite wet on top, we did our best to screed it off level. The second photo shows the chimney being filled. This will make the apron in front of the sink, so we placed additional colored glass into it as we added layers of concrete and vibrated it.

The top surface was the consistency of pea soup, way too watery to make a strong concrete. In order to save the piece, we used scrap towels to remove the excess liquid from the surface. The concrete under the soup was firm but about 1/8″ below the top of the mold, so we mixed up some mortar paste from Portland cement and sand, and troweled it up to the level of the mold. The high water content overall is still a concern but it looks like the vibration consolidated the lower layers and made the excess water rise to the top, so by removing it with towels and filling with mortar we hope we have made a strong piece. Next time we’ll cut back on the water a bit!

August 24, 2010
We let it cure for 5 days before removing it from the mold. This is 2 days longer than the minimum curing time, which will make it stronger and less likely to crack while we turn it over but also harder to polish. As soon as we removed the front of the mold we were disappointed in the quality of the concrete, because it shows quite a few voids in the front apron. It should be plenty strong enough, but this will mean more work to fill all these voids.

We flipped it over and removed the bottom of the mold, and were relieved to see that the top surface looks pretty good, with very few voids compared to the front apron. It doesn’t look good at this point but we won’t know how it is for sure until we grind off the outer layer.

Nash spent a couple of hours grinding down to expose the glass aggregate, and overall it’s looking pretty good. In the second photo below you can see how it will look while standing just to the right of the sink.

The front apron does have quite a few voids, but it’s not as bad as we had feared when we first removed it from the mold. It will be a bit of work to fill the voids but it’s definitely fixable. Next Nash will apply a slurry of Portland cement and sand to fill in all the holes, and then we’ll let it cure for a few days before polishing it again.

September 20, 2010
It took several coats of slurry to fill in all the voids and a lot of polishing, but at last it’s ready for installation and Ryan applied a coat of wax.

Although the south segment was not quite finished yet, we moved it into the kitchen for a temporary test fit so that we could shim up the sink segment to the proper level. Then we moved the south segment back to the polishing area, and used silicone caulk to fix the shims under the sink segment and the one to the right. Then we installed the kitchen sink.

Here are a couple of close-ups showing the glass detail around the front corners of the sink. Despite the number of voids that were in the apron in front of the sink, now that they’re filled and polished you can’t even tell where they were.

Main Kitchen Countertop – North

Back to Main Kitchen Countertops

August 8, 2010
The first countertop will go along the north wall of the kitchen, and it has a cutout in the middle for a cooktop. It’s an unusual shape so we made a template from strips of plywood glued together with hot-melt glue. After flipping the template upside-down (very important!), we used it to locate the walls of the mold. This is the biggest countertop we have made, and it will be over 8 feet long and will weigh about 250 pounds.

August 11, 2010
The cutout for the cooktop leaves only narrow strips of countertop in front and behind the opening. In order to remove it from the mold and polish it we’ll have to put it under some stress before the concrete is fully cured, and it would surely crack in these areas without some reinforcement. We cut lengths of 3/8″ rebar to fit along the front and back edges of the countertop, and tied them together with reinforcing mesh across the middle. This should provide enough strength to keep it from cracking, as long as we handle it gently and avoid twisting it as we remove it from the mold.

August 12, 2010
We mixed up enough confetti glass for the entire kitchen, so that all of the countertops will have a similar mix of colors. We then weighed out the same amount of confetti glass per square foot as we used in the test piece and spread it more-or-less evenly throughout the mold. It includes a variety of sizes from larger pieces all the way down to dust.

At last it was time to place the concrete. We used a bit more water in the mix this time so that it would flow more smoothly, and it should release trapped air bubbles more readily than the stiffer mix we used in the middle bath countertop.

There is no particular pattern in the arrangement of the confetti glass, but we tried to disturb it as little as possible while pouring.

Once it was poured, it was jiggled by hand to spread it out and to help embed the confetti glass on the bottom. This probably moved the confetti around a bit but it’s no big deal since we’re not trying to maintain any particular pattern.

To consolidate the concrete and release trapped air bubbles, Jay ran the concrete vibrator over the surface. The vibration momentarily makes the concrete very fluid and it seems to be boiling as air bubbles rise to the surface, and it also causes more of the glass to sink to the bottom of the mold where it will show on the top of the countertop.

This mix fills the mold about halfway, so that the rebar will end up just a little below the center when the countertop is flipped over.The rebar is placed on top of the first layer, and pressed lightly into the surface. It’s important to have everything ready and work quickly, so that the remaining mix won’t stiffen up before the chimney is filled.

Once the rebar was in place we attached the chimney and filled it. Because this will form an apron in front of the cooktop, we want it to show the same mix of confetti as the top surface. As Jay placed the concrete into the chimney, Liz sprinkled colored confetti glass along the front where it will show. Sorry, there’s no photo of that since we ran out of hands.

We mounded up the remaining concrete from the first batch along the front edge of the mold, where it will show. Again we sprinkled some confetti glass along this edge so it will blend in with the top. That completes the first layer of concrete.

The second layer of concrete uses the same mixture as the first layer, except that it uses all brown bottle glass that won’t show in the finished piece. We made a bit less in this batch since it doesn’t have as much volume to fill as the first batch.

Once the concrete was all placed, Jay used a board to screed it level.

The finished surface is fairly smooth, and we made sure that the mold was level in all areas and not bowed or twisted so that the countertop will be flat. There was just a little concrete left over, which we placed into the square mold sitting on top in the second photo below. We’ll use that as a stepping stone in the garden. Now we need to wait about 4 days so that the concrete will be strong enough to be taken out of the mold without cracking, but still soft enough to grind down to expose the glass.

August 16, 2010
We removed the sides of the mold and carefully flipped the countertop over onto foam strips, then peeled off the bottom of the mold to reveal the concrete. The results look very good with few bubbles, indicating that the increased water and vibration consolidated the concrete well. A few taps with a rubber mallet removed the cutout block in the center where the cooktop will go.

Our nephew Nash started polishing it with the 50-grit diamond disc, and slowly the colors were revealed.

The two photos below show the areas to the right and left of the cooktop. These are taken from the side that will go against the wall, so the front of the countertop is at the top of the photos.

Here are two more shots showing a close-up with a hand for scale, and an overall view. Although the surface has few bubbles, there are still some voids that must be filled so we’ll need to apply a slurry coat before polishing it any further.

August 25, 2010
After applying a slurry to fill in the voids and letting it cure for a few days, Nash polished it down again. We repeated this process several times in order to fill in all the little voids, because the slurry doesn’t always fill every void and each time it was polished a few new voids were uncovered.

September 3, 2010
Before polishing the top to the final finish, we flipped the countertop upside-down and smoothed out the rough areas where it will sit on the base cabinets.Then Nash polished the top all the way up to the to 1500 grit diamond wheel.

Once the top was super-smooth, Liz applied the sealer. It was a windy day and afterward, we discovered that the sealer had dried so fast that it left very visible streaks on the surface. So we had to scrub off the top layer of sealer and scrape it with razor blades to get down to the smooth surface again. This still left plenty of sealer below the surface, which is where it is needed. The sealer doesn’t make the countertop look shiny; it just makes it relatively impervious to liquids.

September 8, 2010
At last we wheeled the countertop into the main kitchen. Nash applied a coat of countertop wax and buffed it to a nice shine.

This countertop weighs about 250 pounds so installing it had to be done carefully to avoid injuring the people or the countertop. Nash and Jay stood it up on edge and then lifted it from the rolling work table onto the base cabinets.

From there it was relatively simple to tilt it down and slide it into place.

We hadn’t actually tried putting the cooktop into the opening in the countertop until now, but fortunately it fit perfectly and it looks great. This completes the first of five countertop segments in the main kitchen.

Main Kitchen Countertops

The main kitchen has five countertop segments in an octagonal arrangement. The computer-generated rendering below shows the general idea, although a few details have changed since we originally designed it. The north side of the kitchen is on the right in this image.

July 31, 2010
We decided to make the main kitchen countertops using a mix of glass colors we call “confetti”. It includes most of the colors of glass that we have collected and crushed, including some unusual bits from antique depression glass and some red glassware. We don’t have large quantities of these colors so we can’t mix them throughout the countertop; instead we’ll place the confetti into the mold before pouring the concrete over it. The concrete mix is 65% clear glass and 35% green glass (mostly from wine bottles), so overall it has more green than other colors and that should coordinate with the green floor. The photos below show a test piece that we made using this mix. We liked the result, except that the red glass was a bit too busy so we reduced the quantity of red in the final mixture. We find that when it comes to red and cobalt blue, a little goes a long way.

Follow the links below to see the fabrication of the five individual countertop segments:

North August 8, 2010 – The longest countertop, with a cooktop cutout in the middle.
West August 26, 2010 – The diagonal section between the sink and refrigerator.
Southwest August 18, 2010 – An interesting hexagonal shape with the main sink cutout and a large apron in front.
South August 26, 2010 – The simplest and smallest section, between the sink and the sitting counter.
Sitting Counter September 15, 2010 – A large peninsula set at table height, with its own sink.

October 2, 2010
It took a lot of work, but at last all the countertop segments are finished and installed in the kitchen.

Main Kitchen Cabinets

July 28, 2010
Today Dan finished installing the cabinets for the main kitchen. The doors and drawers are still under construction but all of the cabinet boxes are done. We set the main sink in place temporarily, in order to arrange the plumbing below while it’s easy to access. The dishwasher will go in the empty space on the left, and the stainless steel sink sitting on the floor will be set into the sitting counter at that location. The sitting counter will be a peninsular countertop set at table height (30″ high) so that it’s a comfortable place to work while seated. The second photo shows the north wall with the wall oven on the right, and the cook top will go in the counter to the left of the oven.

It was a bit of a challenge to connect the range hood vent because the round duct is not centered on the hood as it emerges from the ceiling. This was not exactly an accident because we planned out the desired duct location carefully, but a roof truss ended up right in the way so we had to shift the duct over a few inches to go around the truss. Dan made an offset adapter out of sheet metal, to connect the range hood to the off-center round duct, and he sealed all the joints with duct mastic to prevent air leakage. The duct will be concealed with a wooden cover so it won’t show.

East Bath Countertop

July 18, 2010
We cast the countertop for the third and final bathroom in basically the same way as the middle bath countertop. The photos below show the countertop in its mold, and you can see that the exposed surface (which will be the bottom) is pretty rough. For some reason it was hard to smooth out the surface and we ended up with a lot of glass chips exposed. This should not hurt anything but we’ll have to grind this surface down a bit so that it sits solidly on the base cabinets. As with the middle bath, we used clear and colored glass for the first layer (which will be the top) and then we used all brown glass for the second layer that won’t show. The first layer ended up a bit stiff, with less water than the previous time, so we expect to have some some bubbles that will need filling. It wasn’t as stiff as when we poured the cottage bath countertop though, so hopefully it won’t be too bad.

July 22, 2010
After letting it cure for 4 days, we removed the sides of the mold. In the second photo below you can see that theĀ  front apron has some voids from bubbles in the concrete, more so that the last countertop when we used more water in the mix. Overall it doesn’t look too bad though.

We stood it up on its side and placed foam strips to support it, then lowered it onto the foam. The bottom (now the top) of the mold came off pretty easily, revealing the countertop surface. There are some voids from bubbles in the concrete but they’re not too bad.

These photos show how it looks before and after the first polishing with the 50-grit diamond wheel. It took about 3 hours to polish it down to this level, and it probably would have gone faster if we hadn’t waited 4 days to polish it because the concrete is already fairly hard.

Here are some closer views showing the top and front. If you look closely you can see some voids that will need filling, especially along the upper-left of the front apron.

For this countertop we used mostly clear glass, plus mixed shades of green from wine bottles, light green jadite, white, canning jar blue, and a little bit of cobalt blue. One little piece of red glass snuck in somehow, which makes an interesting little detail to the left of the sink cutout.

July 23, 2010
After polishing the whole countertop with the 50-grit diamond disc, there were quite a few voids in the surface from bubbles in the concrete. We covered the whole surface with a slurry made from Portland cement and sand plus water reducing additives, essentially the same mixture as was used to cast the countertop but without any glass and with an acrylic additive to help it bond to the surface. This will fill in most of the voids, and we’ll need to polish it down and then fill any remaining voids with a thin slurry before the final polishing.

July 28, 2010
Polishing down the first slurry coat left a pretty good surface with all of the larger voids filled. The slurry blends in quite well so you can’t see where the voids were unless you know where to look. In the second photo below you can see an interesting pattern from a piece of ribbed jadeite, where the ribs have been polished down somewhat and the slurry fills in between.

There are still some irregularities in the surface as you can see in the first photo below, so we applied a smooth slurry to fill them in.

August 14, 2010
After Jay finished polishing the countertop, Liz applied the sealer. The photos below show it still wet, and it won’t be quite as glossy once it dries. After it’s thoroughly dry we’ll apply a coat of wax and then it’s ready to install.

August 16, 2010
Our nephew Nash applied a thin coat of concrete countertop wax and then buffed it to a nice glossy shine.

After it was waxed, we moved it into the east bath and set it on the base cabinets, after running a bead of silicone caulk along the left and right edges of each cabinet. The caulk will adhere the countertop to the cabinets but it can be removed if it ever becomes necessary.

Here are some closer views of the left side and the apron in front of the sink.

These close-ups show the texture of the glass in the finished countertop. The toothy white shape on the right looks like it came from an old white glass canning jar lid that had serrations around the top. Overall we’re happy with the way it turned out.

Middle Bath Countertop

Includes affiliate links that help offset our expenses at no cost to you. Affiliate programs and affiliations include Amazon Associates and the eBay Partner Network.

June 18, 2010
Withour supply of recycled glass running low, we paid a visit to the nice folks at Schmohz Brewery who were kind enough to donate five barrels of beer bottles that customers had returned for deposit. Michigan has a mandatory 10-cent deposit on beer bottles and because Schmohz is a micro-brewery, it’s not economical for them to clean and reuse the returned bottles so they normally send them to a waste facility. From there they may get recycled but are usually just placed in a landfill because the price of scrap glass cullet is very low these days.  Pat and Liz set about washing them up and removing the labels, a big job! Then we ran them through the glass crusher.

June 26, 2010
With the success of our first countertop, we moved on to the one for the middle bath. This countertop is a little bigger and otherwise very similar to the first one, but we decided to use a different technique. We mixed the concrete in two batches, with the first batch containing roughly 65% clear glass, 30% green glass (mostly from wine bottles), and 5% brown glass. This layer will become the visible surface and it should be mostly white/clear, with a fair amount of mixed shades of green and just a bit of brown and amber sprinkled through. The second layer, which won’t be visible, will be all brown glass since we have so much of it now.

With less concrete per load, it was easier to mix up compared to the first countertop when we did it all in one batch.

After it was mixed, Jay spread the first layer in the mold to fill it about halfway up. We mixed this batch a bit more runny than last time, in hopes that it would leave fewer air bubbles on the bottom (which will become the top).

We also tried a new technique with the concrete vibrator, with a wooden block attached to let us get down into the concrete better. It seemed to work pretty well and released a lot of air.

This time we decided to put steel reinforcing mesh into the countertop, to strengthen it. The first countertop worked okay without it but this is a little extra insurance against cracking. We placed it on top of the first layer of concrete, and then attached the “chimney” that will form the dropped apron in front of the sink. The chimney is filled with the same concrete mix as the first layer. We also mounded this mixture against the front of the mold so the second layer won’t show.

Once the mesh was in place, we mixed the second batch of concrete containing all brown glass. After it was placed over the reinforcing mesh, Jay screeded it off to make a level surface. Once it was all in place, we covered the mold with plastic to keep it from drying out too rapidly. It will need to cure for about 4 days before we can take it out of the mold.

June 30, 2010
We removed the countertop from the mold after curing it for 4 days. The top surface looked very good, with almost no voids. This is a big improvement over our first countertop, and we attribute it to having a wetter mix plus more vibration to release trapped air, and to mixing all of the colored glass into the first concrete pour rather than placing the colored glass directly into the mold before pouring.

The apron in front of the sink was not so pretty, with quite a few voids that need to be filled. In the second photo below you can see that the top (first) layer is quite solid, but the material that was placed in the chimney afterward did not consolidate well. The mixture was getting stiff by the time we placed it, and it was hard to vibrate the chimney section to release trapped air.

We ground off the surface with the 50-grit wheel to expose the glass and the colors look very good. Once we had ground it down to expose the glass all over, we filled the surface with a slurry of Portland cement and sand over the entire countertop, to fill in the large voids in front and also to fill small voids from bubbles on the top.

July 6, 2010
After the first coat of sand slurry was well cured, it was time to polish it down again. Our nephew Josh did the polishing with the 50-grit diamond wheel, and the result looks really good with just some minor voids still to be filled. We’re really pleased with how the colors turned out.

July 7, 2010
After polishing the surface with the 100-grit diamond wheel, we applied a slurry of just Portland cement with no sand this time. This filled in all the small voids in the surface. Now we’ll cover it in plastic to keep it from drying out too fast, and let it cure for several days so it’s hard enough for the final polishing.

July 11, 2010
Jay polished down the last slurry coat, and then continued to polish using successively finer diamond discs up to 800 grit. It took about 5 hours of polishing, most of which was grinding down the slurry coat with the 100-grit disc. This photo shows the countertop all polished, just wet with water and not sealed yet.

Here’s a close-up of the surface, where you can see the “teeth” from around the bottom of a brown beer bottle. The second photo shows a closer view near the sink cut-out. The sunburst pattern in the clear piece near the middle of the photo is on the bottom of the glass; the top is polished smooth so you can see through to the bottom. This was from the bottom of some jar or drinking glass and it came out of the crusher this way. We glued this piece of glass into the mold so it would stay put while we poured the concrete over it.

July 11, 2010
Liz sealed the countertop using Cheng concrete countertop sealer. It’s a water-based acrylic sealer and the first coat starts out at half strength, cut 50% with water. The concentration is gradually increased over several minutes until it’s being applied full strength. After half an hour a second, full-strength coat is applied. Then it has to dry overnight before waxing with concrete countertop wax.

July 14, 2010
Today we finally installed the countertop into the middle bath. It was a bit of a challenge to muscle it into place since it weighs about 200 pounds, but we managed with only a few paint scrapes on the wall. Fortunately it is the right size! As we did with the first countertop, we ran a thick bead of silicone caulk around the top edges of the cabinets before setting the countertop into place so that it will be supported all around.