Includes affiliate links that help offset our expenses at no cost to you.
May 17, 2010
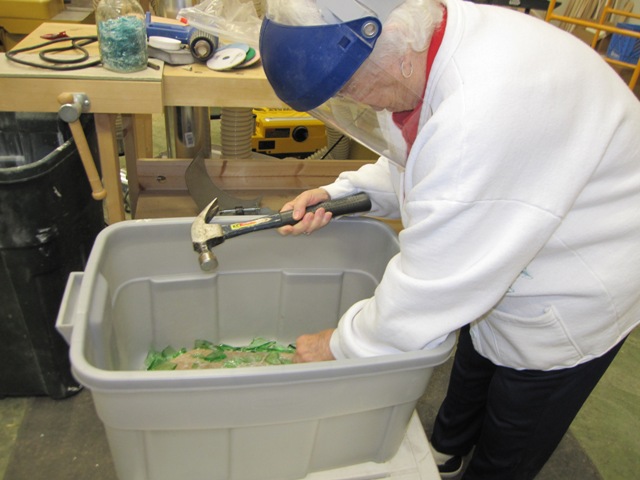
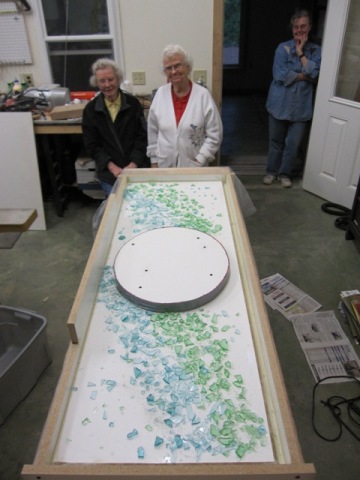
After doing three test pieces we decided we were ready to try making an actual countertop. Jay’s mom Pat crushed up some pale green glass to add to the blue canning jar that Peggy had crushed a few days ago. Jay made the mold from melamine, with an oval block in the center for the sink cut-out. We spread the blue and green glass into the mold in wide diagonal bands.
May 20, 2010
After the glass was placed in the mold, Jay added a “chimney” that will form a dropped apron in front of the sink (keep in mind that it’s upside-down at this point). We wheeled it out onto the lanai for the pouring operation.

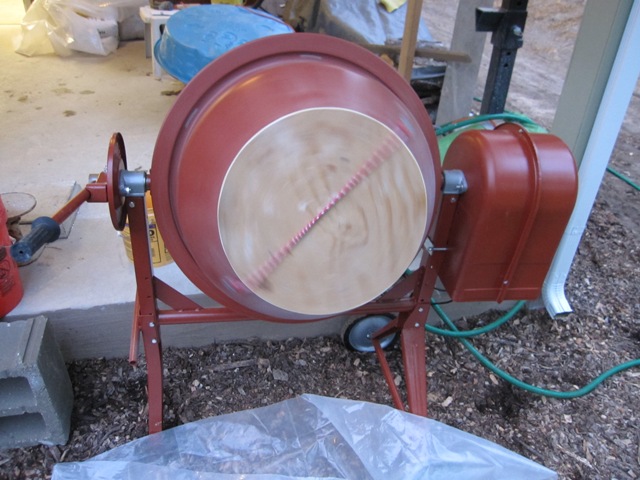
The countertop takes a little over a cubic foot of concrete, which is hard to mix in a small cement mixer like this without some of it spilling out the front. So Jay added a plywood cover that lets us mix a little more concrete, and also keeps in the dust while mixing the dry ingredients. After weighing out the sand, glass, Portland cement and additives, we mixed it all together without water for about 5 minutes.
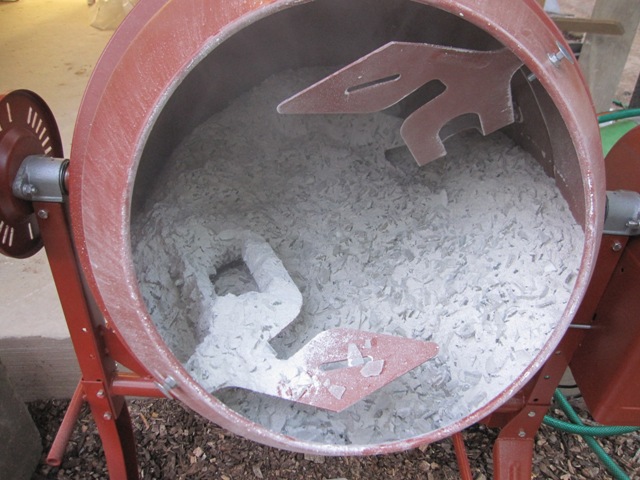
Here’s a close-up of the dry mixed material. You can see some of the polypropylene fibers sticking out from the mixer blade. We’re not using steel rebar in this countertop so the fibers help strengthen the concrete. Individually each one isn’t very strong but with about 6 million individual fibers in a countertop this size the concrete becomes much less likely to crack. The glass chips should also make it stronger than concrete made with gravel, because the chips will overlap to form a layered structure.

We added the prescribed amount of water and mixed for about 5 minutes, and did a slump test. It’s too stiff to work so we added a bit of water and mixed some more. The second slump test looked about right so Jay scooped the concrete out into a 5-gallon pail.

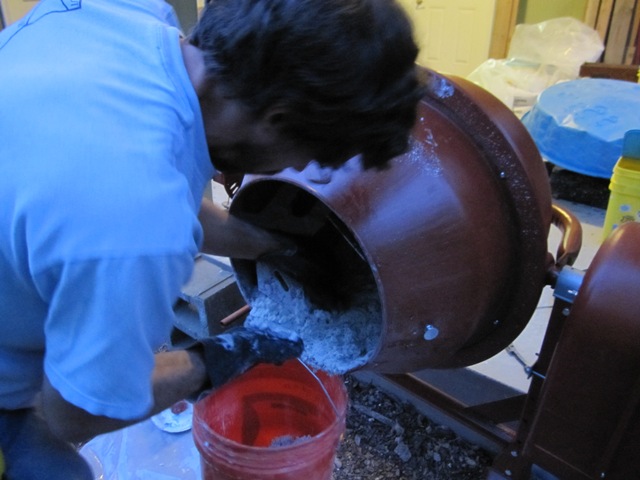
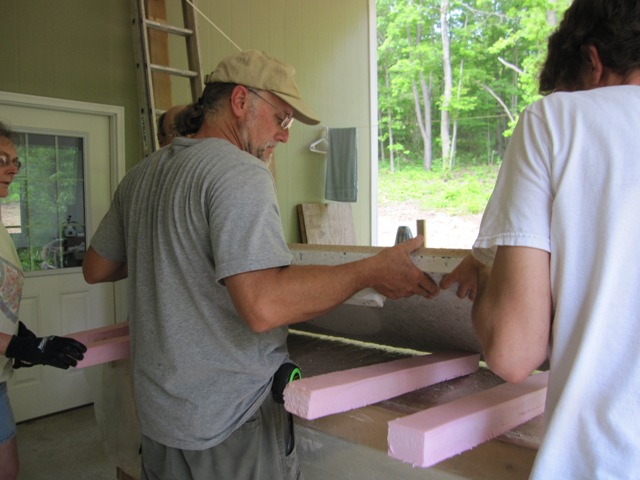
While spreading the concrete we tried to disturb the colored glass as little as possible. The mix was already getting stiff so there was no problem filling the chimney and having it stay put. The hard part was working fast enough to get it all placed before it set up. As we added concrete to the chimney Liz placed some colored glass in it so there should be some color showing on the apron in front of the sink.


The photo below shows Jay using the concrete vibrator, which is designed to consolidate concrete and vibrates a lot more than the simpler methods we used in our initial tests. This releases trapped air and makes it flow a bit even though the concrete is quite stiff at this point. We vibrated it for several minutes, working the vibrator over the entire surface.
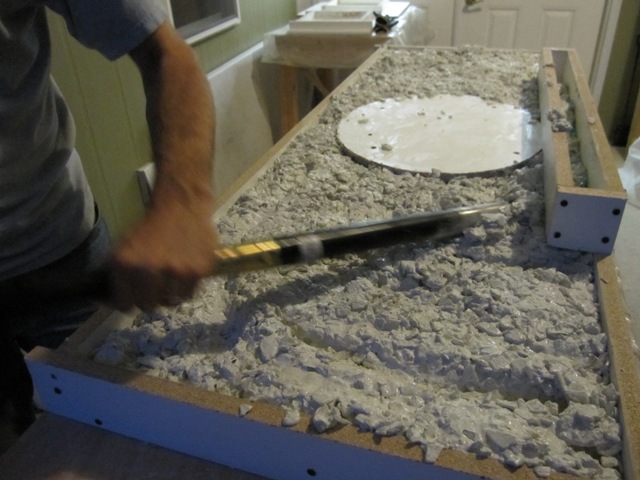

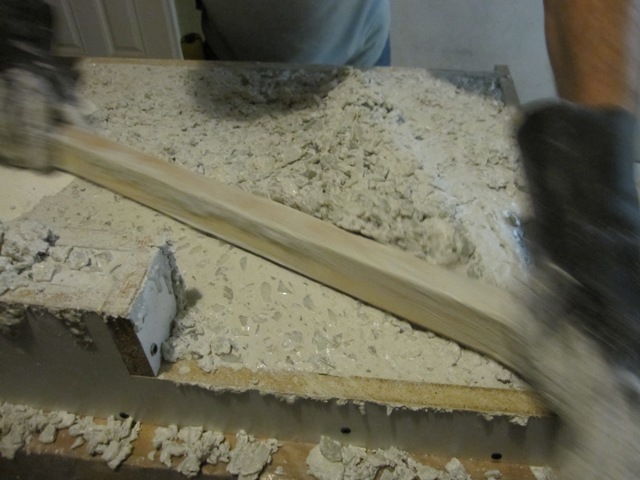
After placing more concrete in the mold we screeded off the top with a board to level it. Fortunately this will be the underside and it won’t show, because it was hard to get it smooth with all the glass in it. The main thing is to get it flat enough to sit solidly on the base cabinets.

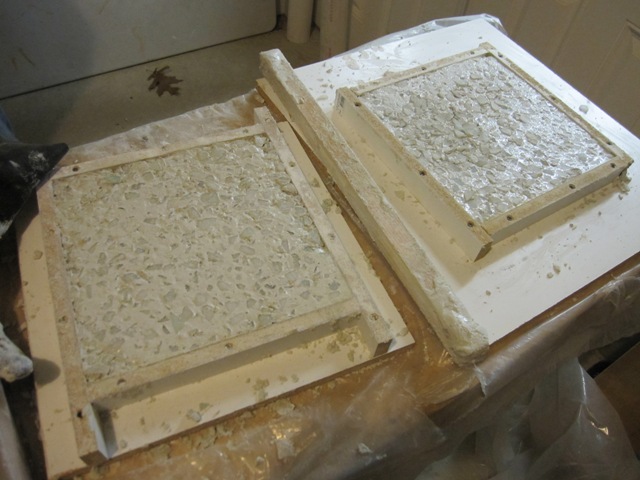
Here’s the countertop in the mold, and it seems not too bad for a first try. We had enough extra to fill the two 12-inch test molds, so we’ll have two test tiles to practice diamond-polishing before we polish the actual countertop. Now we need to let it cure undisturbed for 4 days before we can remove it from the mold and start to polish it.

May 24, 2010
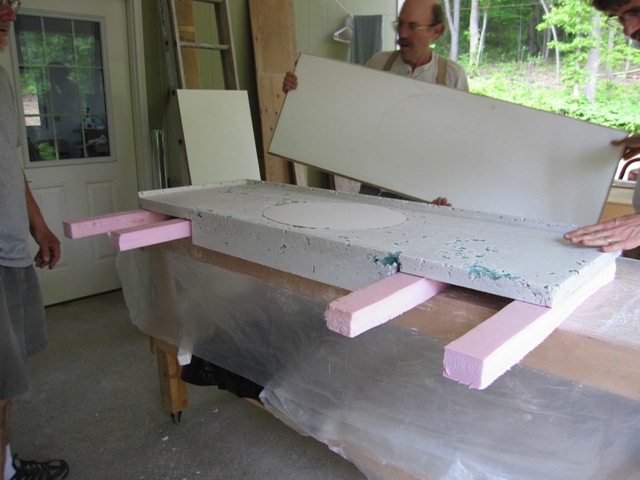
The countertop has cured for 4 days so today we removed it from the mold. It weighs about 200 pounds, which is not too difficult to handle, but the main danger is twisting or dropping it and possibly causing a crack since the cement is not fully cured yet. So we enlisted the help of Jack and Dan to turn it over gently, while Liz positioned foam strips to support it. We could have managed okay with two people but this was good practice for the larger countertops to come.


With the foam strips in place, we carefully flipped it over so that the apron in front of the sink hung over the edge of the workbench.

And finally we removed the bottom of the mold from the top of the counter. It didn’t stick much, so it took only a moderate pull at one corner to get it loose. And with that we revealed the top surface – and a few surprises.
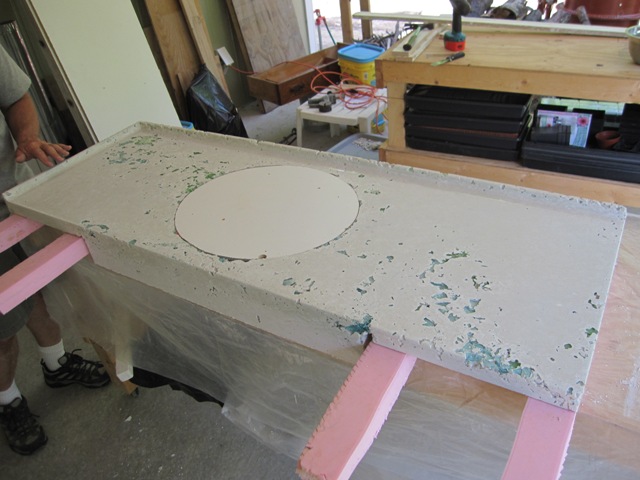
The sink knock-out came out easily, since we had wrapped the edge in 1/8″ foam and duct tape, so a few gentle taps with the rubber mallet eased it out of the hole.
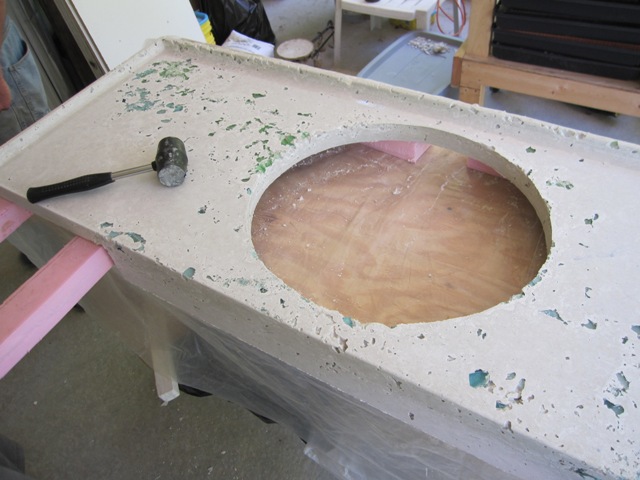
In the photos below you can see the large voids around the areas where we placed the colored glass. Apparently we got the mixture too stiff, and/or we didn’t vibrate it enough to release the trapped air around the colored glass that we placed in the mold. We were hoping to see a solid white surface with glass just below, ready to polish, but this is going to take some fixing!


In order to patch the voids, we mixed up a paste of Portland cement and sand, and spackled it into the holes. Once it has hardened we’ll grind it down with the diamond polisher, and then fill any remaining (hopefully small) voids with a slurry of Portland cement and water. It should look reasonably good when we’re done, but it would have been much less work if we could have gotten all the air bubbles out when it was cast.
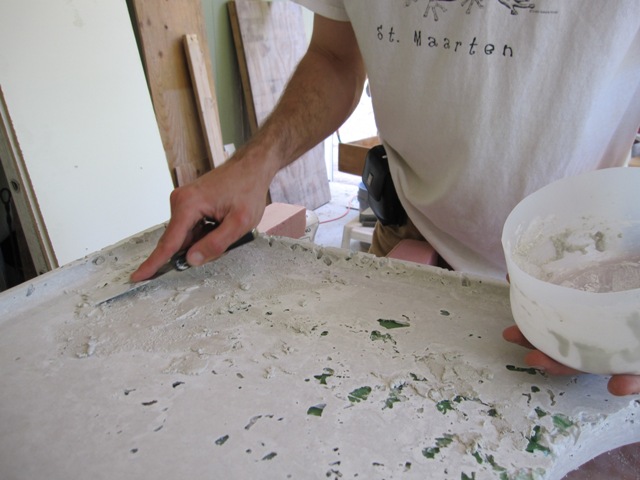

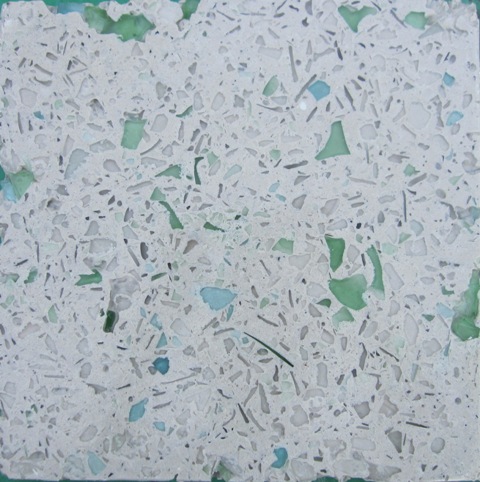
We also removed the test pieces from their molds, and one of them had voids similar to the countertop so we filled them in the same way. That way we can try polishing it in a couple of days, before polishing the real counter top. The other test piece was better, with relatively few voids, so we polished it a bit to see how the glass will look. The colors are nice, and just about what we wanted for this bathroom, so we’re optimistic that the real countertop will turn out good once the voids are filled.
May 26, 2010
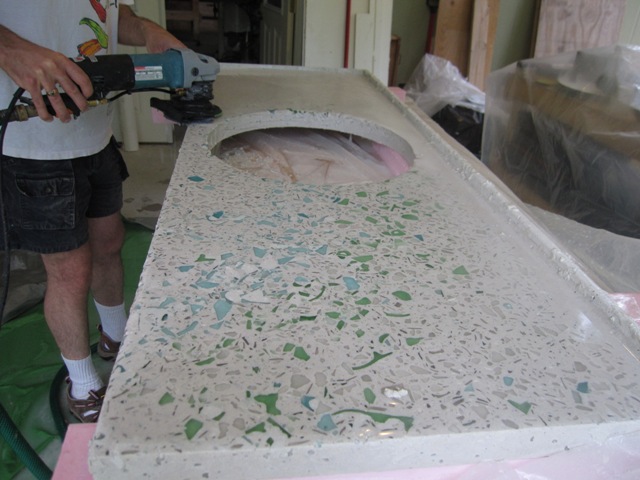
After the voids were patched and the patching material had hardened for two days, it was time to polish it. Jay started out with the 50-grit diamond disc, grinding away the paste on the top surface to expose the glass and rounding over the edges.


It quickly became apparent that polishing the upturned edge at the back was going to be difficult because the diamond pad is not flexible enough to polish the concave curve. For the time being we just left that area unpolished.
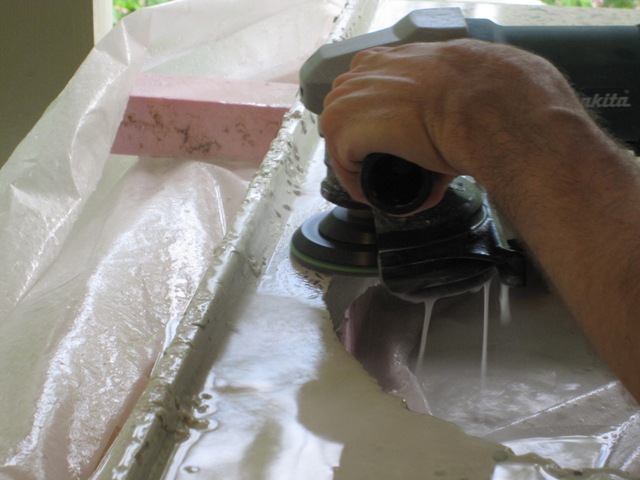
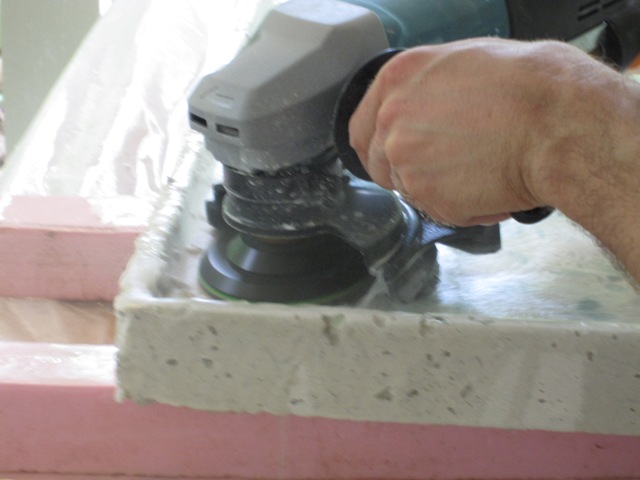
Polishing the sides was not difficult, just a bit messy as the polisher throws a lot of water spray in this orientation.
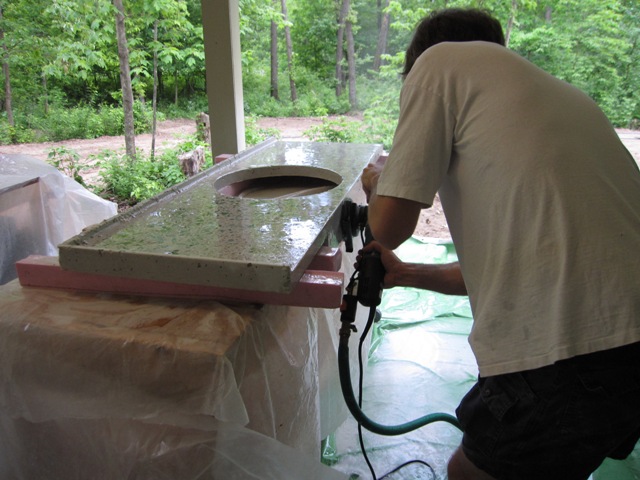
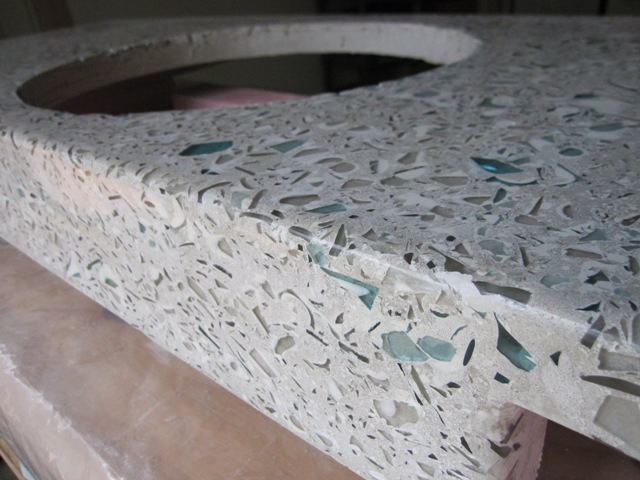
Here are photos of the countertop after the initial polishing was done. This is only with the 50-grit wheel so the surface is not very smooth yet. We like the colors though, just about what we expected.


Here’s a close-up of the top surface, showing the many small pits caused by bubbles in the concrete. It’s going to take some work to fill all of these.

May 31, 2010
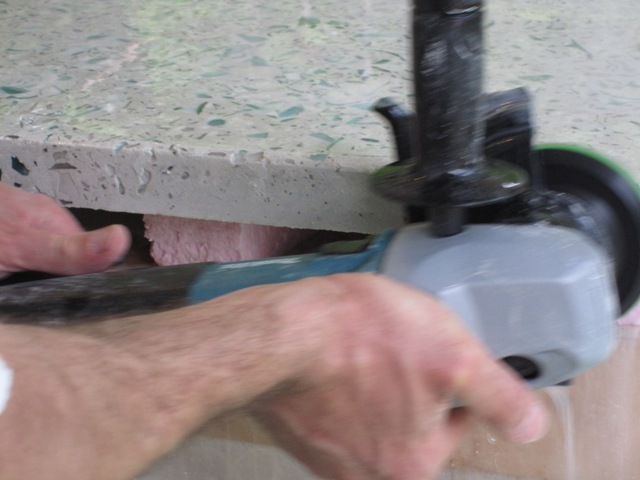
The drip edge on the back of the countertop seemed like a good idea, but it’s just too difficult to polish it with the electric polisher so off it comes! Jay made a plywood spacer a little taller than the height of the countertop on the table, and used it to guide a diamond cut-off wheel to cut off the drip edge. Fortunately it was a breezy day because this dust is very nasty.


After the edge was cut off, Jay went back and ground it flat with the 50-grit diamond wheel. The photos below show the result. You can see that the glass along the edges was oriented more vertically than on the top surface, which creates an interesting effect. Most of this won’t show however, because we’ll add a tile backsplash along the wall after the countertop is installed.


June 6, 2010
Jay polished the surface using increasingly finer diamond discs up to 800 grit. In order to fill the remaining voids in the surface, he applied a slurry made from just Portland cement and water.

June 8, 2010
After letting the slurry cure for two days, it was polished again with the 800 grit diamond disc. The result looks pretty good, but there are still some small voids in the surface so it will need another coat of slurry and more polishing.

June 16, 2010
It took another coat of slurry and a lot of polishing, but it’s finally done! These photos show the final result, after applying a coat of sealer and wax.

Here’s how it looks overall, and after installation:

