Author: Jay
January
March
February
November
Portable Wood Fired Pizza Oven
Includes affiliate links that help offset our expenses at no cost to you. Affiliate programs and affiliations include Amazon Associates and the eBay Partner Network.
This video shows how I built a portable wood-fired pizza oven that’s inexpensive, easy to build, weighs only 7.5 pounds, and can be carried easily in a backpack. And it makes fantastic pizza too!
Also see our Cooking with Fire event where we used this oven along with some other great fire cooking techniques.
Materials List
Here are the materials I used to build this oven. I recommend getting these materials locally but in case you can’t, I’ve included links to amazon.com.
- (2) Full-size stainless steel warming pans, 2.5 inches deep
- (4) Threaded rods 5/16″ diameter, 12″long
- (8) Wing nuts, 5/16″
- (8) Hex nuts, 5/16″
- (4) Fender washers, 5/16″
- (1) Roll of stainless steel safety wire
- (1) Pizza stone, 10″ diameter
Tools
These are the tools I used for this project, again with links in case you have trouble finding any of these items:
How to Use a CNC Router for Shell Inlay
Here’s how I designed a shell inlay for a guitar headstock using Fusion 360, and cut the inlay using my CNC router.
Part 1 – Design in Fusion 360
Part 2 – Cutting Shell Material
Resources
Here are links to some of the tools, materials and software that I’m using in this project:
AutoDesk Fusion 360 for personal use
Next Wave CNC Shark Router
Carbide 2-flute Down-cut end-mills
1/32″ Carbide shell cutter
Phenolic backer board
CNC Feeds & Speeds
| Usage | Bit | RPM | Depth of cut | Plunge mm/min | Cut mm/min | Comments |
|---|---|---|---|---|---|---|
| Wood pocket | 0.0313″ (0.80mm) 2-flute downcut | 25000 | 0.5mm roughing 0.2mm finish | 200 | 250 | |
| Shell | 0.0313″ (0.80mm) shell cutter | 25000 | 0.3mm | 125 | 250 |
Fusion 360 Project File
Here is the Fusion 360 project file that I used for this design. It is set up specifically for my machine and cutting tools so I make no guarantees that it will work for you, but you are welcome to use it at your own risk.
Woodworking
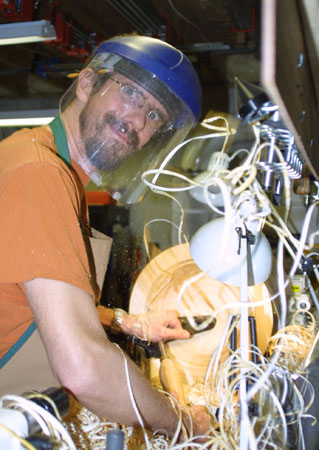
Far and away the main thing that comes out of my workshop is shavings and sawdust, although my portable lathe lets me do most of my rough turning outside now so I don’t spray shavings around the shop quite so much. Here are a couple of shots Liz took of me making a 14″ black willow bowl on the lathe:

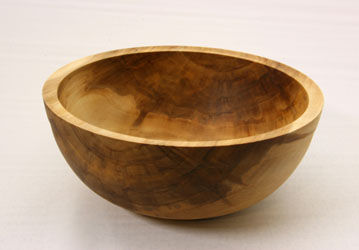
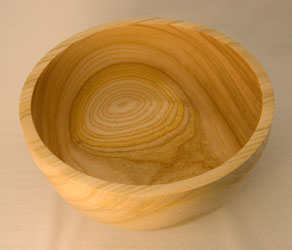
Here are some bowls I’ve made from catalpa, spalted beech, and spalted paper birch:


And these are black willow, ailanthus (tree of heaven), and silver maple:

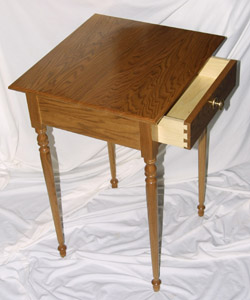
Here’s my first “real” woodworking project, a Sheraton table in butternut that I made for Liz; and a couple shots of the cherry sewing cabinet we made for my Mom:


I’ve made about 20 Native American flutes but I haven’t figured out how to photograph them well. They’re just too long and skinny to make a “normal” shaped picture. But here’s one of my earliest and still one of the most dramatic-looking, made from a piece of spalted apple wood:

Welding Cart
Includes affiliate links that help offset our expenses at no cost to you. Affiliate programs and affiliations include Amazon Associates and the eBay Partner Network.
I built this welding cart to hold my new Everlast PowerPro 205S TIG Welder and Plasma Cutter as well as my Lincoln MIG Welder. The cart features a large work surface and five hitch-style attachment points for mounting accessories such as a bench vise and camera supports.
Resources
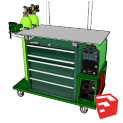
I used SketchUp software (now available as a free online app) to design the cart, and here is the model file: WeldingCart.skp. You are welcome to download this model and customize it any way you like.
Here’s a link to the Menard’s Masterforce 30-inch Five-Drawer Mobile Tool Cabinet around which this cart is built.
I used a 4 in. Swivel Vise with Anvil from Harbor Freight. It’s an inexpensive vise but the quality is good enough for my purposes.
Also from Harbor Freight I bought the 8 in. Deep Throat U-Clamp and 12 in. Deep Throat U-Clamp for under $10 each. The 12-inch clamp is deep enough to reach almost anywhere on the 25-inch wide work surface of my cart. Their quality seems pretty good for the price.
Powder Coating
Includes affiliate links that help offset our expenses at no cost to you. Affiliate programs and affiliations include Amazon Associates and the eBay Partner Network.
This video shows how I powder-coated the steel housing of the 4th Axis that I made.
Links
I used my Eastwood Dual Voltage Powder Gun to apply the powder coating, andthe color is Ford Dark Blue.
My air supply is filtered with this Coalescing Filter and desiccant dryer combo, which supports the high airflow that I need for plasma cutting but it’s larger than would be needed for just doing powder coating. I added a small pressure regulator and replaced its gauge with a low-pressure 0-15 PSI gauge so I can accurately adjust the pressure to about 8 PSI / 55 kPa.
For masking the areas that I didn’t want to powder coat, I used Polyester Hi-Temp Masking Tape.
The video shows the Temperature Controller that I used along with a Solid State Relay to control my kiln. These are widely available and most any of them would work for an application like this, provided that you get a relay able to handle the maximum current of the oven.
