Potting Bench


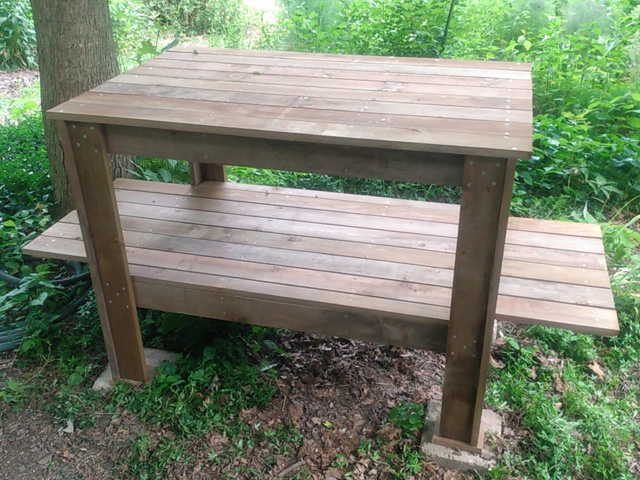
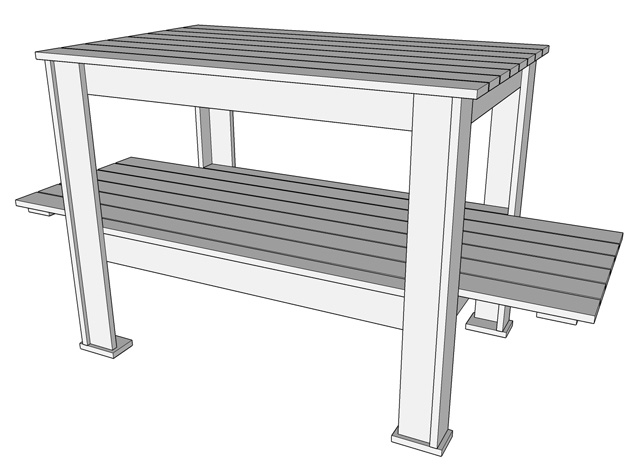
I designed this bench to be used for potting plants and general outdoor use. The top is 48″ x 30″, and the lower shelf is 70″ wide.

Materials

I used preservative-treated wood for mine, and a rot-resistant species like cedar or cypress would also work well. The table is made entirely from 1″x4″ (nominal size) boards andyou can substitue lumber of another size such as 1″x6″ without changing the cut list, except that you would need fewer boards for the top and shelf. The following pieces are needed, with all measurements in inches:

Quantity Length Description
4 44 Frame long
8 27.75 Frame short
8 34.5 Leg*
4 5.25 Foot
8 70 Shelf long
2 44 Shelf short (rip to 2.25″ wide)**
2 21 Shelf cleat
8 48 Top

*The specified leg length gives a 36″ high table when using 3/4″ thick boards for the feet and top (adjust if desired).
**Don’t be tempted to leave the short shelf pieces full-width and notch them so they extend beyond the front of the frame, or your shins will be sorry. Guess how I know that…

You can cut all the pieces from 17 boards 8′ long with minimal waste as follows:

Boards Cut 1 Cut 2 Cut 3 Cut 4
4 48 – top* 48 – top*
2 34.5 – leg 34.5 – leg 25.25 – frame short
2 34.5 – leg 34.5 – leg 21.25 – shelf cleat 5.25 – foot**
2 44 – frame long 44 – frame long 5.25 – foot**
1 44 – shelf short 44 – shelf short 5.25 – foot**
6 70 – Shelf long 25.75 – frame short

*It’s okay if the top pieces are slightly under 48″
**This cut list yields one extra foot piece – this lets you discard one in order to cut around bad knots etc.

Assembly

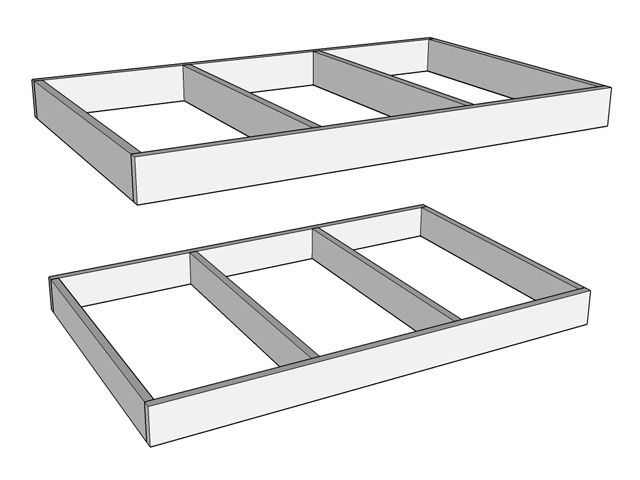
Start by making two frames as shown from the 44″ long pieces and 27.75″ short pieces. I used 2 deck screws at each joint. The inner short pieces are 14″ on center from the outer pieces.
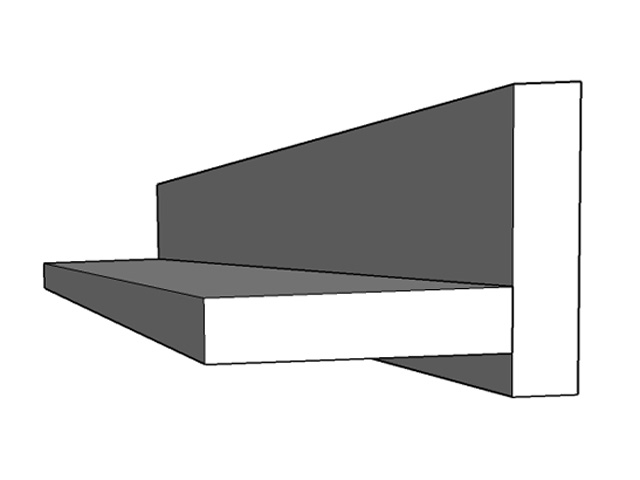
Assemble four legs, offsetting the front boards 1/2″ in from the edge of the side boards. An easy way to do this is to lay a scrap of 1/2″ plywood on a work surface to support the front board, then stand the side board on edge and screw together. I used 5 screws for each leg.
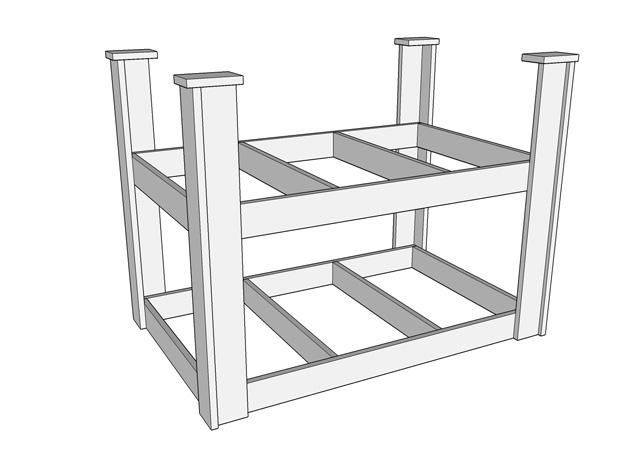
Place the top frame upside-down on the floor and attach 4 legs, with just one screw per leg joint at this point. Then support the shelf frame at the desired height, which can be adjusted as you wish.I spaced them 16″ apart to give 15.25″ clearance after the shelf boards are attached, which is enough to fit a 5-gallon bucket with a lid on the shelf. Attach the shelf frame with just one screw per leg, and then square everything up as well as possible before fastening with more screws. Use plenty of screws for each of these joints to make the table rigid. I used 1-3/8″ deck screws here so the sharp ends don’t protrude through the other side. Attach the feet to the legs (these help prevent the table from sinking into soft ground).
Flip the table over and attach the shelf boards as shown. I used two screws at every joint, to help keep everything flat. Attach a cleat under each end of the shelf to hold the ends even:
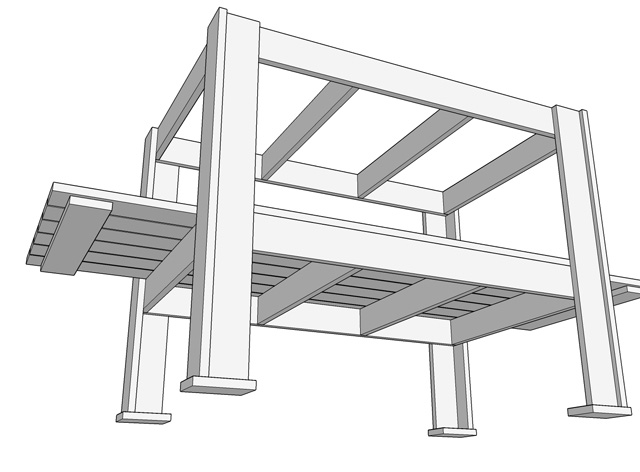
Finally attach the top boards, spacing them evenly across the top:
Custom Circuit Board Graphics

This video shows the process of turning graphics, starting with a design as a Scalable Vector Graphics file, into a custom-made circuit board. As an example I show a circuit board badge that I made for the members of my local ham radio club, the Riverside Radio Amateurs.

Links

I used Inkscape to covert the original SVG file into separate image files for the circuit board layers.

To prepare the circuit board design I used Eagle, which Autodesk licenses free for non-commercial use with boards up to 100mm x 80mm.

My PC boards were made by Elecrow, and I have been satisfied with their prices and quality. Before settling on Elecrow, I used PCBShopper to compare prices and reviews of many different PC board manufacturing services.

Also see Building with Surface Mount Devices for more info about building custom circuit boards using surface mount devies.

Guitars #3 & #3

Includes affiliate links that help offset our expenses at no cost to you. Affiliate programs and affiliations include Amazon Associates and the eBay Partner Network.

December 25, 2014

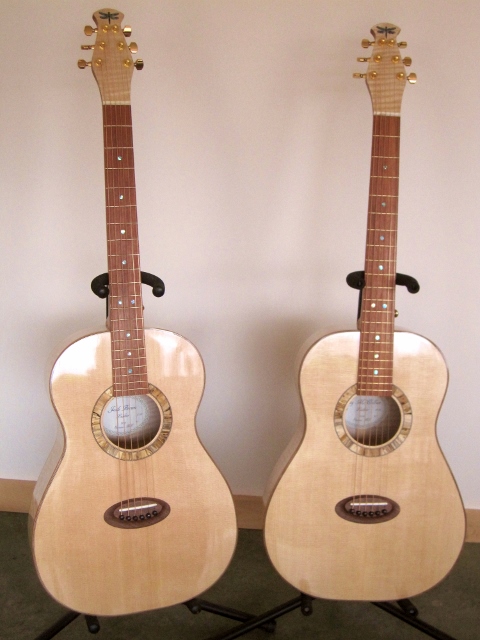
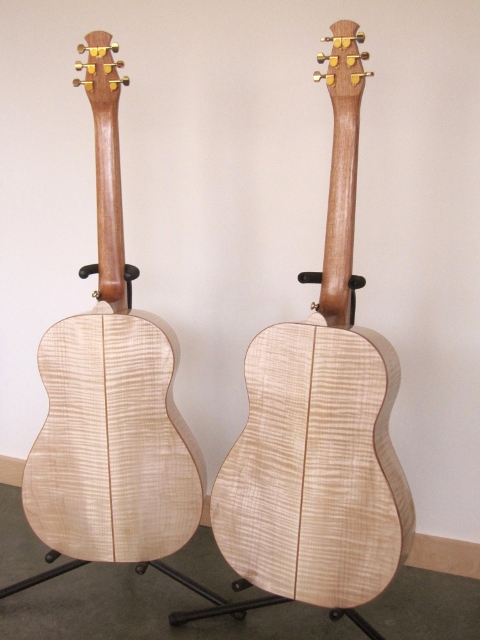
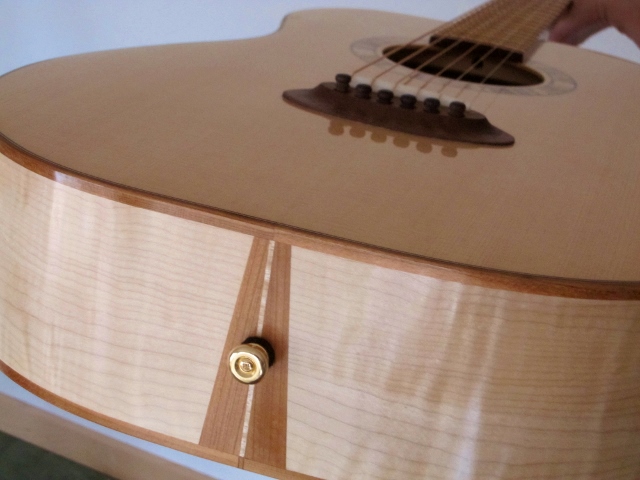
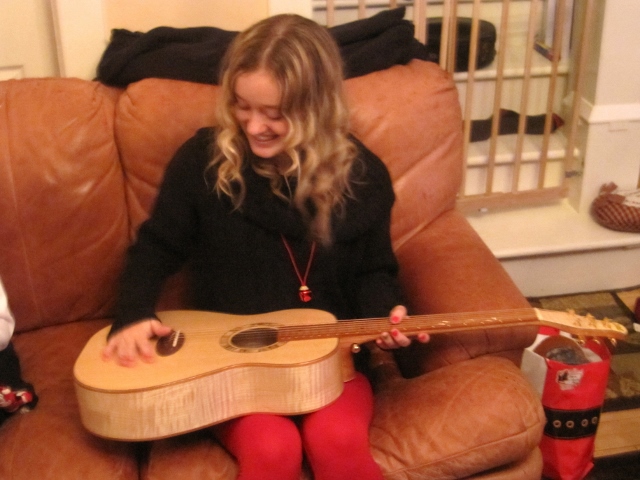
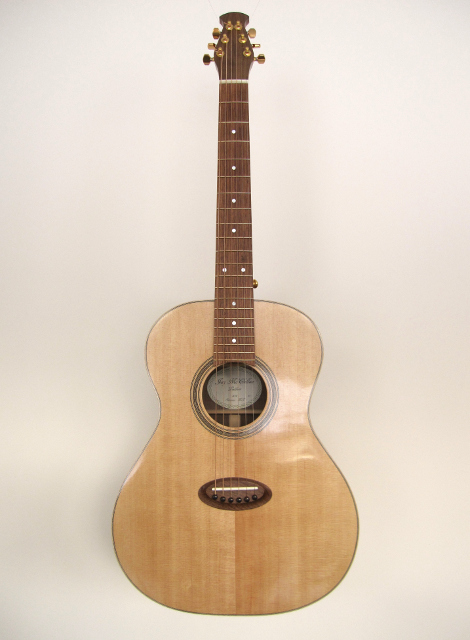
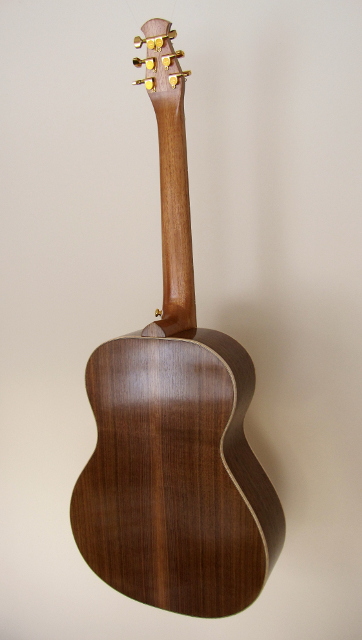
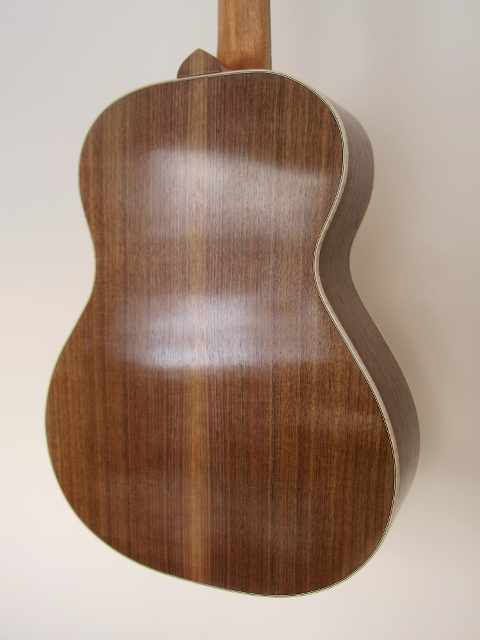
These are the second and third guitars to come out of my shop, a matched pair. I built one for our 13-year-old grand-niece Emily while working with our nephew Josh and teaching him to build one for his wife, and we finished them just in time for Christmas (I took these photos on Christmas morning just before packing them up for delivery). They are medium-small gutars (known as 00-size) and made to the same specs although of course they’re not quite identical. The tops are Sitka spruce and I cut the backs and sides from the same curly maple board, so I call them “sister guitars”. The necks are Spanish cedar and the fingerboards are Granadillo, which I chose for its reddish color to coordinate with the cherry bindings.

Because of the timing, wanting to apply several coats of finish per day at intervals and trying to get them done in time for Christmas, it wasn’t practical for my nephew to come over and do the finishing on his so I did the finish on both of them together. I did the soundboards in French polish with U-Beaut hard shellac. We then polished them by hand, which took quite a while to get a decent sheen and my arm was pretty sore afterward so I promptly ordered a Shop Fox Buffing Assembly for next time!

I finished the backs, sides and necks in Tru-Oil with a satin finish. I used a cherry backstrip to separate the two halves of the back so the reversing grain pattern of the curly maple doesn’t clash at the center.

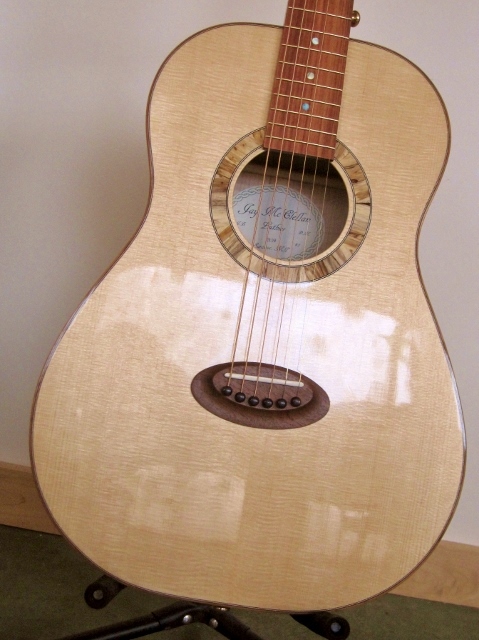
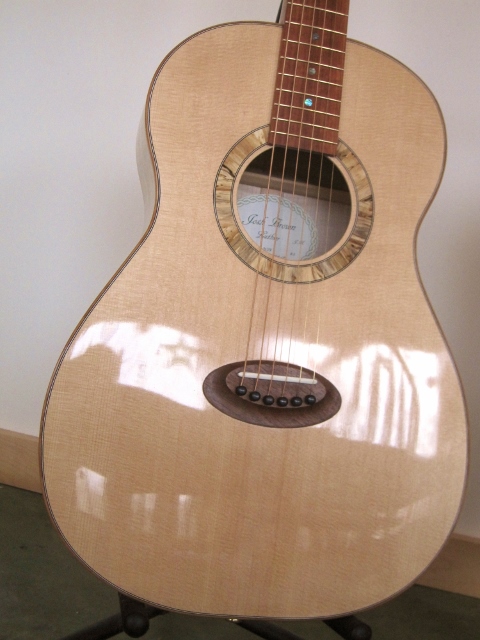
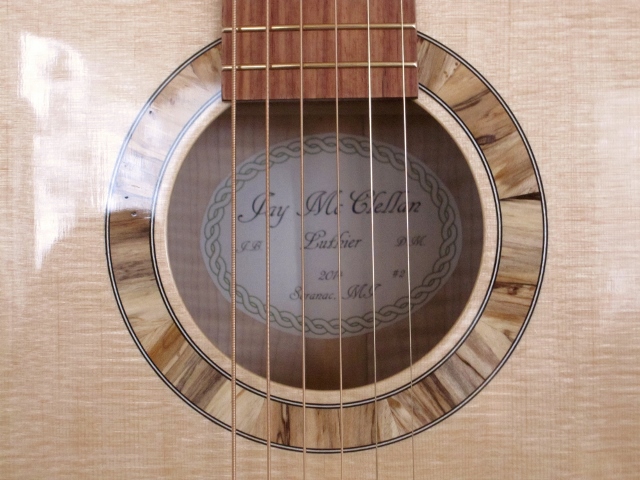
Our nephew and his wife recently bought a house with a wooded lot. I spotted a small rotting maple stump in his woods and said “hey, there’s guitar parts in that stump!” We resawed the stump into veneer about 1/8 inch thick and dried it, then cut a bunch of rosette segments from it. The rosettes each have 9 segments and I made a plexiglass form just to hold them in a circle for visualization, then we spread out all the segments we’d cut and let the recipients design their own rosettes by arranging the segments as they liked. When finishing them I intentionally left some of the worm holes in the spalted wood rather than filling them in, as I think it gives them a nice earthy character.

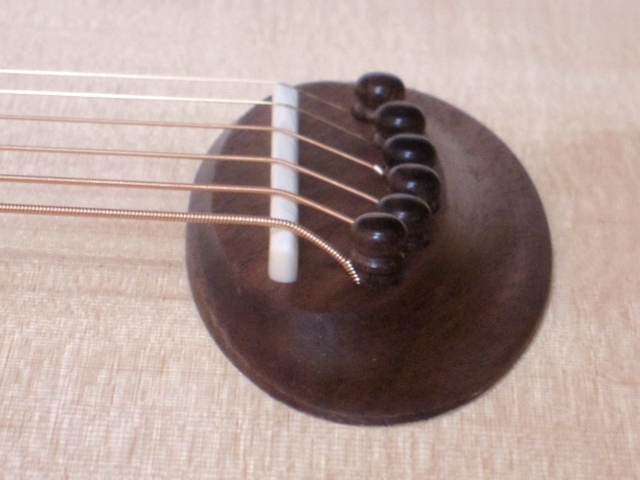
I used the same elliptical bridge design that I created for Guitar #1, but I carefully tweaked the dimensions to further reduce the weight.

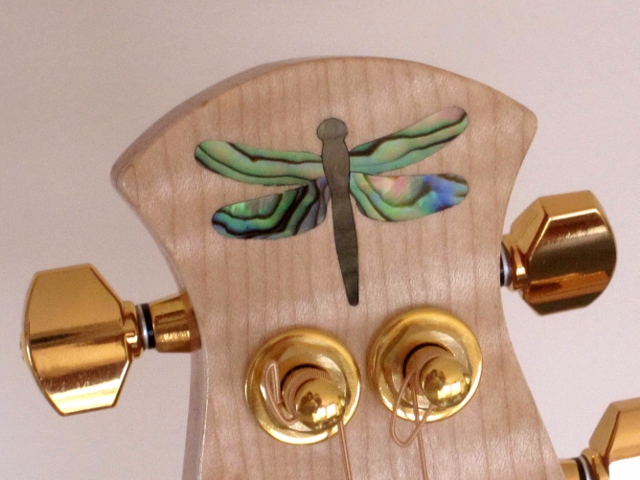
This was my first time doing shell inlay other than simple dots, and I created the dragonfly design from a photograph I took many years ago. I cut the inlay pocket and the shell on my Rockler CNC Shark Routing System and after a few tries on scrap wood I got a pretty decent fit. With the light curly maple headplate there’s no easy way to hide gaps like one could on a darker wood. The wings are paua abalone and I cut the body from black mother of pearl for contrast.

Our grand niece has been learning to play on a borrowed baby Taylor guitar and our nephew’s wife hasn’t had one of her own before so this is the first guitar each of them has owned. We delivered the guitars on Christmas day and they were both delighted!

Guitar #1

November 2014

I started building my first guitar in the Spring of 2014, and it took about 6 months to finish as I was also learning techniques and making or acquiring various tools and fixtures that I needed. It’s a fairly straightforward design but with a few uncommon features.

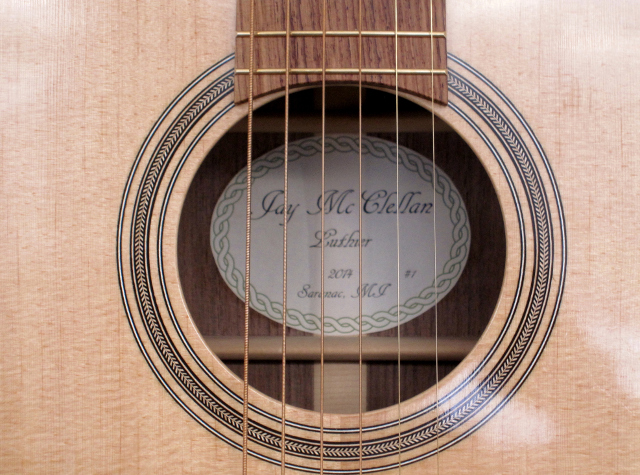
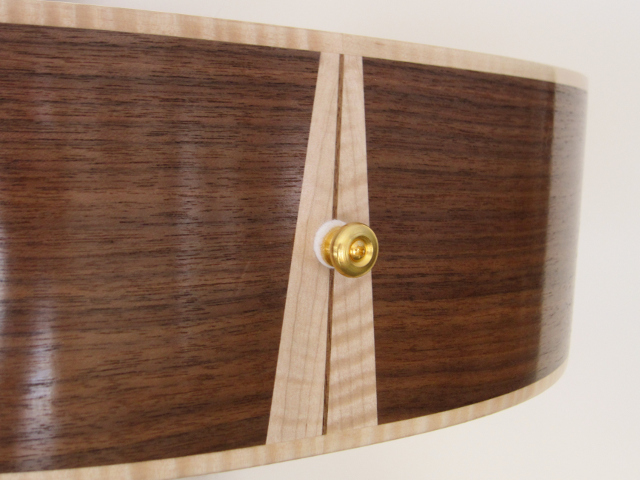
I built it from scratch, without using a kit or prefabricated parts. I think building a guitar from a kit is a great way for people to start out but I enjoyed making everything from scratch. The back and sides are Black walnut, with Sitka spruce for the top and all the bracing. The bindings around the edge are curly maple. The neck is Spanish cedar (not a real cedar but more closely related to mahogany) and the fingerboard is Honduran rosewood, which I chose because it’s a good color match for the walnut. The rosette is a simple wood herringbone inlay, and I made the end flash as a stylized “tree” so unlike most tapered end flashes I’ve seen, the pointy end is toward the soundboard:
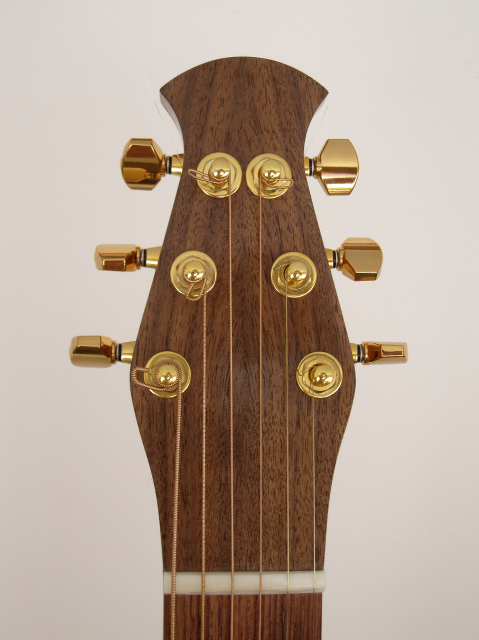
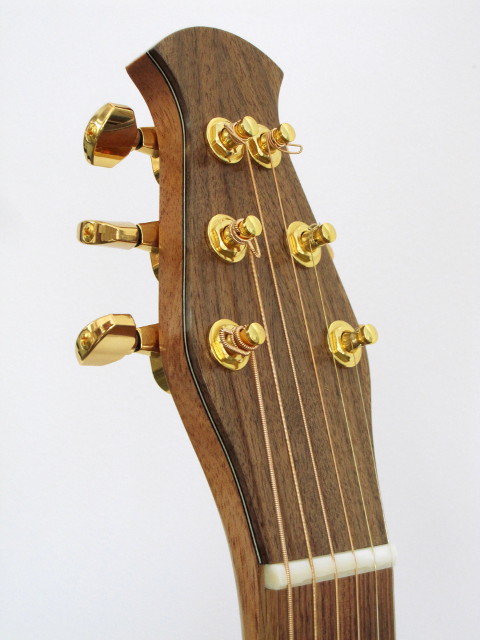
Some guitars are designed with a headstock that pulls the strings in a straight line when seen from above, which can minimize the resistance as the strings pass through the slots in the nut, but it often requires an asymmetrical headstock to position the tuning machines correctly. I liked the idea of a straight string pull but I really prefer the look of a symmetrical shape, so I designed my headstock to give a very nearly straight string pull but using a symmetrical layout. I made the guitar with a compensated nut, meaning that it’s offset differently for each string, which makes it possible to achieve better intonation where the notes don’t become overly sharp when fretted near the upper frets. It’s still a compromise, as are all equal-tempered instruments, but at least it gets closer to a true chromatic scale.

I came up with the ellipse-in-ellipse bridge shape to echo the arched headstock. I used black walnut for the bridge because it’s much less dense than ebony for example, and a ligher bridge can be more efficient at transferring the vibrating strings’ energy into the soundboard, but it still has sufficient stiffness and resistance to crushing. I thinned down the area behind the strings to save weight and also to make it thin enough to flex just a little as the soundboard distorts under string tension, which I think should make it somewhat less susceptible to glue failure in that area.

Here’s a short sound clip, just me playing a little open chord melody, and I’m not yet proficient enough to exercise the full range of the fretboard so honestly I don’t know how it compares to other guitars but I think it sounds decent. To my ears it seems to have a nice rich bass, which I expect is largely due to the deep body. As far as I can tell it doesn’t have any wolf tones or other sonic problems and I haven’t had any problems with fret buzzing.

The FretBoil Ukulele

Includes affiliate links that help offset our expenses at no cost to you. Affiliate programs and affiliations include Amazon Associates and the eBay Partner Network.

February 20, 2014
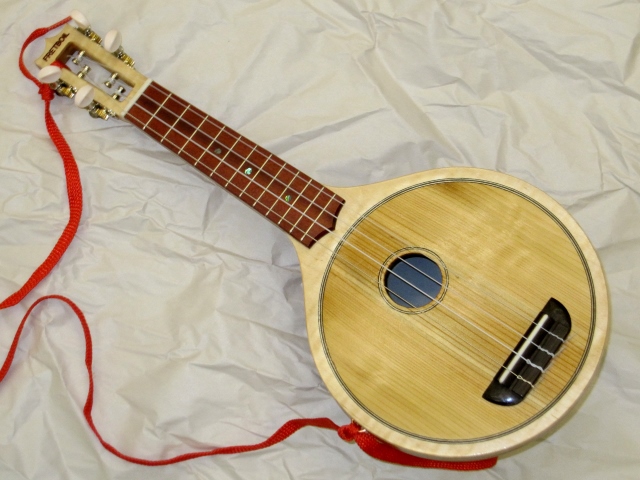
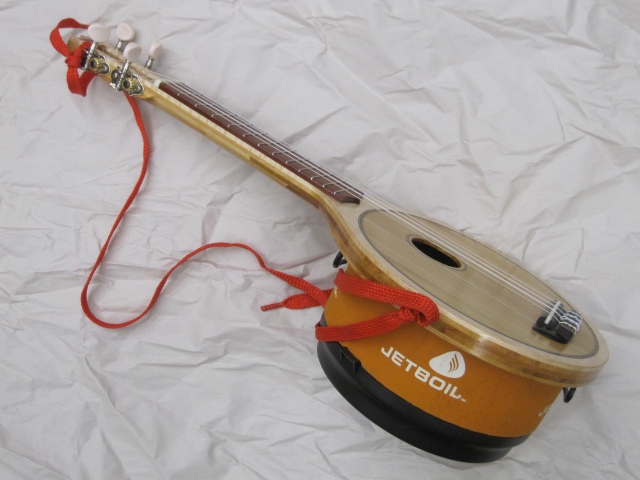
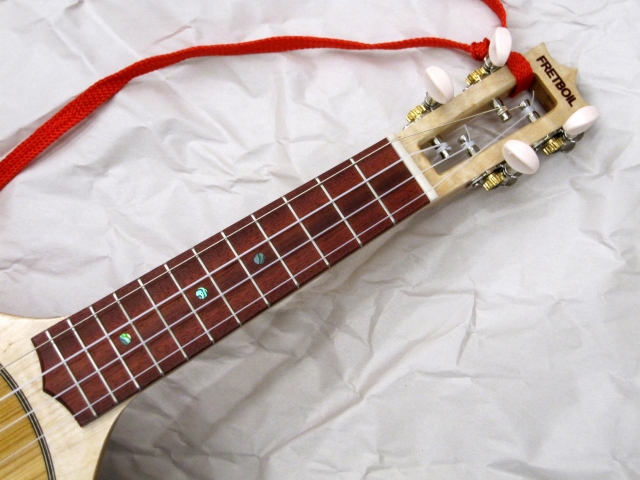
I got this idea when we were canoeing the Boundary Waters with my sister and her sons (my nephews). I brought along an inexpensive ukulele so we could have some music while in camp, and it was nice to have but inconvenient to carry in the canoe since it was too bulky and too fragile to fit in my backpack. My eldest nephew Josh and I each have the same model of JetBoil backpacking stove with a 1.5 liter cooking pot and I thought it would be cool to have a thin and easily packable ukulele that would use the cooking pot as its body, so one could just snap them together in camp and start playing. This year I finally got around to making one as a birthday present for Josh, and here’s the result:

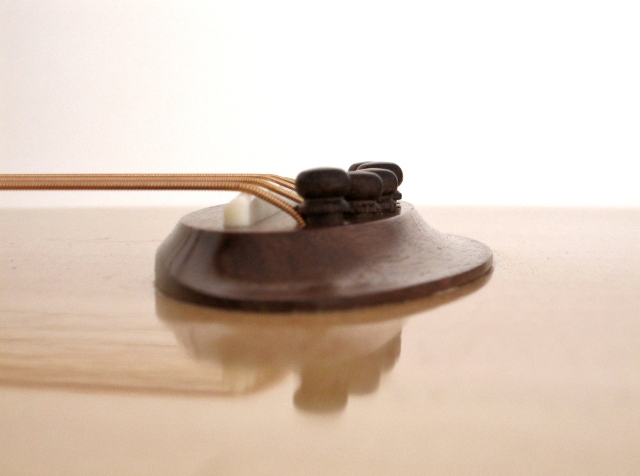
I did most of the machining using my Shark HD 2.0 CNC router. I made the body and neck from laminated quarter sawn white birch, with two of the inner laminations having the grain running at 45-degree angles to the neck to strengthen the area where the neck blends into the body. The top lamination is curly maple and there are five layers total, each 1/8″ thick so the main body is only 5/8″ thick. I made the soundboard from western red cedar, and I made it 1/8″ thick which is quite thick for an instrument of this size. A thinner soundboard with cross bracing would likely give more volume but I wanted it to be sturdy enough to survive being packed in a backpack without much padding so I went with a thicker soundboard and no bracing. I inlaid a single ring of black-maple-black purfling around the soundhole and a double ring around the joint between the soundboard and the maple frame. The bridge is rosewood with a bone saddle, and the finish is about 6 coats of Tru-Oil. The strap is a hiking boot lace, naturally.

Here are two views of the back, showing the spring-loaded latch that I made and the leather gasket I glued around the edge, which keeps the pot from buzzing against the soundboard:

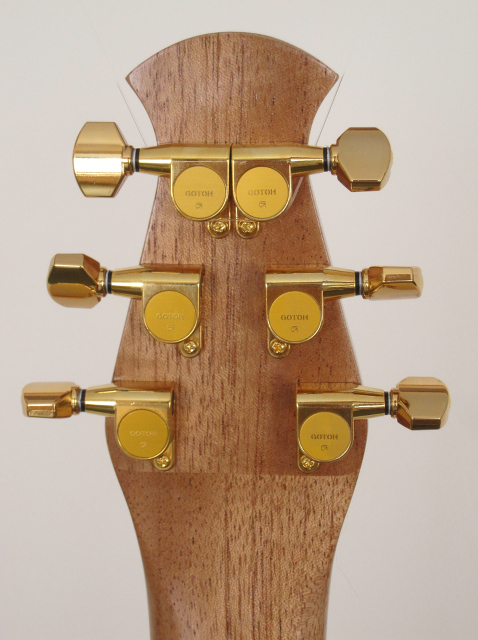
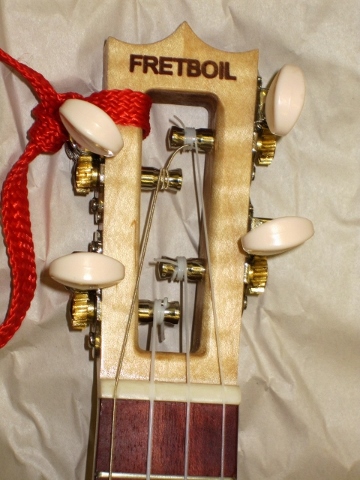
Below are close-ups of the fretboard and headstock. I made the fretboard from bloodwood with inlaid paua abalone marker dots, and it has a 13-inch scale length which is typical (a bit on the short side) for a soprano uke. The tuners are upside-down compared to how they would normally be installed, i.e. the knobs point toward the front of the instrument. This looks a little odd and it is not as easy to adjust because you have to reach around to the front to turn them but it keeps the overall profile flatter this way since they stick up on the same side as the bridge, and this should make it easier to pack in a backpack. Planetary tuners would have been even better (flatter), sticking straight out to the sides, but the standard tuners don’t add much height since they’re about as high as the bridge. I also considered mounting them in a solid headstock with the knobs out to the side but then I’d have to angle it back to make the strings break properly over the nut, so I think that would have been a less packable shape. To make the FRETBOIL text I used the CNC router to V-carve the letters and then filled them with a mixture of epoxy and bloodwood sawdust, and sanded it flush.

Here is a sound clip, recorded with an AKG C3000 microphone into a Fostex MR8 mkII 8 Track Multitrack Recorder in a small room using no reverb or other effects, just the natural reverberation of the instrument. It’s strung with Aquila Nylgut strings with a low wound G string, which are my favorite. My uke playing is a bit rusty and may not win any contests but I think the instrument has a nice sweet voice. This is with the cooking pot’s urethane jacket and plastic bottom cover in place as shown in the photo near the top, which doesn’t seem to have much effect on the volume and I think it improves the sound by damping out some of the tinny quality of the aluminum pot.

Yin-Yang Gate

June 6, 2012
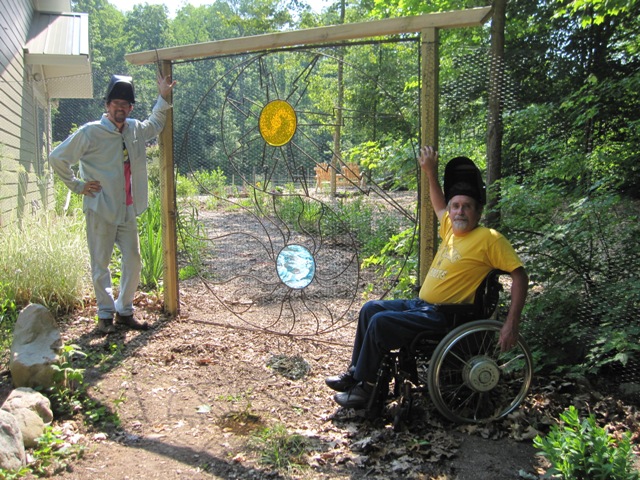
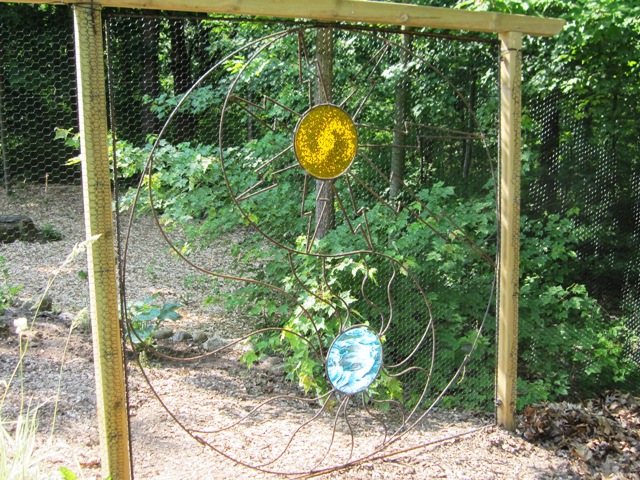
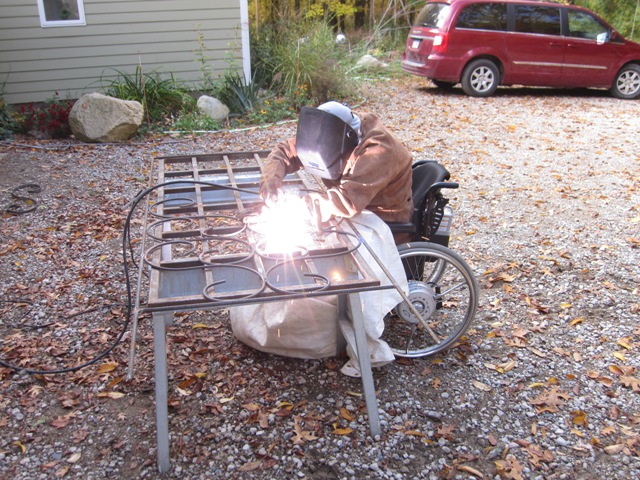
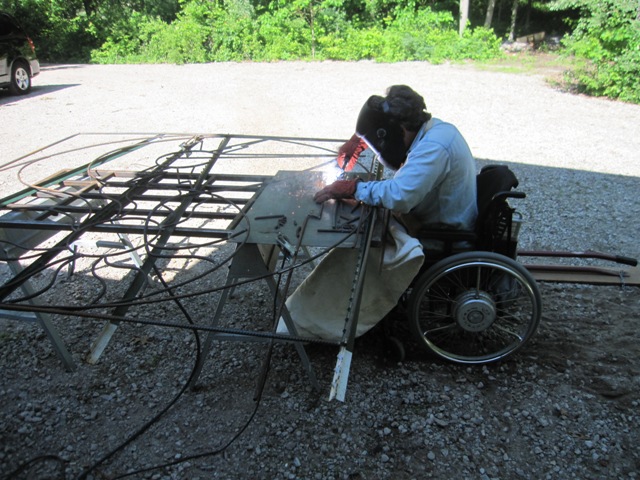
Since we installed the deer fence last year, we have been using pieces of fence tacked over the three openings where gates should be. Jay and Dave set about making a real gate for the front gateway just south of the cottage. This gate is 7 feet square and Jay created a yin-yang sun-moon design for it. Jay did most of the cutting and bending of the rebar while Dave did most of the welding. We used a fiberglass welding blanket to protect his legs so he could work from his wheelchair without setting himself on fire.

The photos below show the finished gate. The sun and moon are 13″ glass disks that we fused in our kiln.

Sun Trellis

June 4, 2012
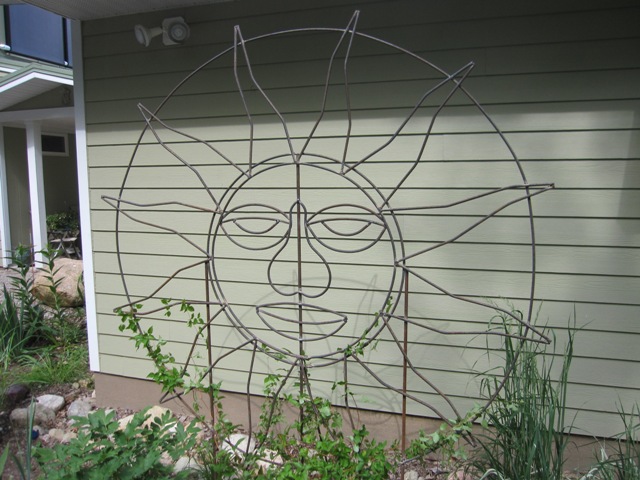
Jay and his brother Dave welded up this sun-face trellis for the clematis vine in front of the cottage near the front door. It’s about 7 feet in diameter and is mostly 3/8″ steel rebar, with 1/2″ steel rods for the vertical supports.

Scrollwork Trellis

October 5, 2012
We made a scrollwork trellis for our Dad’s 85th birthday. Jay cut and bent the S-shaped scrolls from 3/8″ rebar, and Dave did the welding.

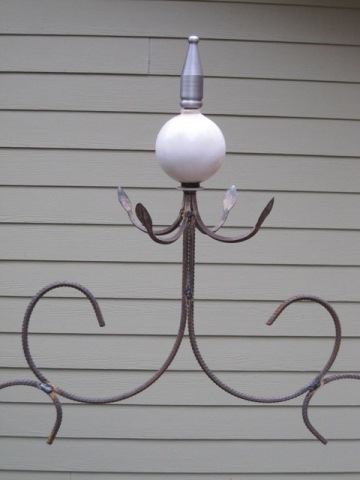
For the top, we cut off 4 tines of an old garden cultivator and welded them together to support an antique glass lightning rod ball. Then we made a finial on the metal lathe to fit over the top of the trellis and inside the top of the ball. The finial is shiny because we just made it but it will soon rust to match the rest of the trellis.

Garden Trellises

Includes affiliate links that help offset our expenses at no cost to you. Affiliate programs and affiliations include Amazon Associates and the eBay Partner Network.

Below are some photos of metal trellises that we built years ago when we lived in Wisconsin.

This was our first garden metalwork project, a hanging trellis made of welded 1/4″ steel. It is 18″ wide and 32″ high. The design is a real circuit called a Darlington amplifier. The plant is Mina lobata, which will get yellow and red flowers that hummingbirds love.

Here are the second and third trellises we made, 73″ high and 30″ wide. The first circuit is part of a Geiger counter, the second circuit is a crystal calibrator, and the vines are morning glory.