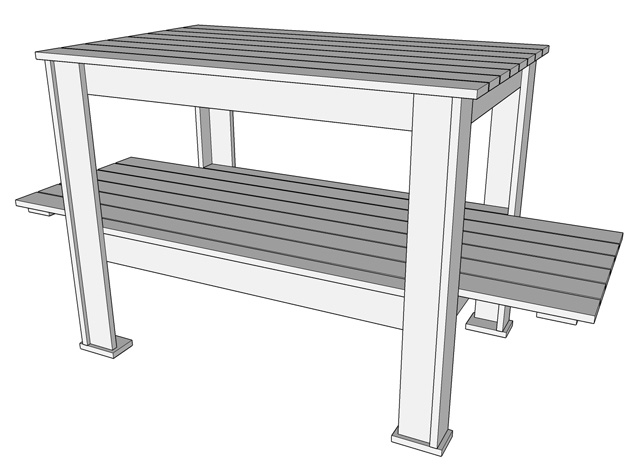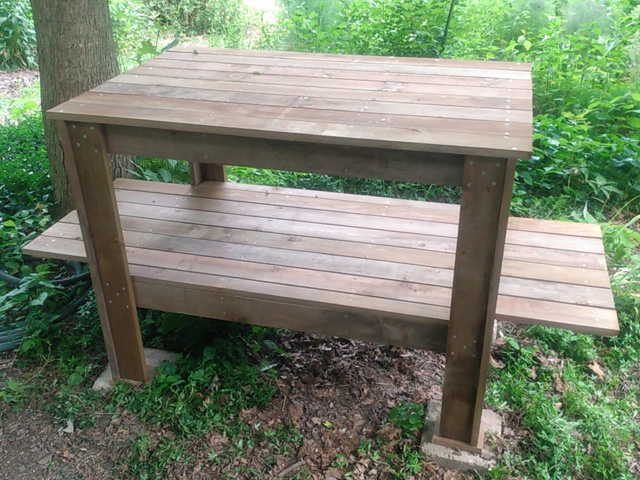
I designed this bench to be used for potting plants and general outdoor use. The top is 48″ x 30″, and the lower shelf is 70″ wide.
Materials
I used preservative-treated wood for mine, and a rot-resistant species like cedar or cypress would also work well. The table is made entirely from 1″x4″ (nominal size) boards andyou can substitue lumber of another size such as 1″x6″ without changing the cut list, except that you would need fewer boards for the top and shelf. The following pieces are needed, with all measurements in inches:
| Quantity | Length | Description |
|---|---|---|
| 4 | 44 | Frame long |
| 8 | 27.75 | Frame short |
| 8 | 34.5 | Leg* |
| 4 | 5.25 | Foot |
| 8 | 70 | Shelf long |
| 2 | 44 | Shelf short (rip to 2.25″ wide)** |
| 2 | 21 | Shelf cleat |
| 8 | 48 | Top |
*The specified leg length gives a 36″ high table when using 3/4″ thick boards for the feet and top (adjust if desired).
**Don’t be tempted to leave the short shelf pieces full-width and notch them so they extend beyond the front of the frame, or your shins will be sorry. Guess how I know that…
You can cut all the pieces from 17 boards 8′ long with minimal waste as follows:
| Boards | Cut 1 | Cut 2 | Cut 3 | Cut 4 |
|---|---|---|---|---|
| 4 | 48 – top* | 48 – top* | ||
| 2 | 34.5 – leg | 34.5 – leg | 25.25 – frame short | |
| 2 | 34.5 – leg | 34.5 – leg | 21.25 – shelf cleat | 5.25 – foot** |
| 2 | 44 – frame long | 44 – frame long | 5.25 – foot** | |
| 1 | 44 – shelf short | 44 – shelf short | 5.25 – foot** | |
| 6 | 70 – Shelf long | 25.75 – frame short |
*It’s okay if the top pieces are slightly under 48″
**This cut list yields one extra foot piece – this lets you discard one in order to cut around bad knots etc.
Assembly
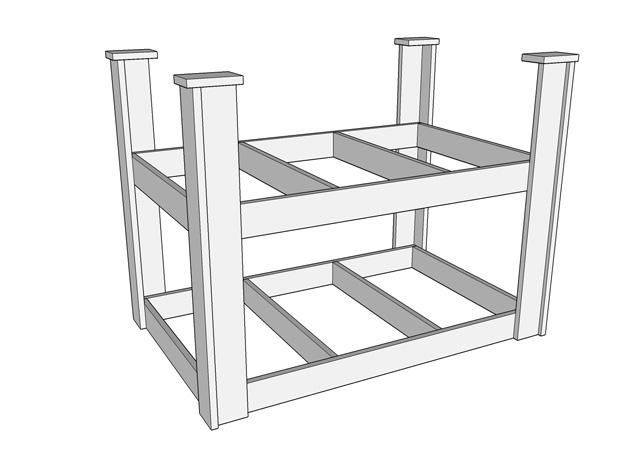
Start by making two frames as shown from the 44″ long pieces and 27.75″ short pieces. I used 2 deck screws at each joint. The inner short pieces are 14″ on center from the outer pieces.

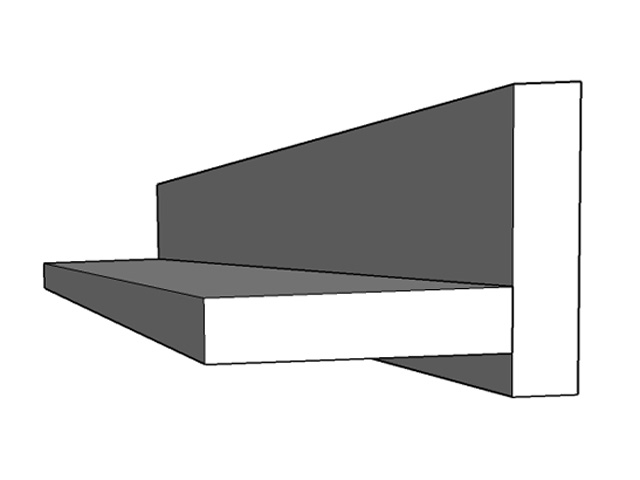
Assemble four legs, offsetting the front boards 1/2″ in from the edge of the side boards. An easy way to do this is to lay a scrap of 1/2″ plywood on a work surface to support the front board, then stand the side board on edge and screw together. I used 5 screws for each leg.
Place the top frame upside-down on the floor and attach 4 legs, with just one screw per leg joint at this point. Then support the shelf frame at the desired height, which can be adjusted as you wish.I spaced them 16″ apart to give 15.25″ clearance after the shelf boards are attached, which is enough to fit a 5-gallon bucket with a lid on the shelf. Attach the shelf frame with just one screw per leg, and then square everything up as well as possible before fastening with more screws. Use plenty of screws for each of these joints to make the table rigid. I used 1-3/8″ deck screws here so the sharp ends don’t protrude through the other side. Attach the feet to the legs (these help prevent the table from sinking into soft ground).
Flip the table over and attach the shelf boards as shown. I used two screws at every joint, to help keep everything flat. Attach a cleat under each end of the shelf to hold the ends even:
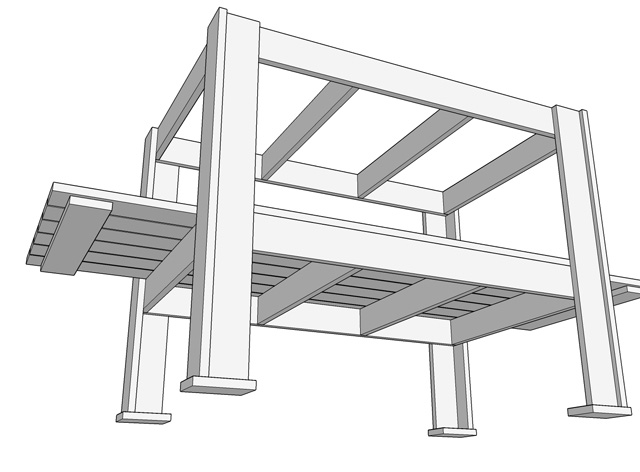
Finally attach the top boards, spacing them evenly across the top: