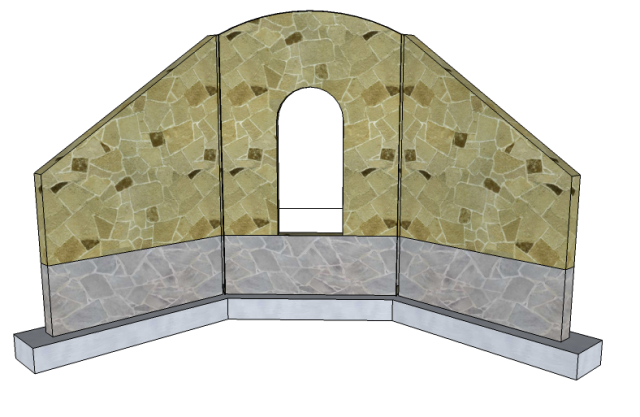
Our root cellar is built into the side of the hill behind the house, and it needs a retaining wall in front to hold back the earth that covers it. We’re going to use the slipform technique to build this wall, and here’s a sketch showing the wall’s design. The gray part will be underground, with footings that go down 46″ to get below the frost line, and the part above will hold back the earth behind it. The wings extend out at a 45-degree angle from the center section.
September 10, 2010
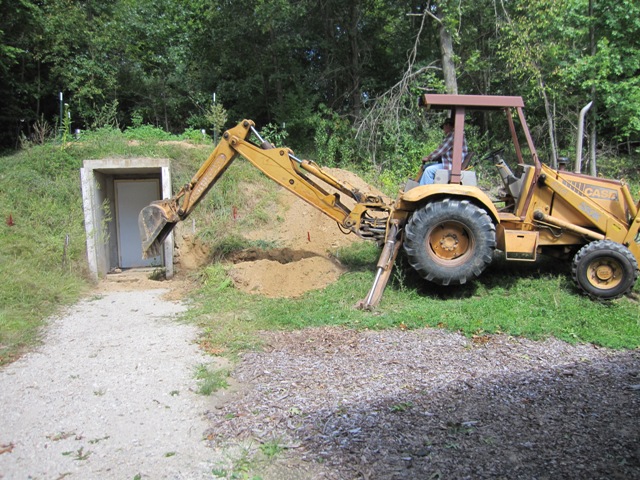
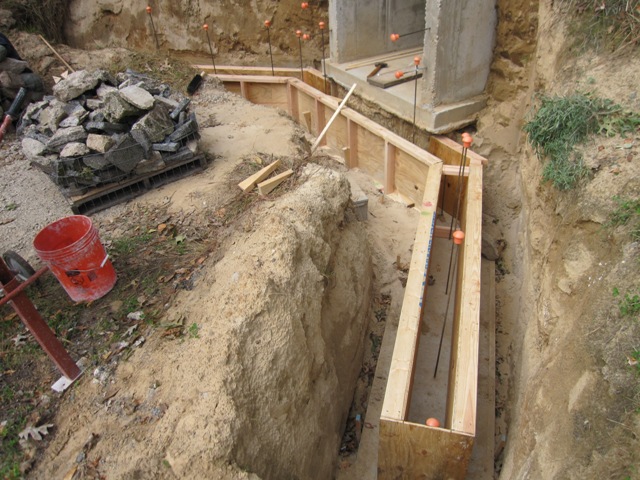
We hired a backhoe to dig a trench for the footings and the second photo shows the view from above, while standing atop the root cellar entrance.
September 14, 2010
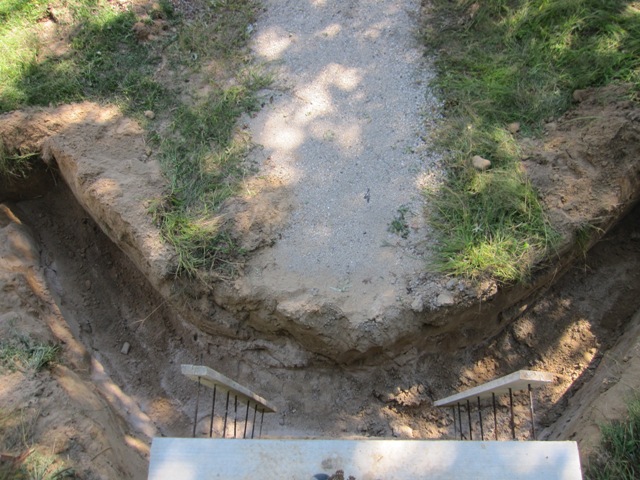
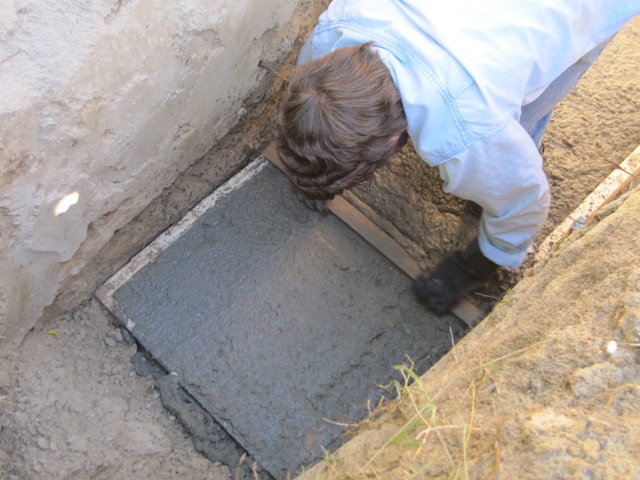
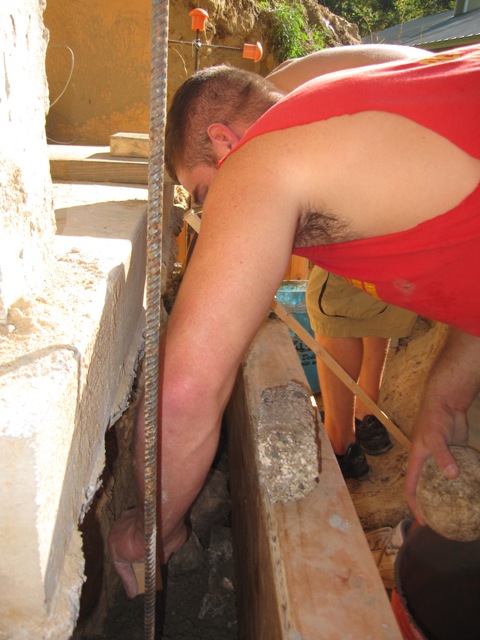
We placed footing forms into the trench and leveled them, and had a commercial cement truck deliver concrete to fill the forms.


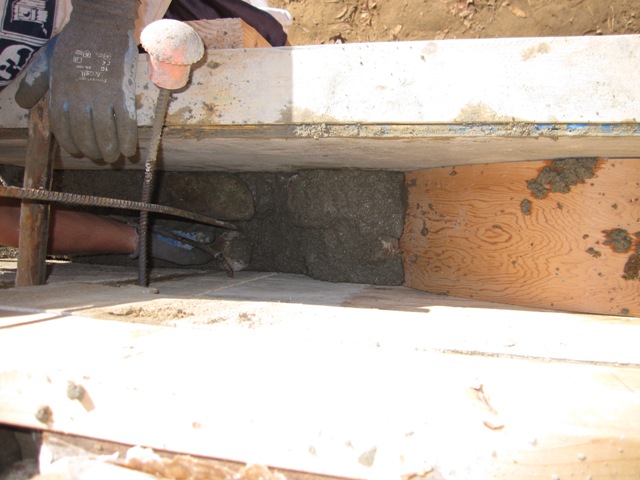
Fortunately we had watched the concrete crew pouring all the footings for the house last year, so we knew how it’s done. Jay screeded off the concrete level with the forms and then inserted lengths of rebar into the wet concrete. These rebar dowels will anchor the wall to the footings so it can’t shift. The sharp ends of the rebar would be very hazardous if someone were to fall into the trench, so we applied the orange caps over the ends.

Here are two views of the finished footings from the side and from above.


September 24, 2010
Our nephew Nash and his buddy Ryan have been busy moving and washing rocks from the rock piles in the woods nearby. They also hauled out some chunks of broken concrete (in the lower right pile) that we’ll use for the part of the wall that’s underground where it won’t show. This is about half as much rock as we’ll need, and enough to get started building the wall.

September 27, 2010
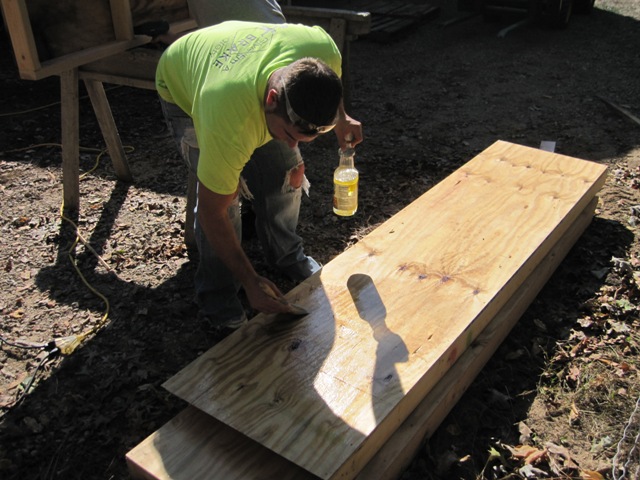
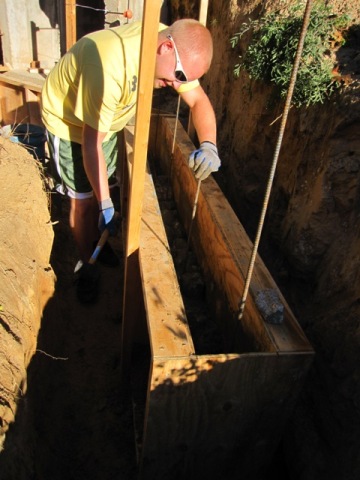
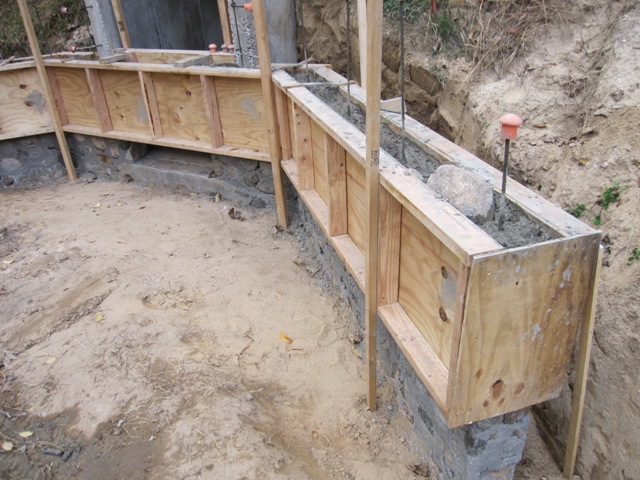
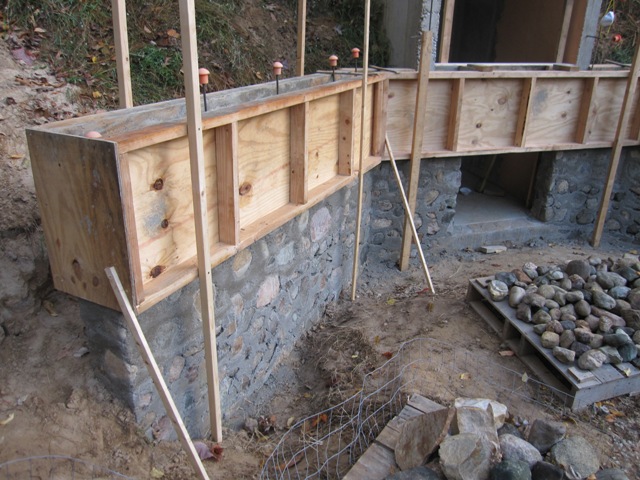
Nash and Ryan built the forms for the walls and brushed them with soybean oil before assembling them. Later we discovered that the oil isn’t really necessary since we willremove the forms each day before it has time to really adhere to the plywood. They assembled the forms so that the space between them is 8 inches, which will be the thickness of the wall.

Here’s a photo of the completed forms resting on the footings, ready for the first layer of concrete and rocks.
September 29, 2010
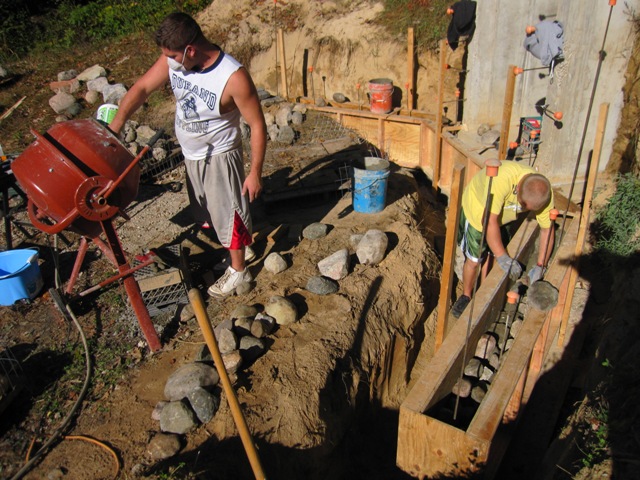
Nash and Ryan spent all morning mixing concrete and using it to pack rocks into the forms. We decided to use Quickrete 5000 because it develops strength quickly, has a high cement content so it should bond well to the rocks, works well in cold-weather applications, and (largely) because it was on sale. As you can see from the photos it’s not cold today but we’re expecting cold fall weather soon so it’s good to have a mix that will perform well in cold weather.
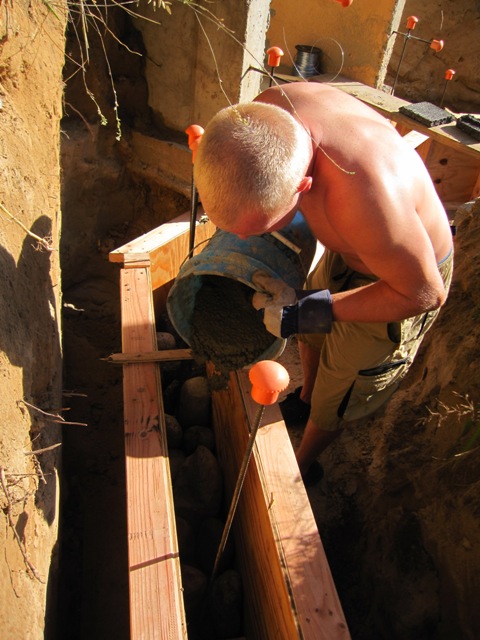
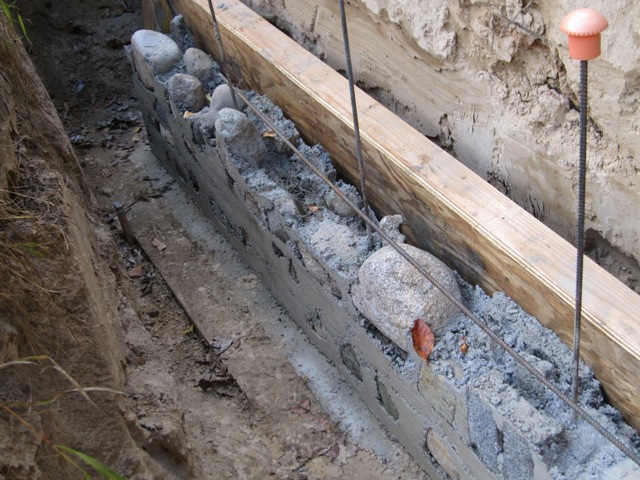
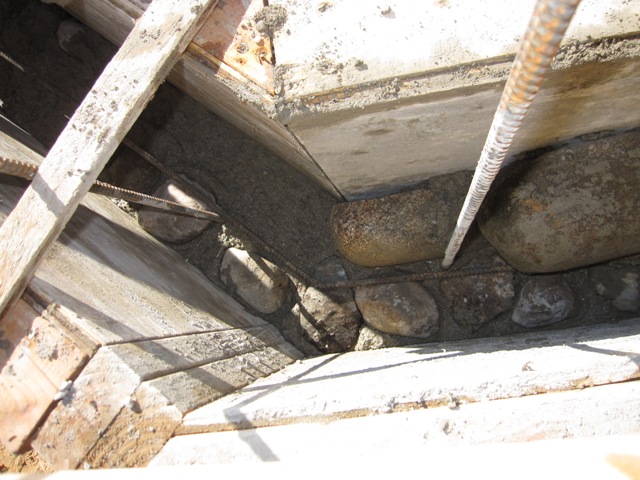
After laying about one foot of wall, we bent and inserted #3 (3/8″ diameter) rebar into the form. We’ll place horizontal rebar every foot and vertical rebar every 2 feet throughout the whole wall. It would be somewhat stronger with heavier #4 (1/2″ diameter) rebar, but we had a lot of #3 rebar on hand because we ordered extra back when they poured the radiant floor slabs for the house, and this should be plenty strong for this wall because it’s supported by its own angled shape and anchored to the front of the root cellar.

After the rebar was laid in place, Nash and Ryan added more concrete and rocks for a total height of about 18 inches. At that point we ran out of concrete, having used up twenty 80-pound bags. The wall is approximately 50% stone and 50% concrete, which seems to be typical for slipform stone walls. It would be possible to use less concrete by taking more time to find rocks and fitting them together very carefully, but the main advantage of the slipform technique is that it can be done fairly quickly. Besides, we want this to look like a root cellar that’s been here for a hundred years so we’re not trying for the appearance of fine masonry. It should look pretty good though.


September 30, 2010
Removing the forms revealed the prior day’s work. This part of the wall will be buried underground so we’re using it to practice the technique before making the visible parts above. Overall it looks pretty good, with some voids as expected but it’s a solid structure. We’ll mix the concrete a bit wetter from now on, to make it flow around the rocks better.
Now the forms are “slipped” up the wall, giving the technique its name. We supported them on 2×3 stilts screwed to the sides of the forms and this worked well.


October 1, 2010
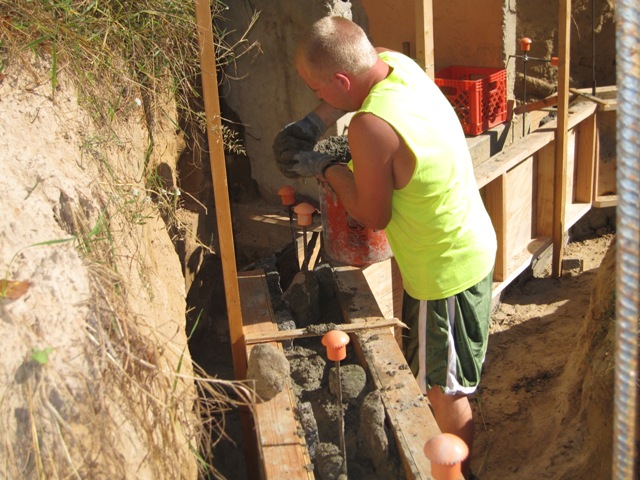
Ryan and Nash traded off mixing concrete and placing it along with stones into the forms. In the second photo below you can see Nash pounding on the sides of the mold with a rubber mallet, which settles the concrete and stones and helps to release trapped air.

October 5, 2010
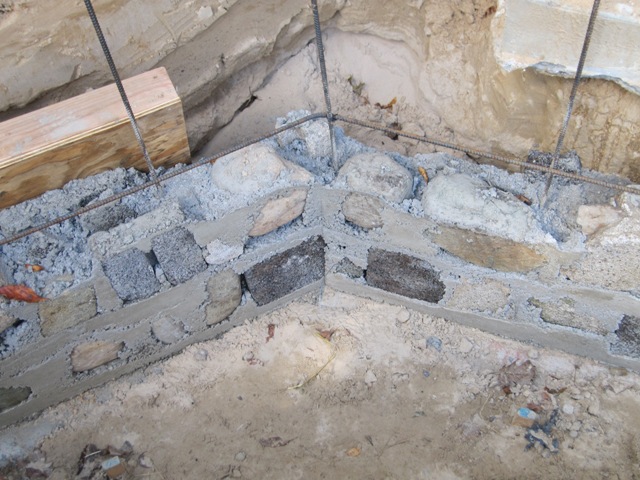
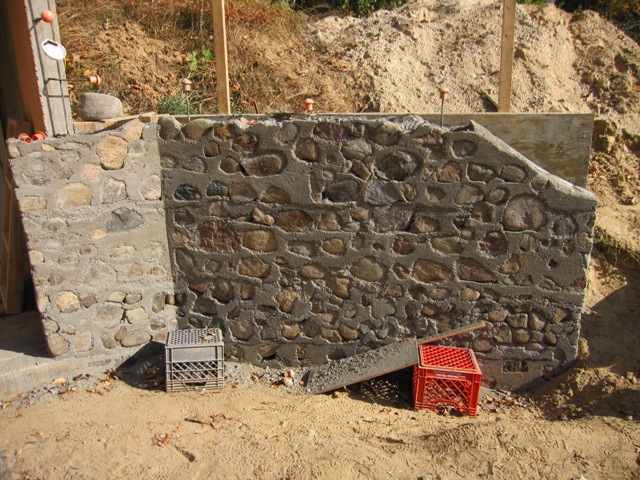
Today they placed the third layer, which is the first layer that will be visible above ground. The trench is mostly filled in now, so it’s much easier to get to the wall since they don’t have to climb down into a trench. The forms create a 36-inch-wide gap in the wall where the doorway will be.
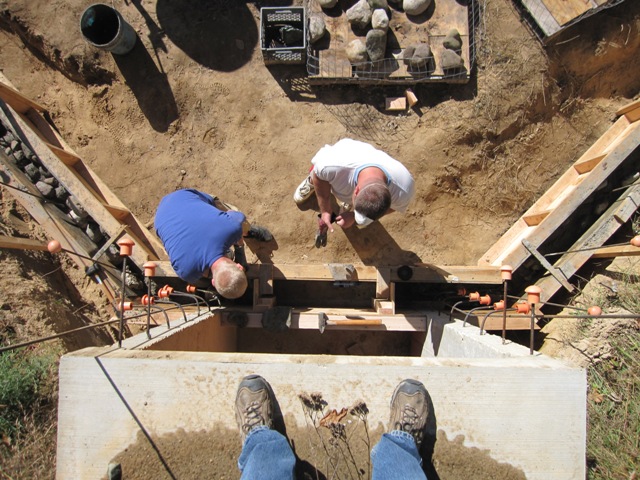

They placed concrete and stones until about 2:30 PM, and it needs to cure for about 5 hours before the forms can be removed. We must remove the forms later today, ideally around 7:30 PM, when the concrete is just strong enough to hold together but still soft enough that it’s easy to chip and scrape it off the faces of the stones.


October 6, 2010
Last nightJay removed the forms and cleaned the concrete off the faces of the rocks, and today Nash and Ryan “slipped” the forms up the wall and placed the next layer of rocks and concrete.

October 7, 2010
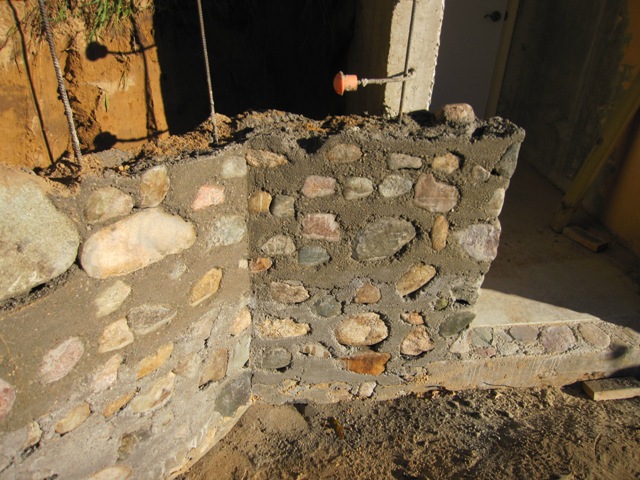
Yesterday’s concrete was placed by 4:00 PM, so Jay waited until 9:00 PM last night to remove the forms and clean off the faces of the rocks. Waiting about 5 hours seems just right, as the concrete is firm enough to hold together but still soft enough that it’s easily chipped off the faces of the rocks. Any less time and it would be too fragile, and by the next morning it’s already too hard to clean easily. Jay brushed the surface with a wire brush to give it a weathered appearance, and here’s how it looked the following morning. The new concrete is darker in color because it’s still damp, but it will blend in as it dries. Eventually we’ll need to fill in the voids around some of the rocks with mortar.

Nash and Ryan back-filled behind the wall with sand, so that there’s no longer a trench and they’ll be able to walk up behind the wall to place tomorrow’s concrete and stones. They didn’t place any new concrete today, but spent most of the morning getting more stones from our stone pile back in the woods and cleaning them so we can use them in the wall tomorrow.

October 8, 2010
The next layer went in fairly smoothly and the wall continues to grow upward at about 18″ per day.

October 10, 2010
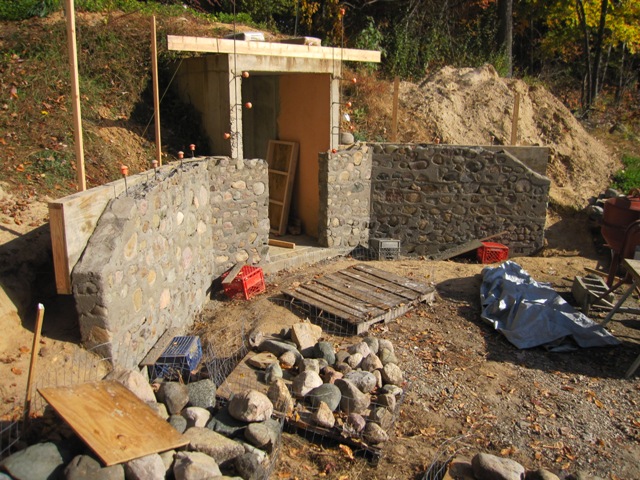
We set the slope of the outer segments using strings stretched from the end of the wall up to the beam set across the opening. You can see the yellow string on the left side of the second photo below. We’re not trying to make it perfectly straight, just close to the nominal slope. The sloped top of the wall is covered in “cap stones” that are relatively flat and thin, to provide a solid top surface that will resist the elements.
October 14, 2010
They got an early start on the wall today and finished it up by mid-day, so we could strip the forms and brush down the wall by late afternoon. It’s working well to wait 5 hours after placing the concrete before stripping the forms and cleaning the surface. The concrete is set up well enough to be stable but it’s still soft enough that it’s easy to scrape off the surface of the rocks with a masonry hammer, and the wire brush cleans off the smooth surface leaving a weathered texture.

October 15, 2010
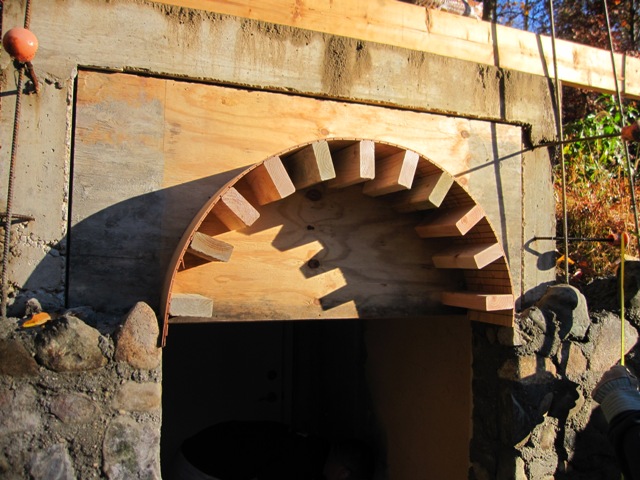
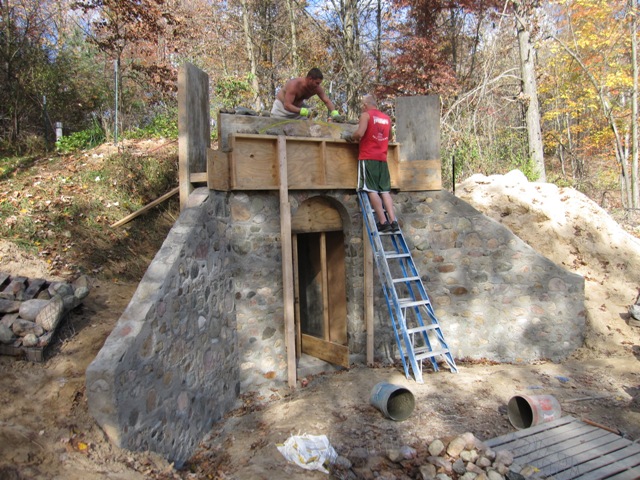
In order to form the arch over the doorway, we picked out stones with a slight wedge shape and arranged them around a template of the 36-inch-wide arch. It was a challenge to find stones that were just the right shape, since we decided not to try splitting them. The second photo shows the form that will support the arch as we place the concrete. Jay made it using 8-inch lengths of 2×4 screwed to the back form. He cut saw kerfs into a piece of 1/4-inch plywood so it could bend around the arch, much like the form he made for the sitting counter.

We placed a shallow layer of concrete and stones into the forms and then laid in horizontal rebar to tie it together. In the first photo below you can see the stones just starting to cover the plywood arch form on the right. The second photo shows the rebar as it bends around the corner in the wall.
The first photo below shows the overall wall, and if you look closely you can see that we extended the center form up a bit more with plywood. The second photo shows how this supports the arch stones in front. We wanted to get plenty of concrete over the arch today so it will be strong enough to hold together when we remove the forms. You can also see some of the rebar that goes over the arch, and there’s another rebar length below it that is already cemented into the arch.


October 16, 2010
Late last night (when it was too dark for good photos), Jay removed the forms from the front of the wall and cleaned the concrete off the faces of the stones. He left the arch support in place so that the concrete could develop more strength before the support is removed. Here’s how it looks in the morning. In the second photo you can see some gaps under some of the stones and these gaps will be filled in with grout later. It looks like some of the stones might fall right out but they’re actually very well cemented in place.


By this time the new concrete was quite hard and we had no worries about removing the support from the arch. The first photo below shows how it looked under the archway right after removing the form. The concrete is quite smooth underneath and the surface texture doesn’t blend in with the rest. Fortunately it was still soft enough to brush off the surface layer and to chip away some of the concrete from the faces of the stones, and the second photo shows the result. We had hoped to expose a bit more stone but by now the concrete was too hard, and most of our arch stones didn’t have a very flat face on the bottom to show under the arch.


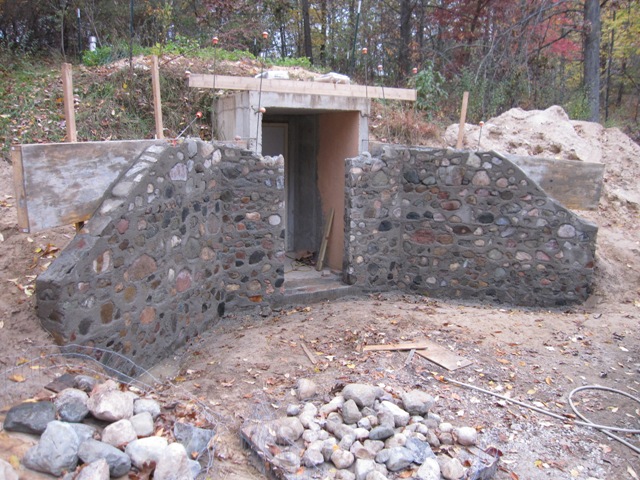
Here’s an overall view of the wall after using a pressure washer to clean the concrete drips off the faces of the stones. The wall will extend about 2 feet above the top of the root cellar entrance, and we should be able to place the rest of the concrete and stones in one more day.

October 18, 2010
We set a form in back of the wall, atop the root cellar entrance. The yellow line marks the curve where the top of the wall will go.

Ryan and Nash placed the remaining concrete and stones up to the curve marked on the form.

October 19, 2010
Late last night Jay removed the front forms and brushed down the surface of the wall. The stones looked good but alas the shape just didn’t look right, too pointed on top, and a little bit lop-sided. It was too dark for a good photo but looking back at the yellow curve in the first photo from yesterday, you can see that the curve doesn’t really blend smoothly from the sides up over the top. So Jay knocked out some of the stones while the concrete was still soft, and today’s project will be to fix the top so that the curve looks better.

To make a better shape, Ryan and Nash held a thin wooden spline over the sides so that it arched smoothly over the top. Then Jay marked the new curve on the form with red spray paint.


Once the new concrete was placed to fix the top arch, Nash and Ryan grouted the voids in the wall’s surface using Quikrete sand/topping mix, which is similar to the concrete that forms the wall but has no coarse aggregate (stones) just cement and sand. A regular masonry mortar mix would have worked but the color wouldn’t blend in as well with the other concrete.


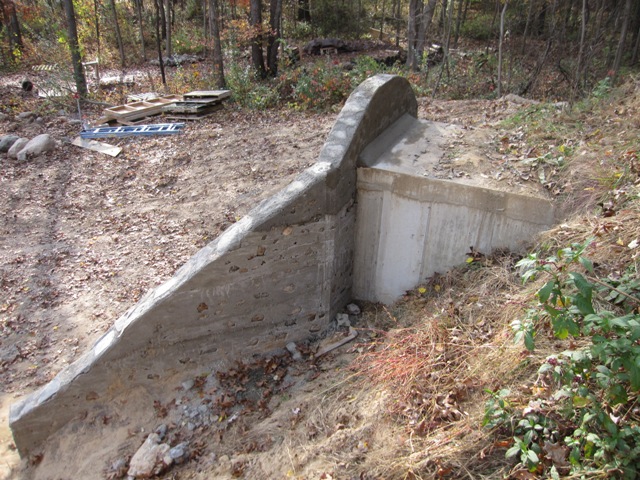
Since it only took a little concrete and stones to fix the top arch, they had it placed by late morning so the forms could be removed by late afternoon. The first photo below shows the result, a much smoother arch than before. The top layers of concrete are darker because they are still damp, and will blend in with the others as they dry. The second photo shows a side view of the wall and entryway. This area will get back-filled with sand so that the entryway is completely covered with about 2 feet of earth over it.
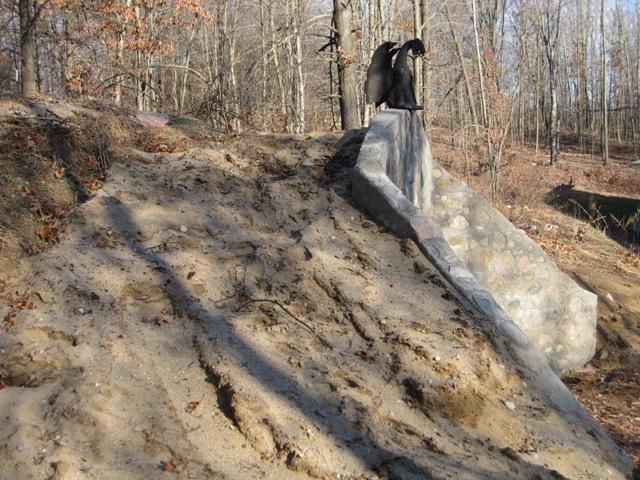
November 29, 2010
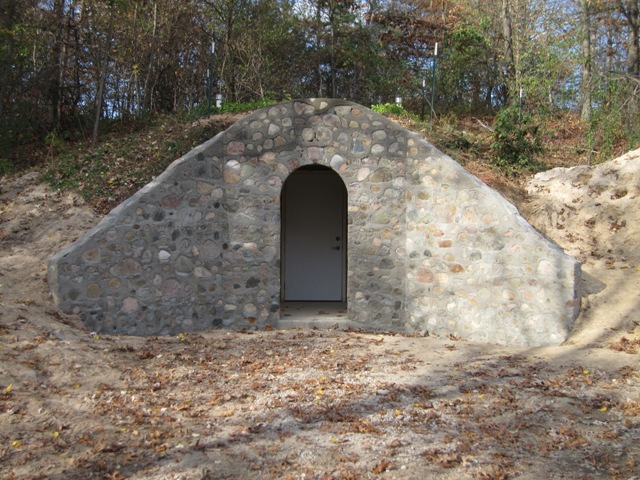
After the back-filling was completed, the final touches were to mount our gargoyle to stand guard over the entrance, and to add a rustic wooden door to the front. The steel door inside the entry is secure and rodent-resistant, while this wooden door is mostly for looks and to keep leaves and snow from drifting into the entryway. Jay made it from some old barn boards so it would have a nice weathered look.


The back-fill is just sand, which won’t hold the slope very well but should be sufficient for the winter. Next spring we’ll top it off with topsoil to bring it up to the same level as the area behind and then we’ll plant a groundcover to keep the slope from eroding.