Includes affiliate links that help offset our expenses at no cost to you.
Our rainwater harvesting system is designed to collect and store rainwater for irrigating the gardens and flushing toilets. Originally we had planned to produce potable water with this system using a U-V sterilizer, which is commonly done in many parts of the country and throughout the world. Alas, not in Ionia County Michigan. We were unsuccessful in educating our local code officials in the merits and well-proven safety of using rainwater for domestic needs. It’s just not done in this part of the country because groundwater is abundant and mostly of good quality, so using rainwater is practically unheard-of. This will change, we predict, and when it does we’re likely to see better acceptance of this technology that is already in widespread use in areas of the U.S. where water is not so plentiful. But for now, we use our rainwater only for non-potable needs and draw our domestic water from a conventional well.
The Roof
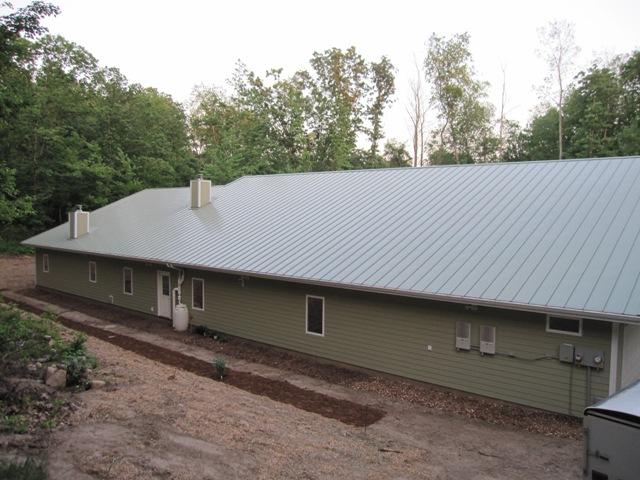
The roofers finished installing the roof in December 2009.The large north roof of the house is the rainwater collection surface, and it represents 53% of the total roof area of the housein terms of horizontal cross-section. It collects approximately 2000 gallons of water per inch of rainfall.
Gutters
April 29, 2010
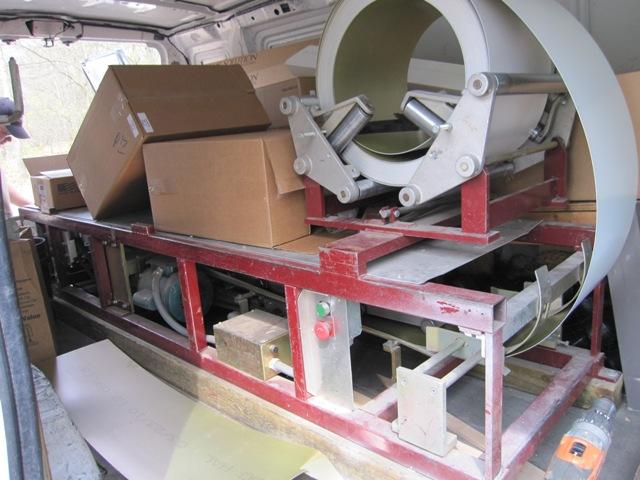
The first photo below shows the machine that produced our seamless aluminum gutters. As the aluminum material unrolls, the machine bends it into the gutter profile and extrudes it out the back of the van.

Here’s a shot of our gutter installer forming one of the two long sections of gutter for the rainwater collection roof. Each section is over 50 feet long, about the longest length that is practical to handle.


We chose Leaf Solution gutter covers to exclude debris as the rainwater is collected. They have a fine stainless steel mesh that excludes even small particles of dirt. Here you can see it shedding maple seeds. This is our first defense against contaminants in the water.

First Flush Diverter
The purpose of a first flush diverter is to discard the first water that comes off the roof during a storm, because this water carries most of the dirt. This is a common approach used in most rainwater harvesting systems. How much water one should discard depends on the size of the roof and how dirty one expects it to be. In our case, with the gutter covers excluding most of the debris, we can get by with discarding the first 50 gallons each time it rains. There are commercially-available first flush diverters that we could buy, but most of them are designed for smaller roofs and don’t handle this much water. For that reason (and because it’s more fun) we decided to design and make our own.
May 20, 2010
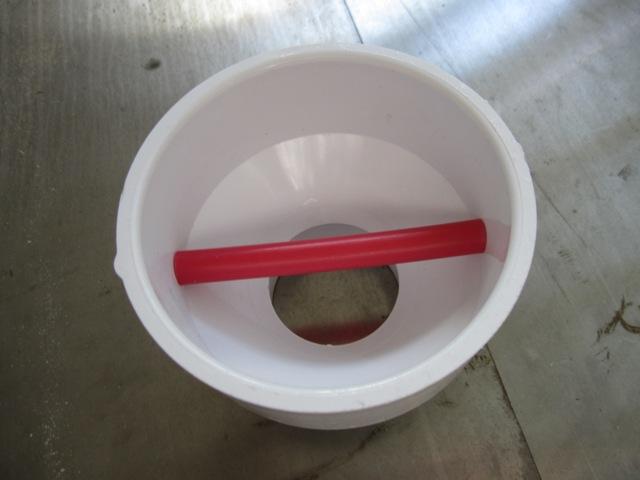
Our design uses a closed 50-gallon barrel to hold the diverted water, and above the barrel is a valve with a floating ball that closes off the incoming water when the barrel is full. This is a common design that we didn’t invent, but here’s how we made ours. It’s made from a pair of 2-inch to 4-inch PVC reducers, a short length of 4-inch PVC pipe, a length of 3/8″ PEX tubing, and a floating ball. The PEX tubing goes in the bottom and will prevent the ball from sealing against the lower reducer. Then the short length of 4-inch pipe is glued in.

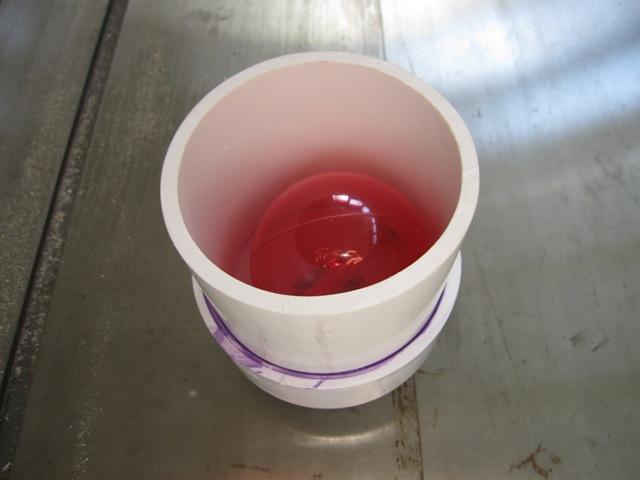
After dropping in the 3-inch-diameter hollow plastic ball, we apply the second reducer to the top. This upper joint is driven tight with a hammer and pinned with a screw but it is not glued so that we can take the device apart if we ever need to service it. Once the barrel fills completely, the water level will cause the ball to float and seal against the upper reducer, closing off the dirty water in the barrel from the cleaner incoming water. Although the inlet and outlet of the floating-ball valve are only 2 inches in diameter, this should be more than enough for the first trickle of water coming off the roof as it starts to rain. Then the main flow of water will pass through 4-inch piping that can handle even a torrential downpour.

Before we could build the rest of the diverter, we needed a solid pad for the barrel to sit on behind the house. This was also a good chance to test out the new cement mixer to make sure it works before we use it to make our countertops. We built a 24-inch-square form and carefully leveled it before pouring the concrete.


May 21, 2010
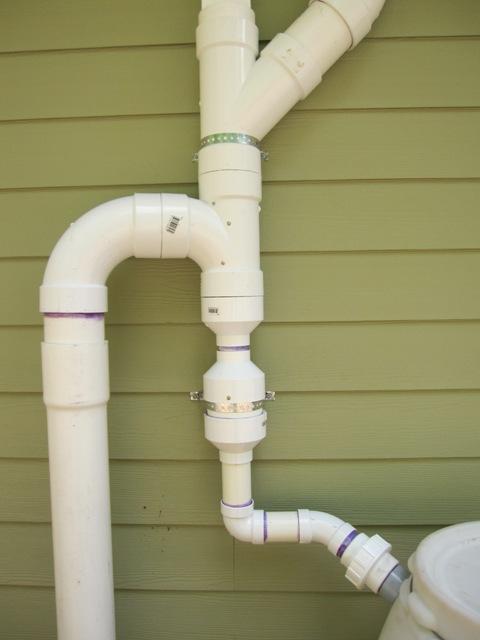
Getting back to the diverter plumbing, above the floating-ball valve is the Tee fitting that directs rainwater to the cistern after the barrel is full. The shape of the tee may look upside-down, but this is intentional because it prevents any water from running out the side port until the barrel is full. We attached a stainless steel screen inside the tee to prevent any debris from entering the cistern. Although we wouldn’t expect any debris to get through the screen on the gutter covers, they’re not completely sealed around the edges so it’s still possible for insects and some debris to get into the gutters. The screen is our third defense against contaminants in the water, and it also prevents flying insects from entering the cistern via this pipe. Because the screen is vertical in the pipe, it should continually clean itself so we don’t expect to have to clean it, but it will be accessible and replaceable should the need ever arise. This workssimilarly to the commercially-available Leaf Eaterdownspout filter.


May 23, 2010
These photos show the completed first flush diverter. The two gutters at the top deliver rainwater to the 4-inch wye fitting. At first the water passes straight downward through the floating-ball valve and into the barrel (an old pickle barrel with a sealed lid). Once the barrel is full the water backs up through the floating-ball valve and the ball seals it off. Water then flows out the side of the tee fitting and downward into the cistern inlet. Some of the connections are not glued so we can access the internals for maintenance and repair, and there’s a union fitting at the bottom so we can disconnect the barrel for cleaning if needed.
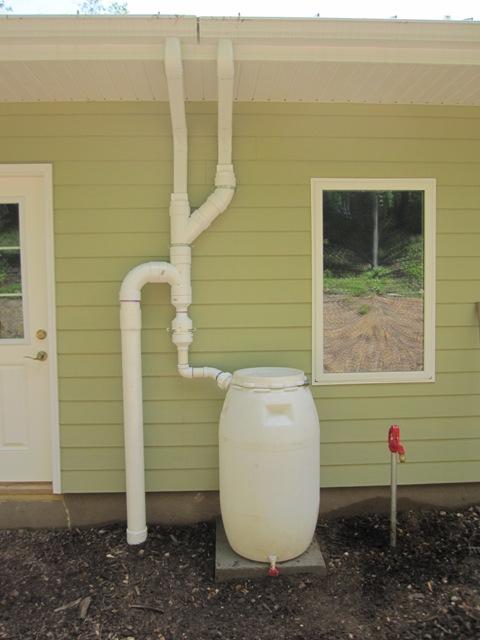
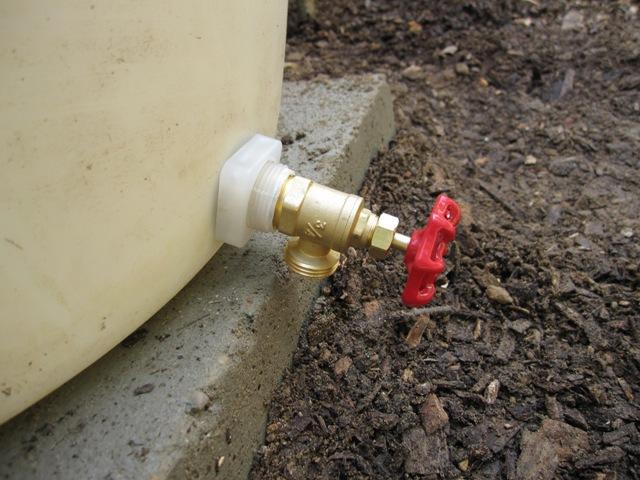
At the bottom of the barrel is a drain valve, which we’ll leave slightly open so that it slowly drains the barrel in between storms.
Calming Inlet
May 23, 2010
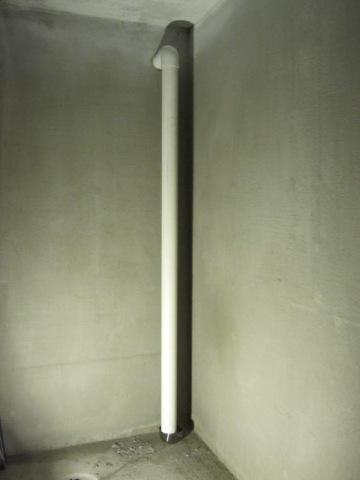
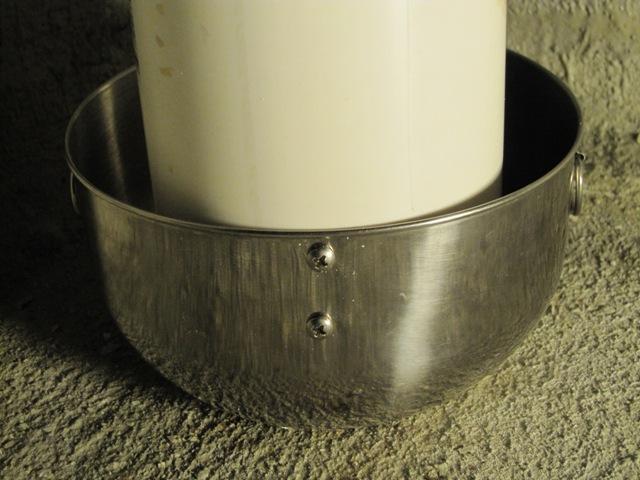
After the water passes through the first flush diverter on the north side of the house, it runs through a 4-inch pipe under the house and into the cistern. We don’t want to just dump water into the cistern, as it would stir up any sediment that had settled out.Instead, the water drops through a pipe to the floor where it hits this ‘calming inlet’, which is simply a stainless-steel mixing bowl screwed to the bottom of the pipe with stainless-steel screws. The pipe stops about 2 inches short of the bottom of the bowl so there’s plenty of clearance for the water to exit. This gently directs the flow of water upward and away from any sediment on the bottom of the cistern.
Floating Filter #1
May 23, 2010
In the first half of the cistern, we built a floating filter that will draw water from just below the surface where it is the cleanest.These are commercially available but we made our own from about $20 worth of parts from Menards.
Update – later on we found an inexpensive ready-made Floating Intake Filter, which would have been a lot less trouble than making our own!
The PEX tubing and fitting are secured with a nylon zip tie into the filter cage, which is half of a screen filter made for pumping water from irrigation ponds. The plastic float is an ordinary toilet float from the plumbing department. The filter bag, also made for the pond screen filter, slips over the whole thing.


The floating filter connects with a length of 3/4″ PEX tubing to the cross connection that we placed into the concrete wall in the middle of the cistern when we poured the concrete. This will allow water to flow slowly from the first half of the cistern into the second, excluding most of the sediment in the process. Many cisterns are built with floating intake filters, but usually only with a single chamber. Having two chambers like this should provide cleaner water as more particulates settle out.

The first photo below shows the connection from the line above heading out of the first chamber, and the second photo shows the other side of the wall where water enters the second chamber. We added the elbow to direct the flow of water upward, to avoid disturbing any sediment on the bottom. This water will flow only by gravity from the first chamber to the second and the flow will be relatively slow due to the 3/4″ diameter pipe, compared to the 4-inch inlet from the roof. Thus the water level in the first chamber will rise during a rain storm, and it may take a few hours for the water levels to equalize.


Pump Intake, Floating Filter #2
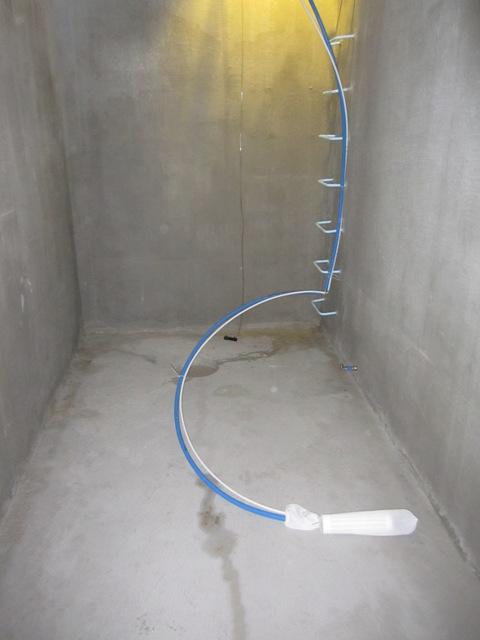
In the second (south) half of the cistern, we have another floating filter similar to the first. Any sediment that makes it through the first filtration gets a second chance to settle out in the south half of the cistern before being pumped out. The first photo below shows the pump intake, with a one-way check valve on the right. This prevents the pump from losing its prime by keeping water in the pipe when the pump is off. To prime the pump initially, we need some way to fill this 70-foot-long pipe with water without having to climb down into the cistern. To make this easy, we added the 3/8″ white PEX tube shown at the top of the photo. Both of these tubes will run back to the mechanical room in the house, and we can prime the pump simply by running water into the 3/8″ priming line until the entire water intake pipe and the pump are full. This entire assembly fits into a floating filter bag just like the one shown above, so the pump will draw water from just below the surface where it is the cleanest.


This shows the completed south half of the cistern, with the blue and white PEX tubing leading upward and into the conduit (not shown) that runs to the mechanical room.
Overflow
May 30, 2010
The last piece of plumbing inside the cistern is the overflow, which allows water to flow out of the cistern if it gets completely full. It’s important to screen this opening to prevent pests such as insects and rodents from entering the cistern. After all, a dead rat would not benefit our water quality! We don’t have to worry about lizards in Michigan but in some parts of the world they are serious pests of cisterns too. We glued a piece of screen onto a short length of pipe, and inserted it into the overflow fitting in the first (north) half of the cistern. This is where the surge of water will be during a storm so the overflow must come from the first half.

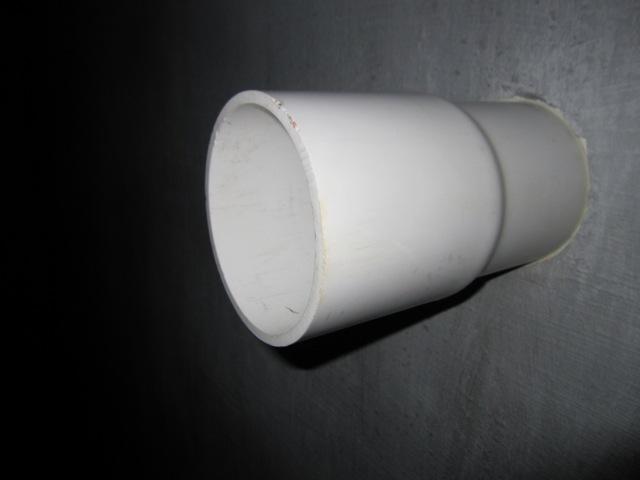
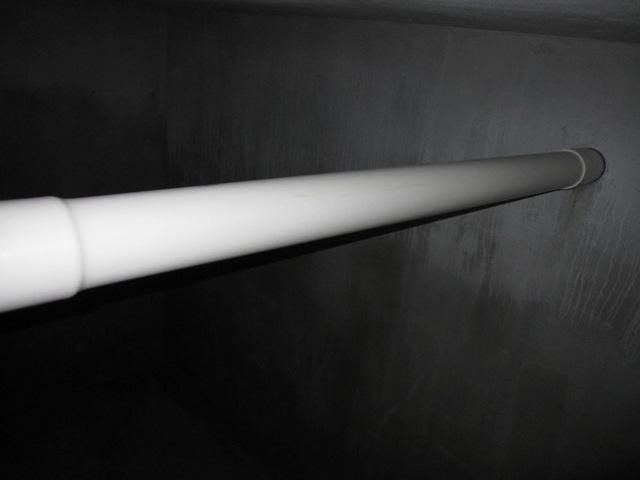
The overflow line passes through the center wall and into the second (south) chamber, and it continues straight through and out the south side of the house just below grade level. From there it runs downhill and into the valley to the south where the buried drain pipe emerges.

First Rain
May 31, 2010
At last we had our first rain storm after hooking up the plumbing.It was not a heavy thunderstorm, just a shower, but we watched as the first-flush diverter barrel began to fill up.


Once the barrel was full, we noticed some leakage around the top as shown in the first photo below. Apparently it’s supposed to have a rubber gasket but it didn’t come with one so we’ll have to fix that. Fortunately the leakage wasn’t a lot compared to the volume of incoming rainwater, so after the barrel filled up water was diverted into the cistern as planned.


June 3, 2010
The first-flush diverter worked pretty well, but the floating filter in the first half of the cistern floated too well! We collected about 2 feet of water in the first half, but the floating filter kept the intake pipe above the water level so none of it flowed into the other half.

To fix the filter problem, we added an elbow to the pipe near the filter basket. We also added a fist-sized rock inside the basket, which you can just barely see in the photo below.

As soon as the modified filter was dropped back into the water, the intake end sank below the surface and water started flowing into the other half.


June 5, 2010
Today we had a thunderstorm that produced fairly heavy rain, and another problem became apparent.When it was raining hard, water started spraying out around the downspout where it enters the PVC piping above the first-flush diverter. This won’t hurt anything immediately, but it’s a serious problem because it would ruin the siding over time and it could cause water damage to the wall. It looks like perhaps the screen filter in the diverter was clogged with debris but we’ll have to disassemble it to be sure. At any rate we need to redesign it a bit so that if an overflow does happen for whatever reason, the water is channeled safely down to the ground without contacting the side of the house. We’ll try to get this fixed before the next heavy rain!
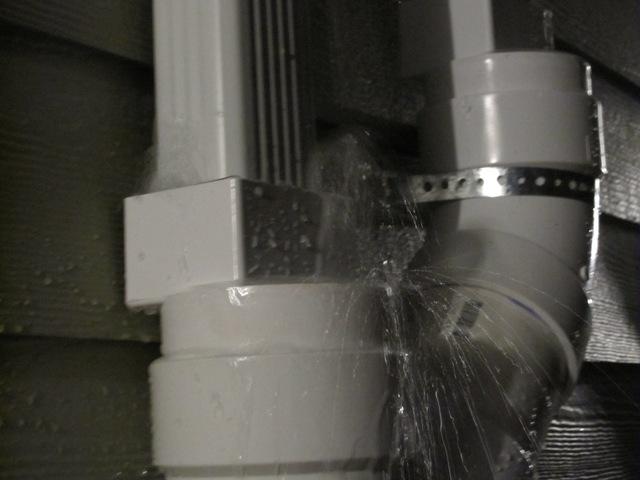
The good news is, even with some unplanned leakage as shown above, we have collected about 3600 gallons of water in the cistern so far.