May 9, 2010
Before making our actual countertops, we decided to cast some small pieces in order to test our mixture and our technique. We made a mold 12″ square and 1.5″ high, which is the thickness that our countertops will be. For this test we decided to try placing some colored glass pieces in the bottom of the mold before pouring in a concrete mixture made with just clear glass. We want to use this technique, rather than just mixing the colored glass throughout, because we only have a little bit of some colors like canning-jar blue and we’ll need to use it to maximum effect. This also lets us control, to some degree, the pattern of glass that will appear on the finished countertop.
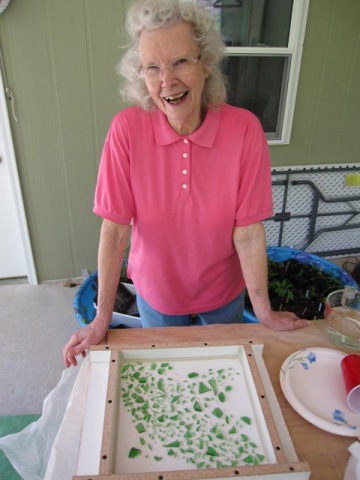
We enlisted Liz’s mom to help smash some green glass pieces for the test. It’s not worth using the glass crusher for such a small quantity, so Peggy just broke it up with a hammer on a large flat rock. Then she carefully arranged the pieces in the mold. We also documented the pattern with a top-down photo (not shown), which we will compare later to the finished piece to see how much the pieces moved around as the concrete was placed. The countertop is molded upside-down, so the glass on the bottom of the mold will end up on the top surface.

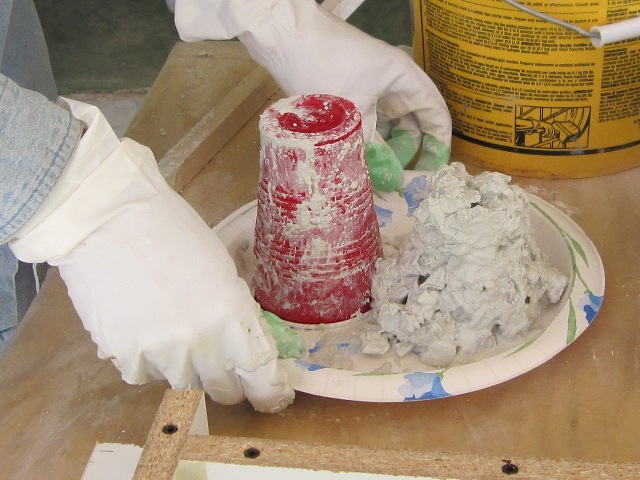
We mixed up the concrete from white Portland cement, crushed clear glass, sand, and a commercial concrete countertop admixture that strengthens the concrete and reduces the amount of water we need. The concrete mixture needs to have just the right amount of water – if it doesn’t have enough water it won’t flow completely and if it has too much water it will be weaker and more likely to shrink and crack. In order to check the water content we performed a slump test using a plastic cup. We filled the cup with concrete, tapped it a few times to settle, cut a small hole in the top to let in air, and pulled the cup straight up. The resulting cone was nearly as high as the cup; it didn’t slump much at all. Too dry!


After adding a little more water and mixing again, we did another slump test. This time the concrete slumped to about 60% of the height of the cup, which should be just about right.
We carefully placed the concrete into the mold, trying not to disturb the green glass. We only filled the mold about half full at this point.


In order to consolidate the concrete and to encourage air bubbles to rise to the surface, Peggy vibrated the mold by tapping around the edges with a hammer.


After tapping for a minute or so, the concrete had settled and air bubbles rose to the surface. If we don’t vibrate it enough, air bubbles will remain and any that are on the bottom of the mold will become pot holes in the top of the concrete (which we can fill later if needed). And we want the liquid to flow around all of the green pieces that we placed in the mold so they’re well embedded in the concrete. But if we vibrate too much, the solids will settle out of the mixture and we could end up with not enough cement “cream” on the bottom to make a hard surface. The photo below shows what we judged to be about right.

With the first layer consolidated, we placed the rest of the concrete and smoothed it with a stick. We calculated the amount of mixture that should just fill the mold and it came up close but a little bit short, partly due to some material still clinging to the bucket and tools. We’ll add about 10% extra next time.


Here’s the finished piece in the mold after a little more vibrating. We’ll cover it with plastic to prevent rapid moisture loss, and leave it undisturbed for 4 days to cure before we remove it from the mold.

May 13, 2010
After letting the piece cure for 4 days, we removed it from the mold. The first photo below shows the piece as it came out of the mold, and the Makita stone polisher we used. The second photo shows the underside of the polisher, and some of the diamond-impregnated polishing discs that attach to it. The first disc on the polisher is the coarsest, 50-grit, which will remove material quickly but leave a rough surface. The other discs have progressively finer grits up to 1500. The stone polisher has a hose connection and a valve so that it can feed water right through its central shaft and onto the piece as it’s being polished.


As Jay started to polish the piece, the green and clear glass started to appear.

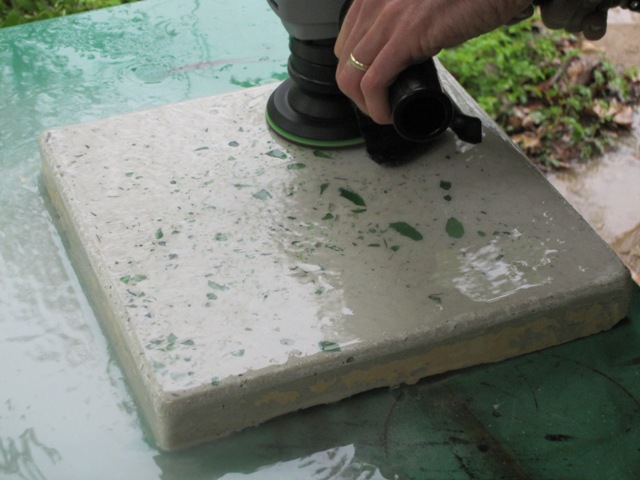
After about 10 minutes, most of the green was visible. Overall it took about 15 minutes to polish the top and the edges with the 50-grit diamond disc.

The first photo below shows the green glass as it originally appeared when Peggy arranged it in the bottom of the mold. This photo is a mirror image, so that it can be compared with the view from the other side after polishing. The second photo shows how it looks after polishing with the 50-grit disc. We can see most of the original pattern, but some of the original pieces are not visible – presumably because they moved upward in the mold as the piece was vibrated. More grinding would reveal those pieces but it would also grind away some of the fine pieces of green glass so we won’t grind it any more with the coarse diamond wheel.


Below is a close-up of the two above photos combined, with the original pattern of glass overlaid on top of the final photo. It lets us see how much the green glass moved around as the concrete was placed in the mold, and how much of each piece is actually visible. We can see that most pieces stayed about where they were, but some of them moved by up to 1/2 inch. This tells us that we can create large patterns this way, but there’s no point in placing each piece of glass exactly because they’re going to shift around a bit.

The photos below show how the edges of the piece came out. They look decent but of course there’s no green on the edges and it seems that it would look better to get some colored glass on the edges somehow. We could just mix it all together if we had enough colored glass, and we have plenty of green to do that but not enough of some of the colors we want to use. So instead we’ll try to find a good way to get some colored glass to stay around the edges of the mold.In these photos you can also see quite a bit of texture from the sand that we used in the mix. It seems a bit more sandy than we’d like so we’ll cut back on the sand and increase the percentage of glass for the next batch.

